Note: “Introducing the Cloud Director Plugin Development Environment” is the first part in a blog series entitled “Authoring Cloud Director Plugins: A Practical Approach”. Be on the lookout for Part 2, “Building a Cloud Director UI Plugin”.
Introduction
Contents
A frequent request we see regarding UI plugin development is “how can I iterate on my plugin development in a rapid fashion?”. The current process goes a little something like this:
- Step 1: Stand up a VCD environment with the underlying infrastructure and make sure you have provider-level access to it.
- Wait, is that really Step 1?…yes, yes it is
- Step 2: Clone the seed project and make some changes.
- Step 3: Test changes.
You’re probably saying to yourself, “Step 3 seems manageable” so let me provide some additional detail:
Step 3: Test changes. Build changes into a distribution that creates a ZIP file, and then use a Python script to upload that ZIP file to your VCD instance.
The problem with Step 3 is that it is necessary for every. single. change. Add a new screen? Step 3. Typo in your header? Step 3. Change tabs to spaces? Step 3.
I had originally started writing this post as a sort of DIY blog series entitled “Authoring Cloud Director Plugins: A Practical Approach”, where the first part focused on creating a development environment. It would be easy, and I’d walk you through each step. Just do this, this, and this…and this…and this…aaaand, turns out it’s not so easy after all.
So I’m taking a slightly different approach–I’d like to introduce you to the new Cloud Director Plugin Development Environment!
Quick Start
I tend to dislike those recipe websites that give you a 6 page history of food before the actual recipe, so let’s jump right in and get this thing running.
Prerequisites
This is simple: Node.js will be our starting point (which comes with npm).
|
node —version |
Either the Active LTS or Maintenance LTS (12.x or 10.x respectively) should be sufficient for a production application.
Get the Development Environment
First download the code from GitHub and then install the dependencies.
|
git clone –b developer–container/9.7–10.0 —single–branch https://github.com/vmware-samples/vcd-ext-samples.git vcd-dev-env cd vcd–dev–env/cloud–director–container/ npm ci |
Run the Development Environment
Next start the container application.
That’s it. The container is running. You should see some output on the screen like:
|
1 2 3 4 5 6 7 8 9 10 11 12 13 14 15 16 |
** Angular Live Development Server is listening on localhost:4200, open your browser on http://localhost:4200/ ** 10% building modules 3/3 modules 0 active[HPM] Proxy created: /api –> https://<insert your VCD endpoint here> [HPM] Subscribed to http–proxy events: [ ‘error’, ‘close’ ] [HPM] Proxy created: /cloudapi –> https://<insert your VCD endpoint here> [HPM] Subscribed to http–proxy events: [ ‘error’, ‘close’ ] Date: 2020–02–11T21:07:21.492Z Hash: 55c8b9d043d72cc10c2e Time: 56744ms chunk {main} main.js, main.js.map (main) 31.4 kB [initial] [rendered] chunk {polyfills} polyfills.js, polyfills.js.map (polyfills) 241 kB [initial] [rendered] chunk {runtime} runtime.js, runtime.js.map (runtime) 6.22 kB [entry] [rendered] chunk {scripts} scripts.js, scripts.js.map (scripts) 755 kB [rendered] chunk {styles} styles.js, styles.js.map (styles) 450 kB [initial] [rendered] chunk {vendor} vendor.js, vendor.js.map (vendor) 5.24 MB [initial] [rendered] i 「wdm」: Compiled successfully. |
If you navigate to http://localhost:4200/ you’ll be greeted with a Cloud Director-like UI:
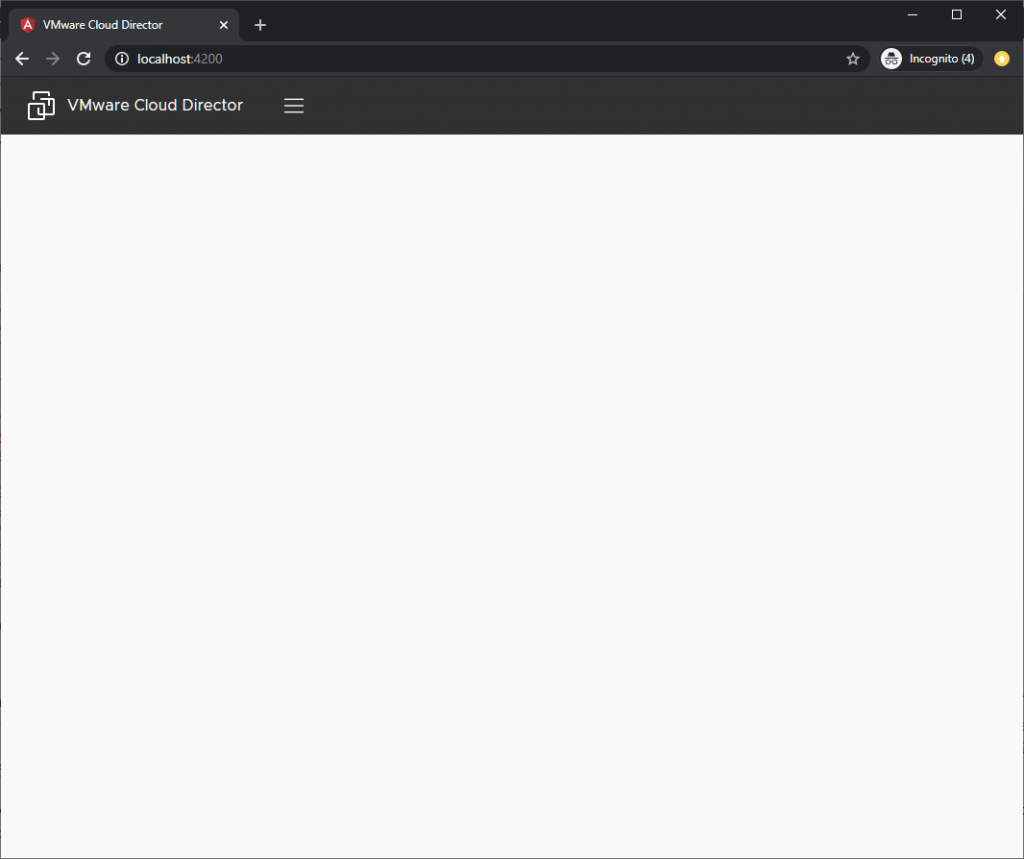
Cloud Director Plugin Development Environment
Goals
Based on the previously mentioned hurdles faced by would-be plugin developers, we set out to build a solution to address those pain points. For this first release, we focused on three key areas:
- Use industry standard tools and processes for developing and testing Angular applications
- Don’t require provider access to a real VCD instance to do basic functional testing of a UI plugin
- Allow a reasonable development lifecycle for “top level navigation” plugins
Angular CLI
To address the first concern we based the development environment on a standard Angular CLI project. The thing you downloaded in the previous section is a self-contained Angular CLI project, geared toward building UI plugins for versions 9.7 and 10.0 of VCD. By self-contained, I mean that it is specifically designed to use the versions of Clarity and Angular that are compatible with the version of VCD that your plugin targets, regardless of globally installed tooling in your environment. For reference this is the compatibility matrix for VCD, Clarity, and Angular:
| Cloud Director | Angular | Clarity |
|---|---|---|
| 9.5.x | 4.4 | 0.10.x |
| 9.7.x | 6.x | 0.13.x |
| 10.0.x | 6.x | 0.13.x |
Angular CLI gives the development environment a structure that is familiar to many Angular developers. It also gives them access to valuable tooling and commands for initializing new components, and for ongoing development and maintenance of applications.
Offline VCD Portal
When you navigate to http://localhost:4200/ in the above flow you are presented with a UI that is basically a very simplified version of the VCD portal, with no product features. It is this shell, combined with the Angular CLI commands, that will enable things like source change detection and live reload of the container.
Neither this container nor the actual plugin loading mechanism it performs is an exact match with the Cloud Director UI and plugin loading mechanism. Instead it is intended to be a best effort sort of compromise. As this development environment matures you should assume that with just a few small tweaks to the registration process, your plugin will load in a real VCD if it loads in this container. Those registration differences (specifically the use of ExtensionNavRegistrationAction) can exist in the plugin immediately; this container will silently ignore them. The tradeoff for this small discrepancy is the ability for plugins to hook into the change detection and live reload process of the container, which should greatly improve developer velocity around plugin authoring.
Features
Top Level Plugin Harness
This container will allow you to build plugins using current Angular tooling and conventions. It provides an environment for doing incremental compilation and testing of the plugin code without requiring a full VCD environment and provider level access to that environment.
This is the main feature provided by this development environment. I’m dedicating the entire next post in this blog series to building top level plugins with this environment, so for now we’ll move on to some of the other features.
Branding
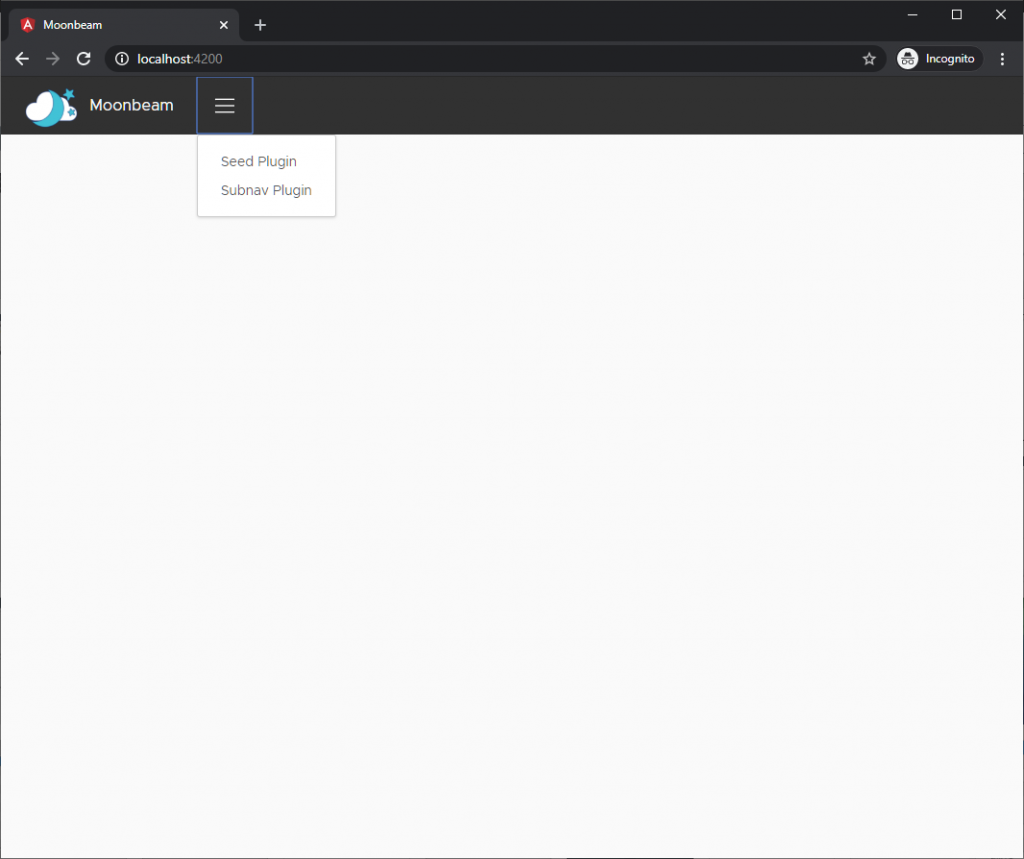
We implemented some simple branding in this initial release, making it possible to change the header title and logo. Taking everyone’s favorite off-planet cloud AZ for DR as an example, we can make a few simple changes to the src/environments/environment.ts file:
|
export const environment = { production: false, branding: <Branding>{ // headerTitle: “VMware Cloud Director”, headerTitle: “Moonbeam”, headerLogo: “assets/logo.png”, } }; |
Commenting out (or removing) line 4, and adding lines 5-6, changes the branding. If npm start is still running the browser automatically refreshes to show the new page:
Proxy to VCD
Although the goal of this environment is to not require a VCD stack, at some point you’ll want one to test actual functionality. This environment can be configured to communicate with a VCD instance, by proxying API calls. Simply modify the src/proxy.conf.json file to point to a real Cloud Director:
|
1 2 3 4 5 6 7 8 9 10 11 12 13 14 |
{ “/api/*”: { “target”: “https://<insert your URL here>”, “secure”: false, “logLevel”: “debug”, “changeOrigin”: true }, “/cloudapi/*”: { “target”: “https://<insert your URL here>”, “secure”: false, “logLevel”: “debug”, “changeOrigin”: true } } |
Change the highlighted lines and restart the container (npm start). API calls (including OpenAPI) now redirect to the configured target with the origin reconfigured to prevent CORS-related issues. The shell that you execute the npm start command from displays log messages when the proxy is configured, and when an endpoint is proxied.
Authentication
The development environment now talks to VCD. You’ve got a set of credentials for that VCD. You need the development environment to get those credentials to that VCD. You’ll leverage the same file you used to configure branding to specify credentials:
|
1 2 3 4 5 6 7 8 9 10 11 12 |
export const environment = { production: false, branding: <Branding>{ headerTitle: “Moonbeam”, headerLogo: “assets/logo.png”, }, credentials: <UserCredentials>{ username: “jmoroski”, password: “12345”, tenant: “acme” } }; |
When the browser refreshes, it establishes a VCD session with these credentials. How do you know? The browser console is your friend here. Open the console (Ctrl+Shift+I on Windows) and examine the output:
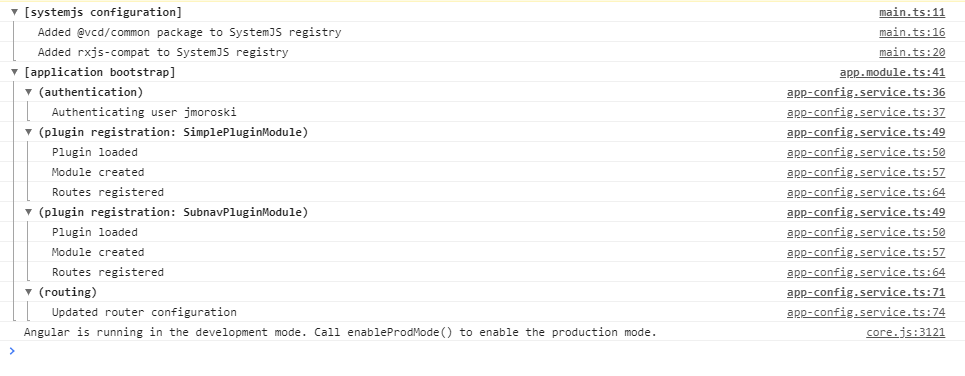
This authentication process allows plugins to inject an authentication token the same way they would if they were running within an actual VCD instance.
Summary and Next Steps
Plugin authoring today can be complicated. It doesn’t follow current development trends and tooling for building Angular applications. It requires provider-level access to a live VCD environment to test the plugin code. This in turn reduces the overall development velocity because the feedback loop for changes is more complicated than necessary.
The Cloud Director Plugin Development Environment solves these issues by emulating a Cloud Director UI, providing a container to validate plugins in a local development environment. This validation cycle is quicker thanks to change detection and live reload. The container provides hooks for connecting to and authenticating against an actual VCD environment.
In my next post, I’ll take you through the process of building a plugin within this environment.
What is your development process for plugins today? Does this new development environment address your current pain points? Are there other improvements you’d like to see? Leave a comment with your thoughts or questions!

