The finger command is a user information lookup utility that allows users (mostly system admins) to list logged-in users including login time, terminal type, and more.
In this tutorial, I will walk you through how you can use the finger command to find detailed info on logged-in users.
How to use the finger command
The thing is, finger does not come pre-installed in most Linux distributions so let’s take a look at the installation for various Linux distros.
For Ubuntu/Debian base:
sudo apt install fingerFor Fedora/RHEL base:
sudo yum install fingerOnce you are done with the installation, let’s take a look at the simple syntax of the finger command:
finger [options] [username]Here,
[options]is used to modify the default behavior of the finger command.[username]is where you’ll specify the username of the logged-in user to get more information about him.
📋
Both [options] and [username] is optional to use.
The default finger command output without any options results in:
finger
And as you can see, it gave me a list of the logged-in users. Let’s break down the output to have a better understanding.
Login: This column lists the username of the logged-in usersName: Show the full name of the logged-in userTty: Indicates how the user has logged in. Here,ptsindicates remote log-in whereas thettyrefers to the main console (the actual hardware).Idle: It shows how long the user is in an idle state using 3 formats: If shown in plain numbers, then it is referring to minutes, if colon (;) is present, then it indicates hours and if it usesdthen it is referring to days.Login Time: Shows the login time along with the date.Office: Strangely, it shows the IP address from where the user has logged in. Remember, the IP addresses will only be shown for the remote logins.
Now, let’s have a look at some examples of using the finger command.
1. Display information about the specific user
If you want to know the information about the specific logged-in user, then use the finger command in the following manner:
finger usernameFor example, here, I want to know the details about the milan, then, I will execute the finger command in the following manner:
finger milan
If you notice, in the last two lines, it says No mail and No Plan. Later on, I will show you how you fill up those details!
2. Show specific user information in columns
In the previous section, I explained how you can get information about the specific user but what if you want the same in column form?
Well, all you have to do is use the finger command with the -s flag as shown:
finger -s username
3. Prevent showing plan, project, and PGP key fields
For most users, the plan, project, and PGP key fields are useless so how about removing them?
Well, that’s pretty easy and can be done using the -p flag as shown here:
finger -p username 
And as you can see, the No plan field is no more!
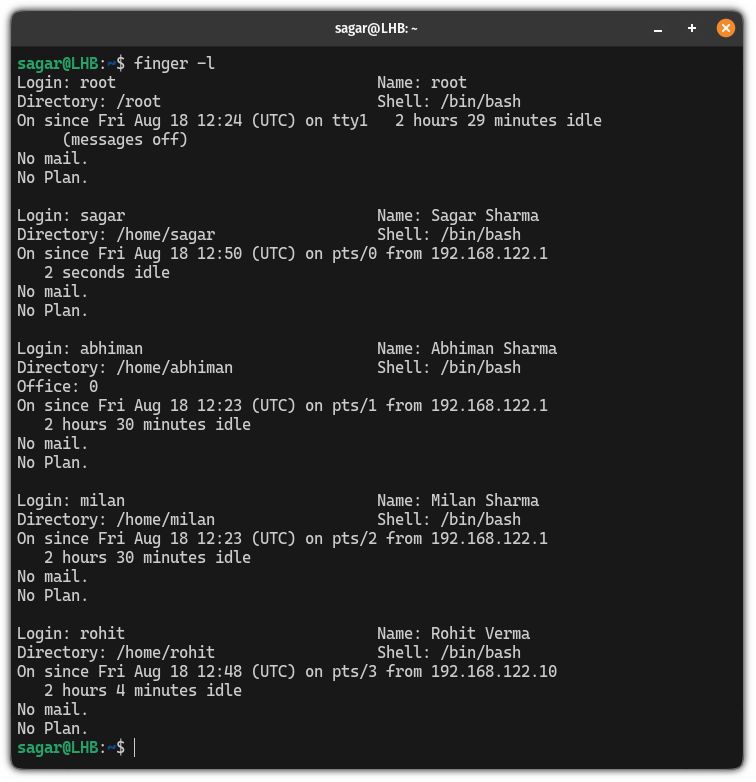
4. Display all the logged-in users in long form
If you want data of logged-in users in long-form, then, all you have to do is execute the finger command with the -l flag:
finger -l
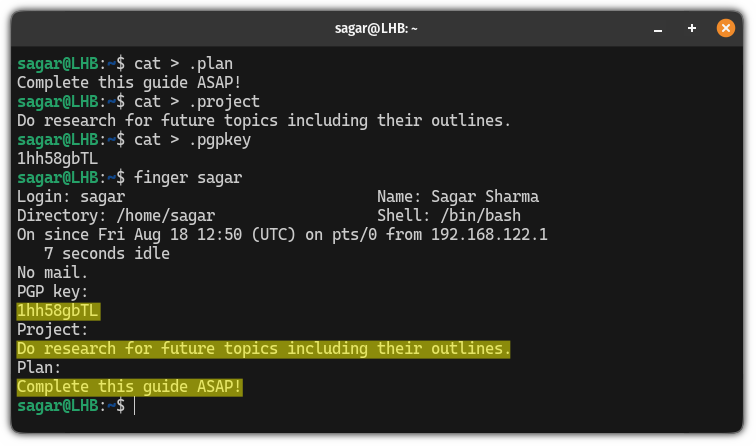
5. Create a plan, project, and PGP key for the user
If you want to create a plan, project, or PGP key, the process remains the same for each. All you have to do is create a normal file inside the user’s home directory.
And here I will show you one by one.
To create a plan, use the following command:
cat > .planType the plan, and once done, press Ctrl + d to save changes.
Similarly, to create a project use the following:
cat > .projectTo save changes, press Ctrl + d.
And if you want to create a PGP key, then, use the following:
cat > .pgpkeyOnce you’re done info, you can press the Ctrl + d to save changes.
Next, run the finger command for a specific user and it should reflect the changes immediately:
finger username
Force users to change their password
If you’re an admin, changing passwords frequently is considered one of the best security practices. But users tend to ignore this factor.
And in that case, you can force users to change their passwords at their next login:

I hope you will find this guide helpful.


