This post originally appeared on Clouds, etc. by Daniel Paluszek.
This is a continuation of the VMware vCloud Usage Meter 3.6.0.1 – End to End Deployment and Configuration (1 of 3)
Post 1 of 3 here
vCloud Usage Meter Web Configuration
Contents
-
- Now we are ready to log into the Usage Meter from your browser. Google Chrome is the best choice for Usage Meter.
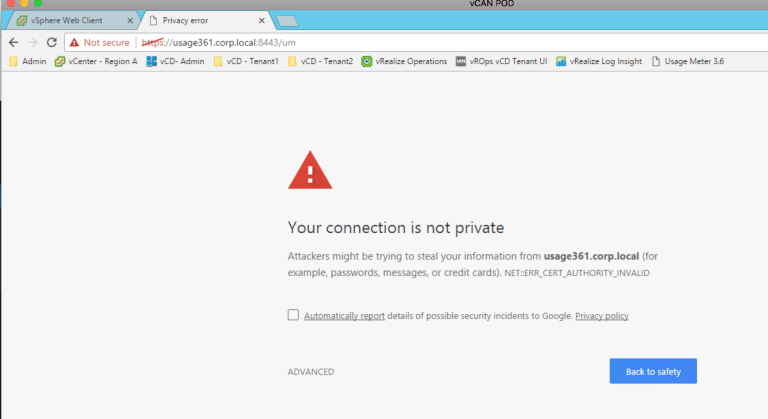
- Point your browser to https://<UM-FQDN>:8433/um
-
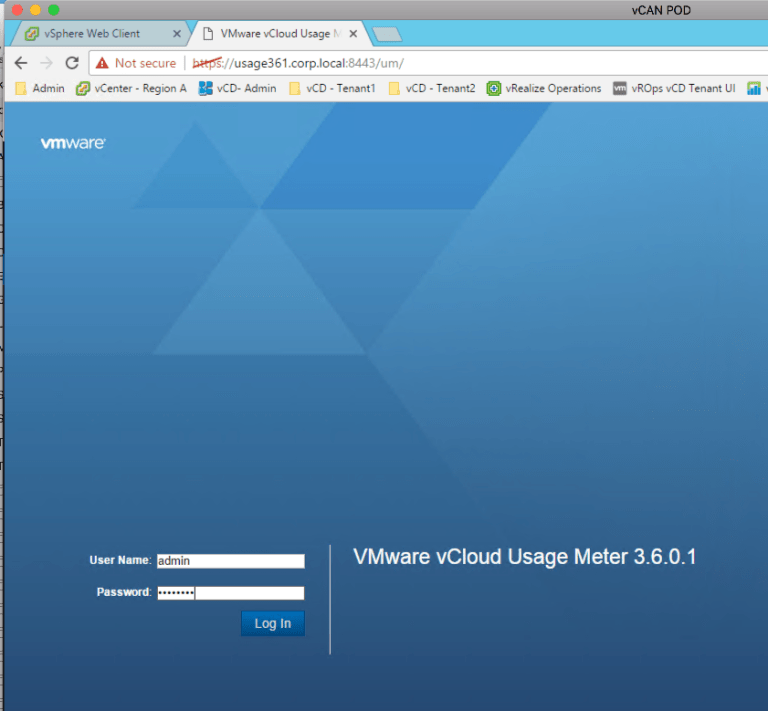
- Accept the self-signed cert and continue to the login page. Type admin as your username and the password you set when we set the webpass password.
- Accept the self-signed cert and continue to the login page. Type admin as your username and the password you set when we set the webpass password.
-
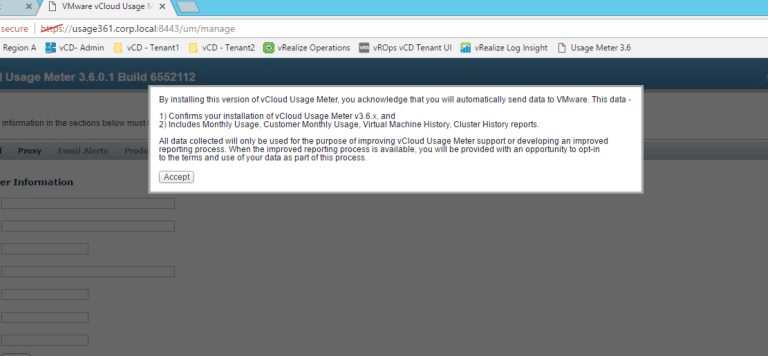
- Accept the Terms and Conditions.
- Accept the Terms and Conditions.
-
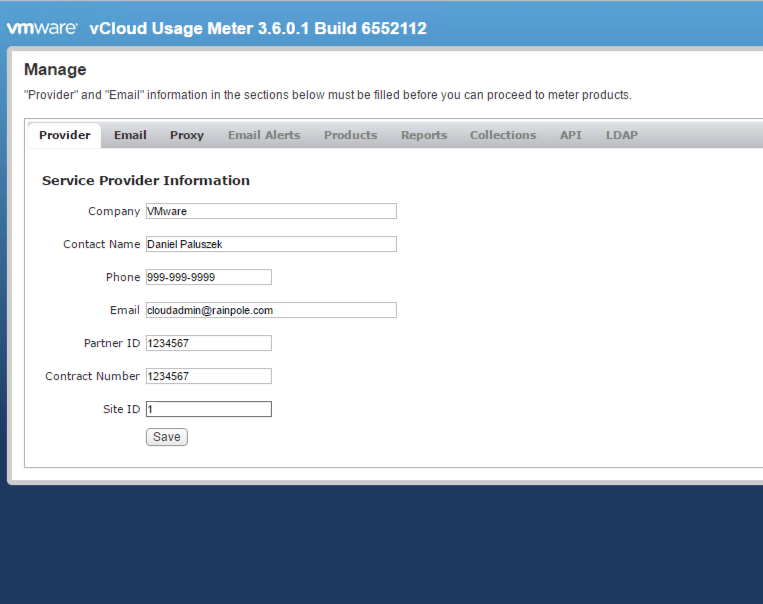
- Before we start doing any product configuration, we need to set up the Provider and Email information.
- Under the Provider tab, put in the Company/SP Name, contact email address (I usually put in the person who is responsible for UM collection), and your Partner ID and Customer Number. Site ID is for you at this time – we may use for this for future versions on multiple UM instances. Press Save when complete and it should bring you to the Email tab. Note: If you are installing Usage Meter for initial data collection and/or proposal purposes, you can put in “1234567” or “99999” for the Partner ID/Contract Number.
-
- On the Email tab, put in your SMTP server FQDN or IP address. If it’s an open relay, it will not need a username/password. Authentication options are available.
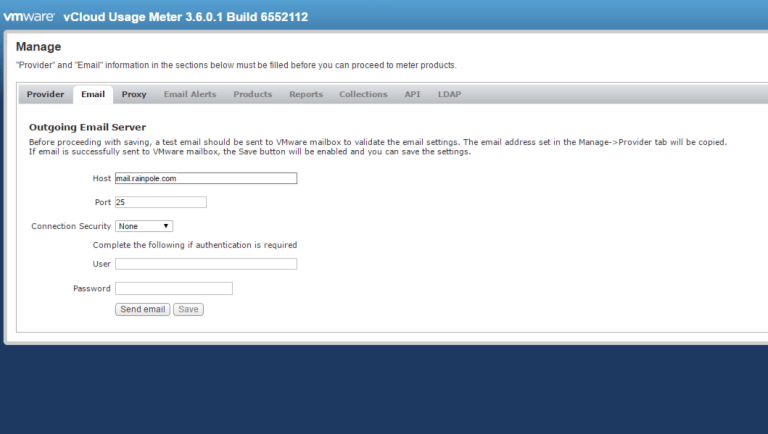
- On the Email tab, put in your SMTP server FQDN or IP address. If it’s an open relay, it will not need a username/password. Authentication options are available.
-
- Now press the Send email button – this will send a test email to VMware along with the individual email address you supplied on the Provider tab. If it is successful, you will receive a successful message along with an email to the specified address. As shown in the 2nd screenshot below, I can see that I received a successful test email.
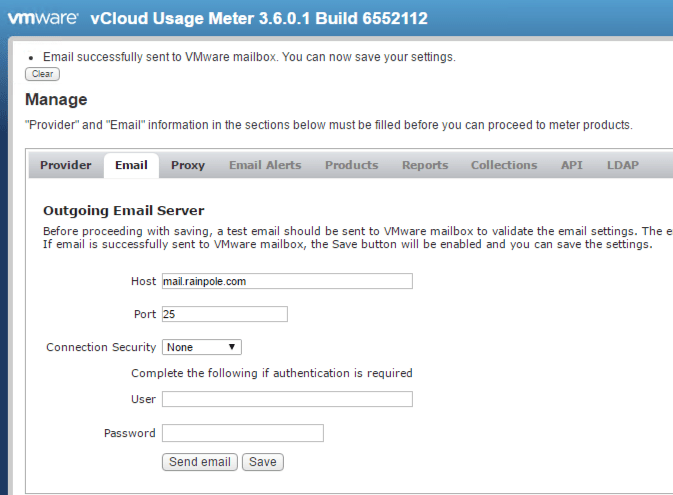
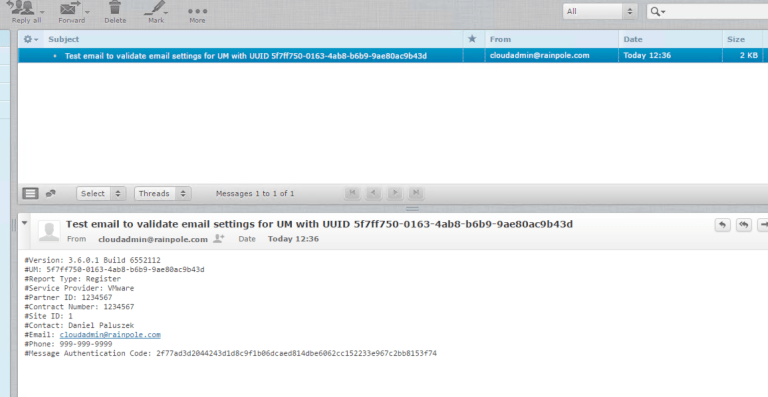
- Now press the Send email button – this will send a test email to VMware along with the individual email address you supplied on the Provider tab. If it is successful, you will receive a successful message along with an email to the specified address. As shown in the 2nd screenshot below, I can see that I received a successful test email.
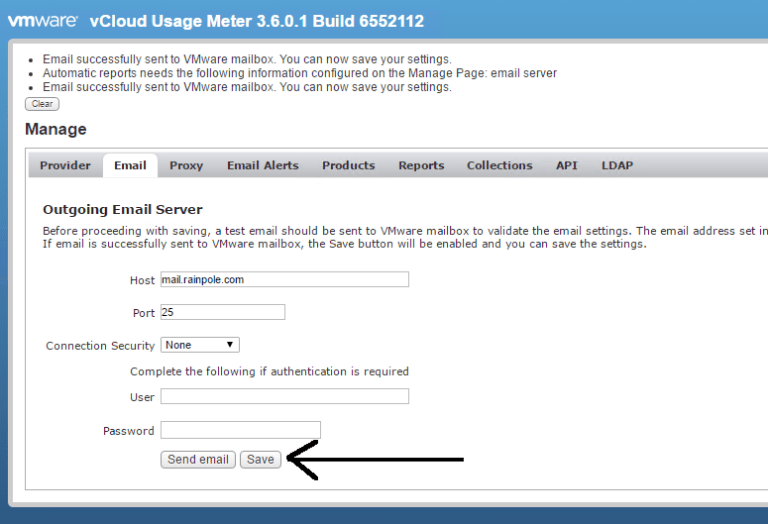
- Now press the Save button – from here, it will immediately bring you to the Products page.
vCenter and vRealize Operations Setup
-
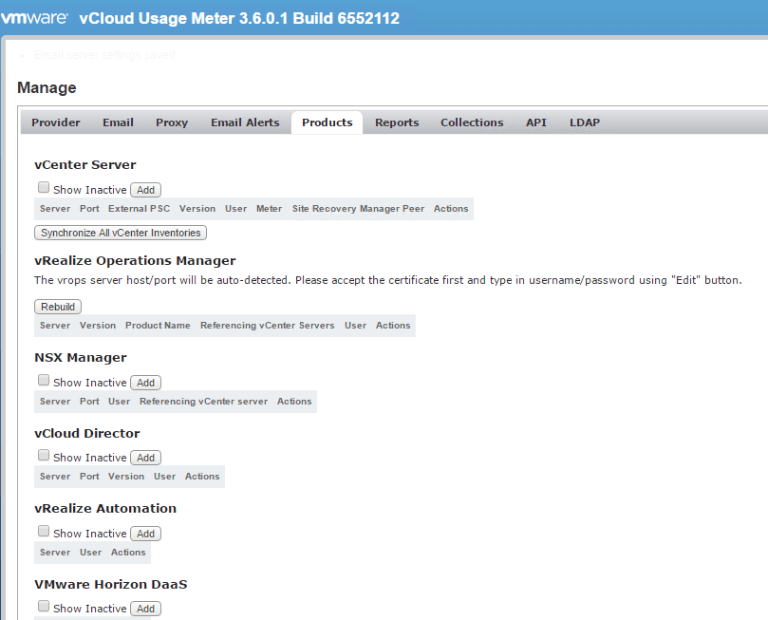
- Now we are ready to add our VMware management systems. First, let’s add our vCenter. Click the Add button right below the vCenter Server category. Do you have an external Platform Services Controller? If so, make sure you check the box and input the required info! If you are using SRM, this dropdown will be available once the secondary vCenter site is connected. When finished, press Save
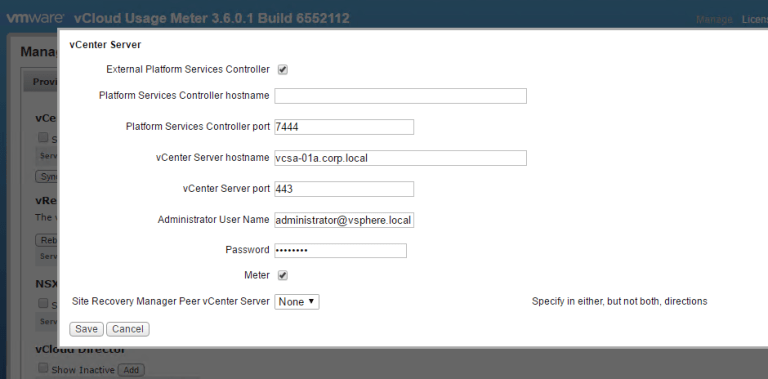
- Now we are ready to add our VMware management systems. First, let’s add our vCenter. Click the Add button right below the vCenter Server category. Do you have an external Platform Services Controller? If so, make sure you check the box and input the required info! If you are using SRM, this dropdown will be available once the secondary vCenter site is connected. When finished, press Save
-
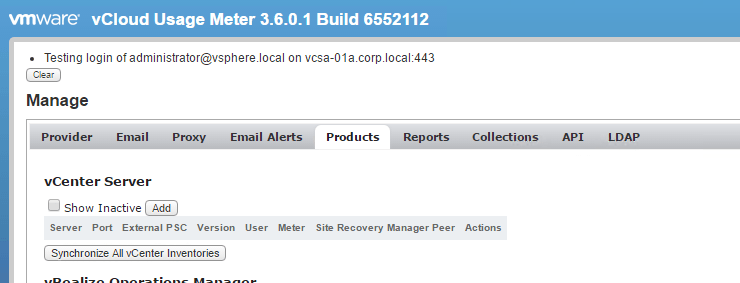
- OK, we can now see a message showing UM attempting to log into vCenter. If you get errors on this part, there are two possibilities: 1) wrong credentials or 2) ports are not open.
-
- Great – we can now see a message requesting us to accept the certificates. Press Accept All.
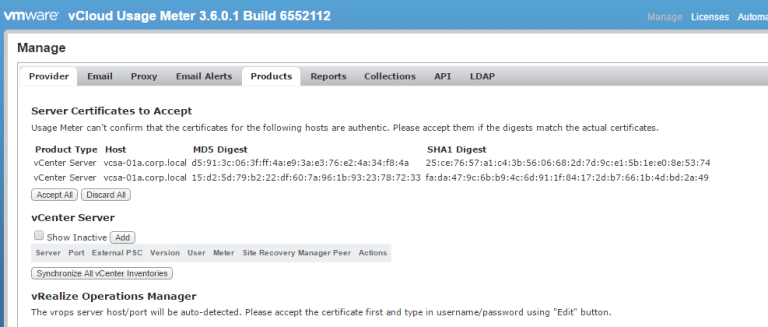
- Great – we can now see a message requesting us to accept the certificates. Press Accept All.
-
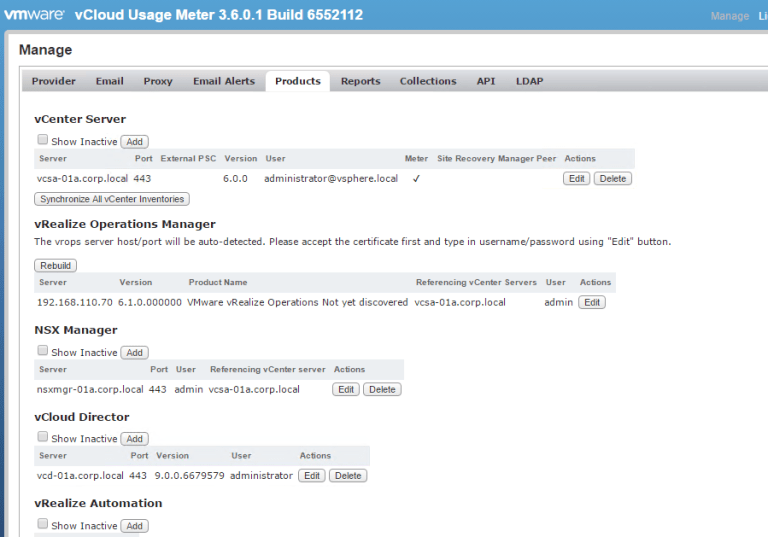
- Alright, vCenter is now showing on our list and now we see vROps was automatically detected. This is done by the MOB extension list inside of vCenter. Press Accept All to accept the certificate. The wrong vROps instance showing here? Here’s how to fix it.
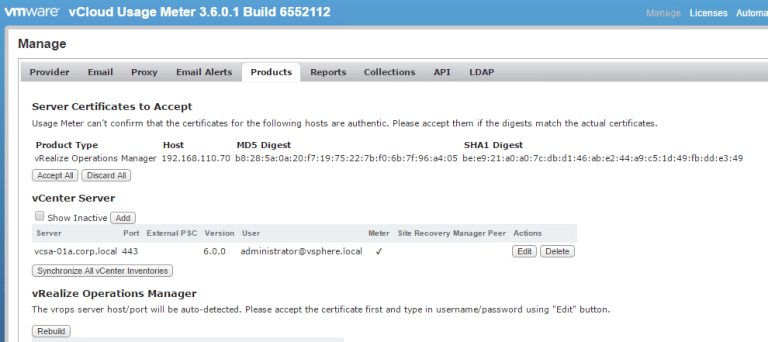
- Alright, vCenter is now showing on our list and now we see vROps was automatically detected. This is done by the MOB extension list inside of vCenter. Press Accept All to accept the certificate. The wrong vROps instance showing here? Here’s how to fix it.
-
- Now we can see vROps in the list, but we need to update the credentials for it to activate. My vROps instance is not connected to the SSO domain, so I am going to use local admin credentials. Press the Edit button by the vROps instance and put in the credentials.
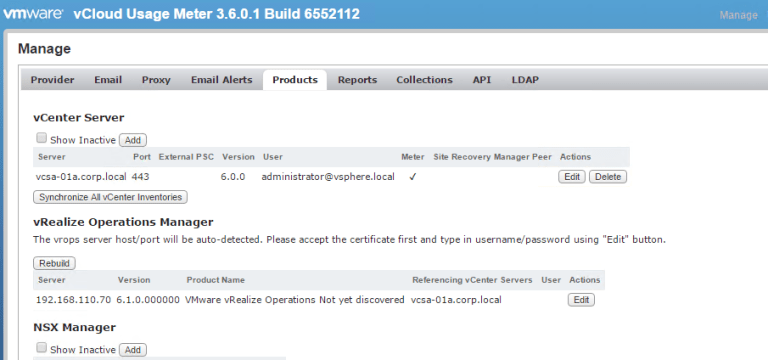
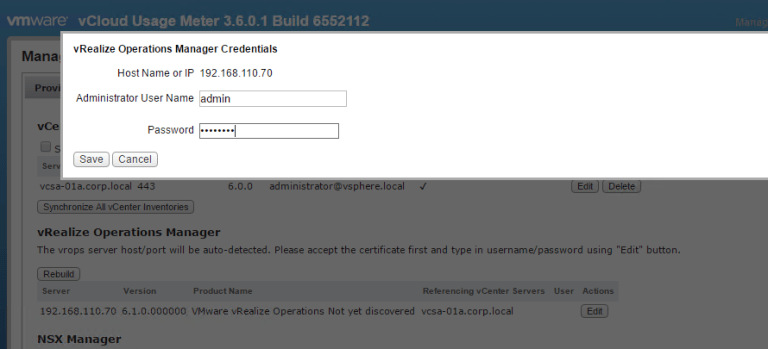
- Now we can see vROps in the list, but we need to update the credentials for it to activate. My vROps instance is not connected to the SSO domain, so I am going to use local admin credentials. Press the Edit button by the vROps instance and put in the credentials.
- Now we can see a message stating vROps credentials are correct. Excellent. It will still show Not Yet Discovered until the next hourly collection interval – do not worry. Do check it in an hour to verify the message has been removed.
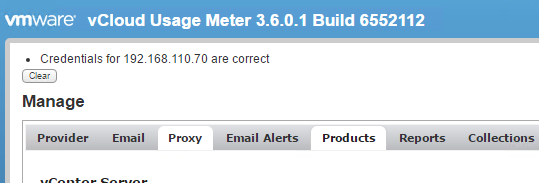
- We are now complete for vCenter and vROps! If you have any other instances of vCenter, please repeat these steps. vROps cannot be added independently – it must be tied to a vCenter instance.
NSX Manager Setup
-
- Now let’s add the NSX Manager instance. Very straightforward – hit the Add button under the NSX Manager section. Now we need to input our NSX Manager FQDN or IP, username and password (remember, NSX Manager instance credentials!) along with the connected vCenter server.
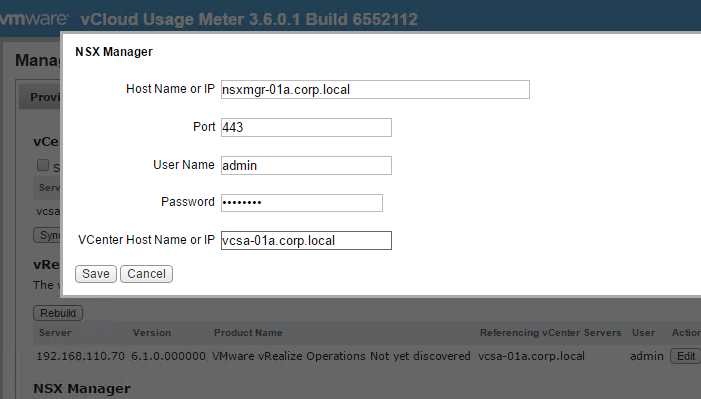
- Now let’s add the NSX Manager instance. Very straightforward – hit the Add button under the NSX Manager section. Now we need to input our NSX Manager FQDN or IP, username and password (remember, NSX Manager instance credentials!) along with the connected vCenter server.
-
- A similar message we saw from vCenter additions – accept the certificate and hit Accept All.

- A similar message we saw from vCenter additions – accept the certificate and hit Accept All.
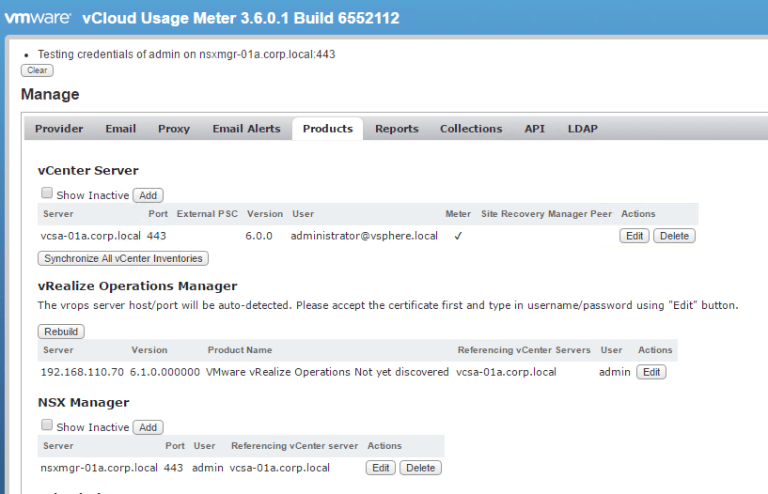
- We will see a testing credentials message and once that disappears, NSX Manager will populate in the list. Done! Repeat these steps for any additional NSX Managers.
vCloud Director Setup
-
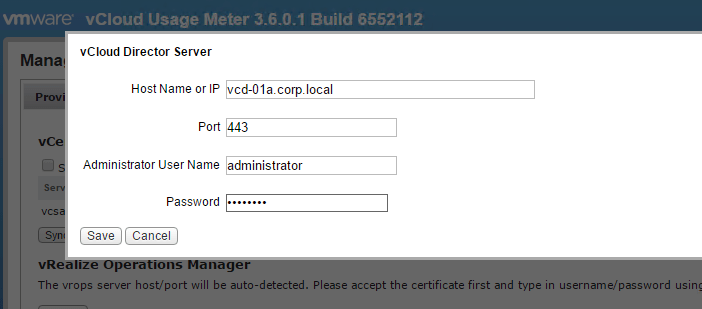
- Again, very similiar steps for vCD integration – the key difference is you do need sysadmin privileges to access vCD from UM.
- Click Add under the vCloud Director section and input the FQDN/IP along with the credentials.
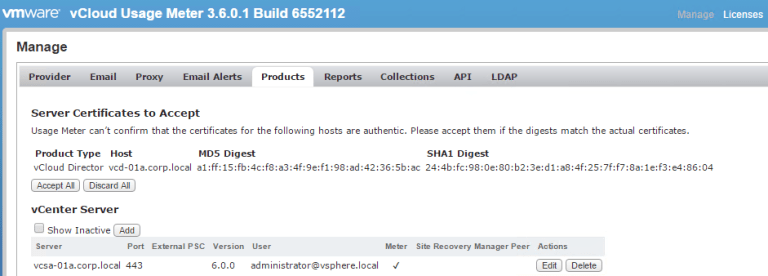
- We will see the message to accept the certificate again – hit Accept All. Once that happens, it will test the credentials and populate into the list. Done!
Stay tuned for the third post in this series!
Stay tuned to the VMware Cloud Provider Blog for future updates, and be sure to follow @VMwareCloudPrvd on Twitter and ‘like’ us on Facebook.

