July 27, 2020 by Brigit Murtaugh, @BrigitMurtaugh
We’ve heard from many educators that the first days or weeks of the semester can be lost to configuring the correct environment for students. Even so, students may still end up with a low-quality development experience or insufficient grading of their assignments:
“Set up for my students normally takes five class periods. There are version of Python to deal with. There’s a lot of complexity. Sadly that complexity takes a lot of time and money to sort out.” -[Community College US Professor CS 101]
“I would prefer a version of VS Code, specifically set up for a Python installation…” -[Assistant Professor, Liberal Arts College]
Development containers with Visual Studio Code can serve as a fantastic tool in education to ensure students have a consistent coding environment. They take care of setup so that students and instructors can quickly move past configuration, and instead focus on what’s truly important: learning and coding something great!
Development containers
Contents
So, what are development containers? Containers are pieces of software that package code and all of the dependencies that code needs to run, including the runtime, tools, libraries, and settings. Containers were initially created as a way to deploy and manage apps in a consistent environment and make more efficient use of hardware. They later evolved to help in providing a consistent build environment, and more recently, development environment. That’s where the name dev container comes from.
When you create a container, its initial contents come from what’s known as an “image.” An image can be thought of as a mini-disk drive with things like the operating system and other tools pre-installed. You describe what goes into the image using a Dockerfile, and once you run the image, it becomes a container.
Dev containers provide a separate coding environment from your computer. For example, if you download a specific version of a dependency, that version will be unique to the container. In the diagram below, notice how the container includes the app and its necessary dependencies, keeping the computer (Host OS and Infrastructure) free and clean of any dependencies:
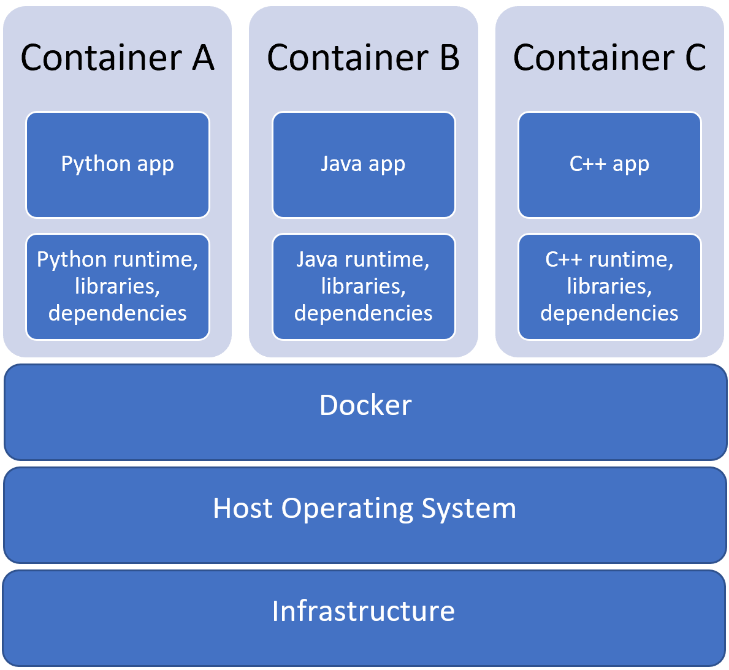
As an instructor, you can create a specific image for an assignment. Each student will get the same exact same version of dependencies, such as the same version of Python or a C++ compiler, regardless of their operating system or any other files already installed on their computer.
Remote – Containers in VS Code
The Visual Studio Code Remote – Containers extension lets you use a container as your main coding environment. In the classroom, an instructor can take an existing dev container, or create their own, and share it with the class. Each student can open the container in VS Code and automatically have the tools and runtimes they need to develop their applications. Students will also have access to VS Code’s full feature set, including IntelliSense and debugging, while coding.
The Remote – Containers extension works solely with Linux-based containers, so although students may have different operating systems on their computers, the coding environment will be consistent across all of them.
We’ve already seen instructors using Remote – Containers in their classrooms with success. You can check out Using DevContainers to Standardize Student Development Environments: An Experience Report to learn more about the experiences of three researchers who used dev containers in a course at UC San Diego.
This post will serve as a guide to instructors looking to implement development containers in the classroom to create a smoother, more consistent environment for their students.
To witness dev containers in action and how students can get started in just 5 minutes, check out our introductory student video.
Guide for Instructors
With traditional set up approaches, students can run into a wide variety of issues while setting up their environment. Some examples include differences in their unique OS, where project files are stored, or small differences in runtimes or tools they’ve installed. Instructors need to be well versed in all these subtleties to be able to help students solve these issues.
A common issue is managing different versions of a tool. Let’s take Python as an example: there’s Python 2 and Python 3, along with different minor versions. Having multiple versions of Python, and then multiple accompanying tools such as linters, can be confusing and lead to errors.
To save tremendous time and confusion, we can use dev containers to create a standardized Python development environment across our class. Students will all get the same version of Python, avoiding the need to install a new version or uninstall any old ones, and everyone running the same container and source code will get the same exact results.
Prerequisites
- Install Visual Studio Code.
- Install Docker Desktop.
- Docker is the industry standard for building and sharing containers. We recommend Docker Desktop Stable 2.3.0.3 as it is the most recent and performant version of Docker Desktop.
- There is newly introduced Docker Desktop support on Windows Home. It requires Windows 10, version 2004 and enabling the Windows Subsystem for Linux 2 (WSL 2) backend. Enable WSL 2 by following the WSL 2 installation guide.
- For students who would prefer to not configure the WSL 2 backend, Docker Desktop for Windows can alternatively be used on Windows 10 Pro, Enterprise, or Education (Build 16299 or later), and Hyper-V and Containers Windows features must be enabled.
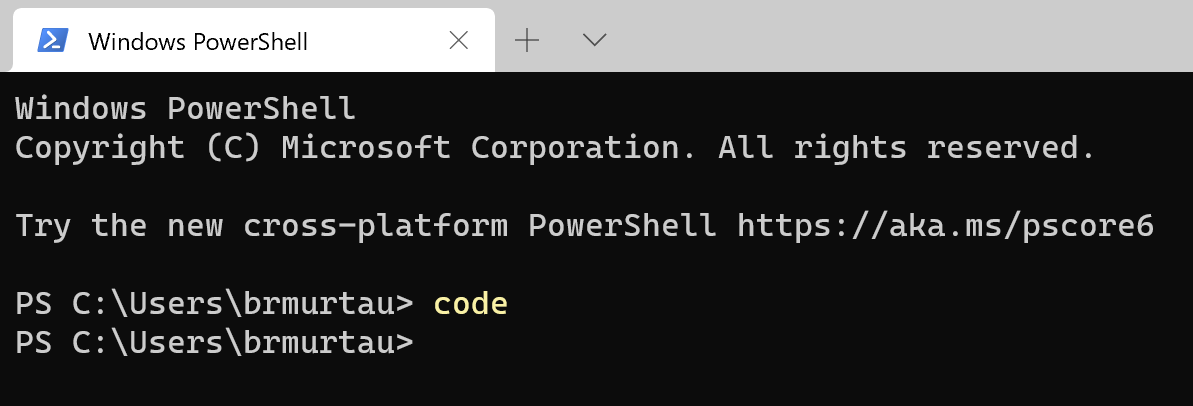
Let’s start off by launching VS Code, which we can do by typing code in the command prompt or terminal (or just by selecting VS Code on your computer):
Once VS Code launches, ensure you’ve installed the Remote – Containers extension:

When we install any of the Remote extensions, the green Remote indicator is added to the bottom left of the Status bar:
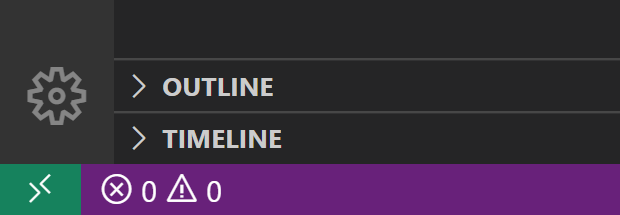
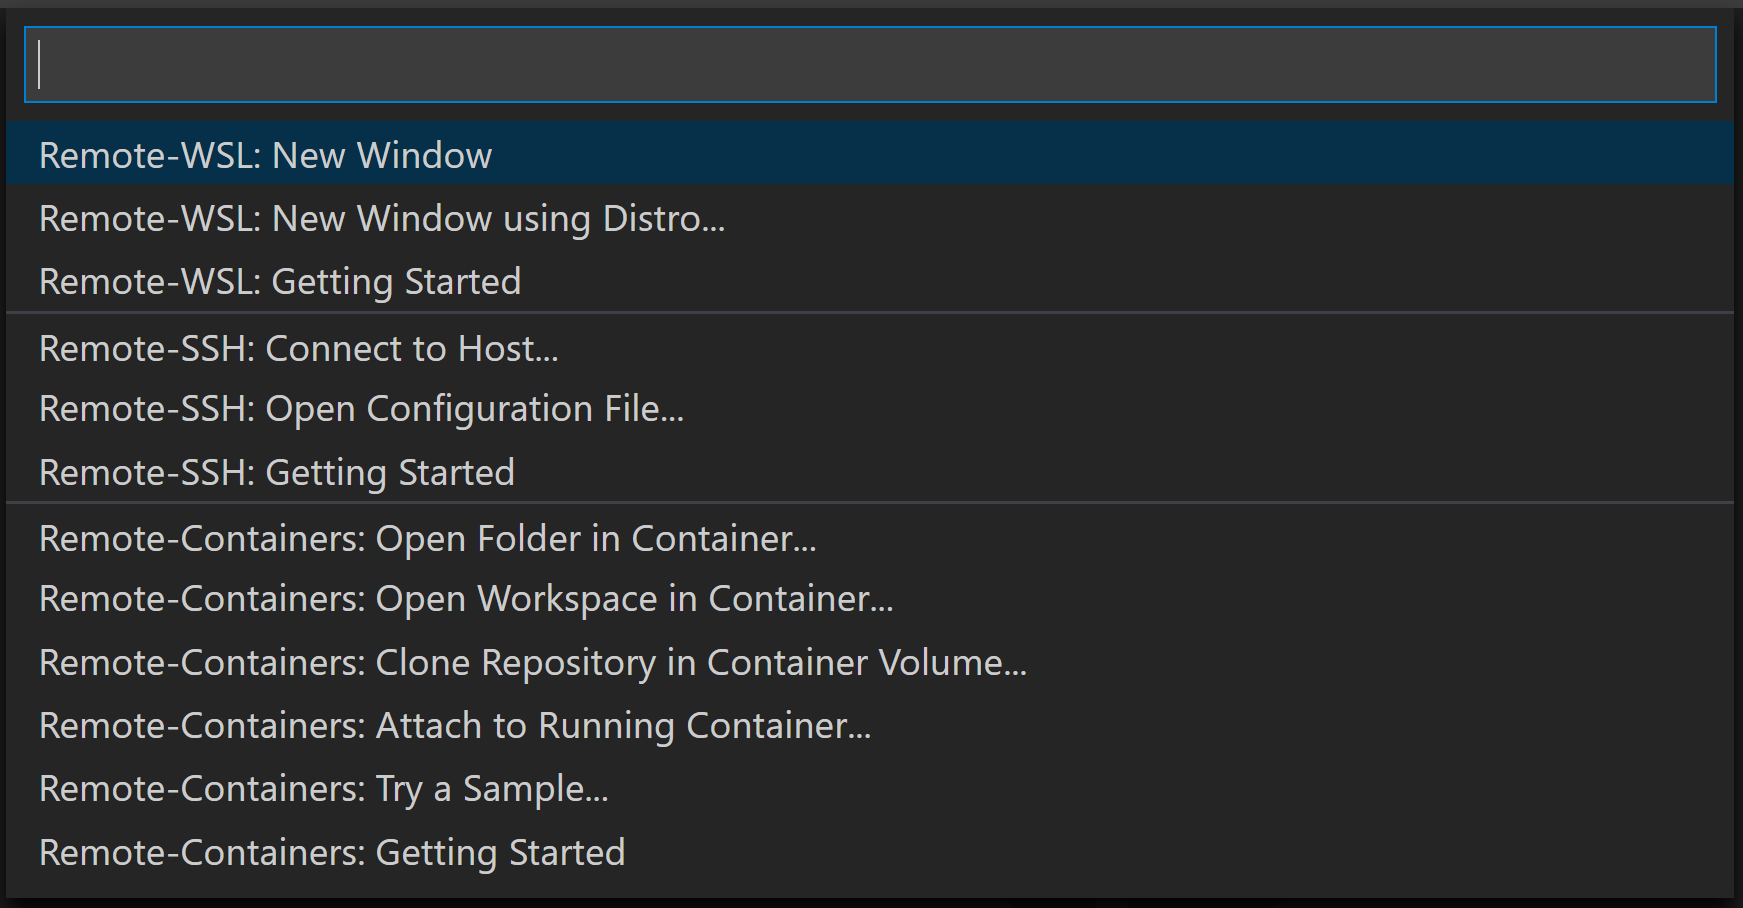
You can click on it to open the Command Palette and verify the Remote-Containers commands are listed:
Accessing a container for your class
Let’s walk through an example dev container to help students get a consistent coding environment. In our classroom, we could create a single GitHub repository to store exercises that share the same tech stack. For instance, all the Python assignments can use the same container and be stored in the same repo.
We have an example vscode-course-sample GitHub repo with a Python dev container and two Python intro assignments. Let’s open it in VS Code.
You can select the Remote indicator in the bottom left, or use the Command Palette, to bring up the Remote-Containers commands.
Let’s call Clone Repository in Container Volume…

We need to enter the URL to the GitHub repo where our container is stored, which in our case is microsoft/vscode-course-sample:

You can Create a unique volume. A volume is where files will be stored in our container:

Now that we’ve chosen our container repo, VS Code reloads to build the image and start the container:

Once the container is built and running, our files are loaded and we can start coding within our Python environment!
Click on sort.py in the Explorer to open it, and press F5 (or the green Run icon in the top right) to run it:
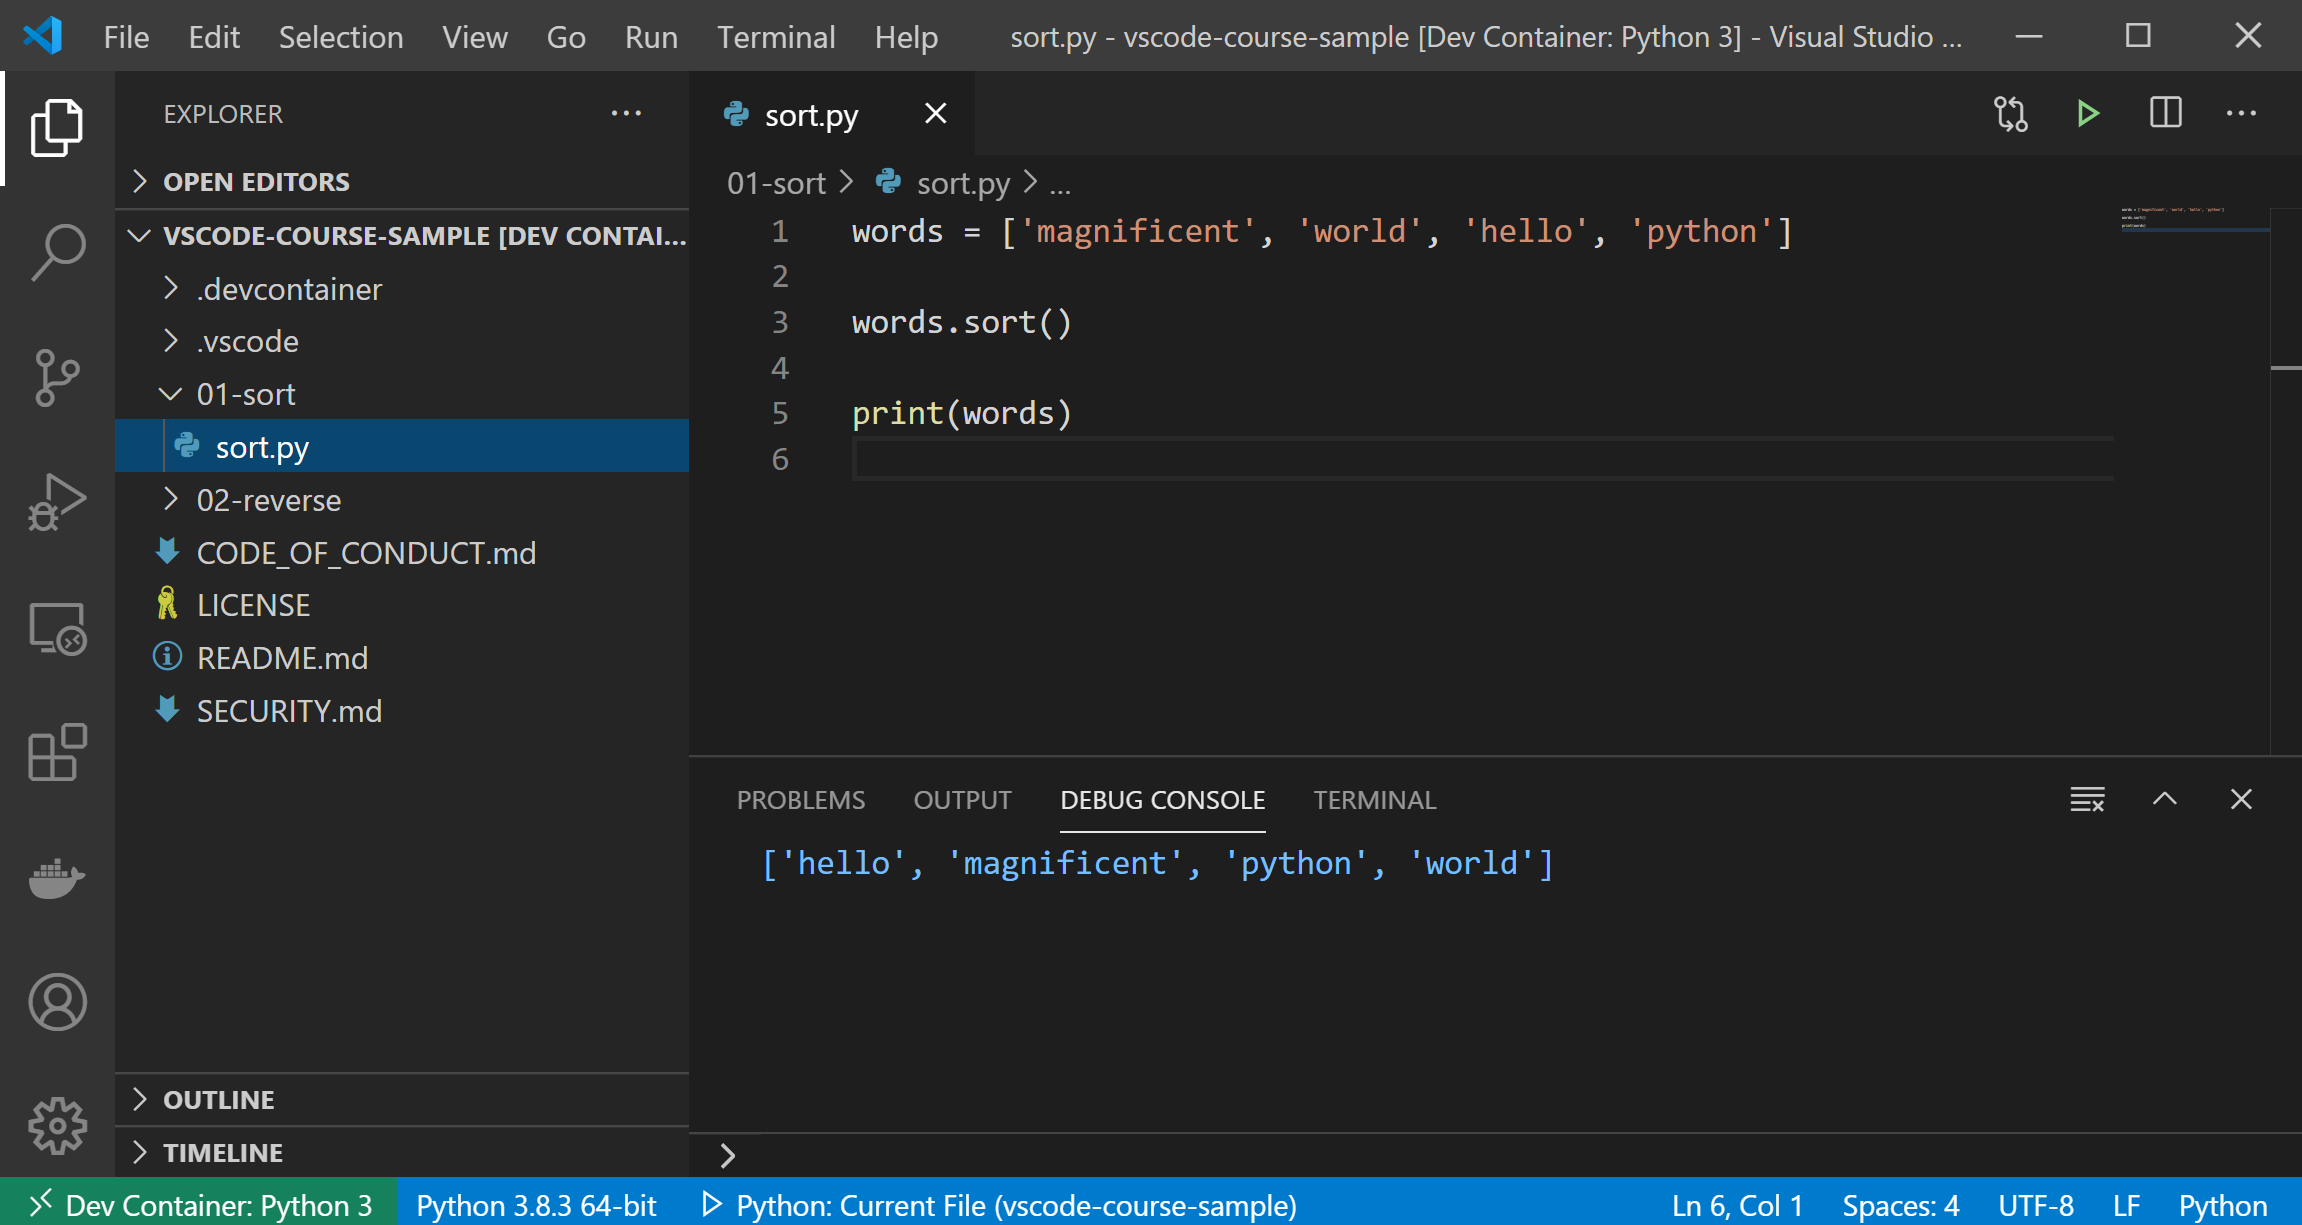
Our Python code ran successfully without ever having to set up Python on our local computer.
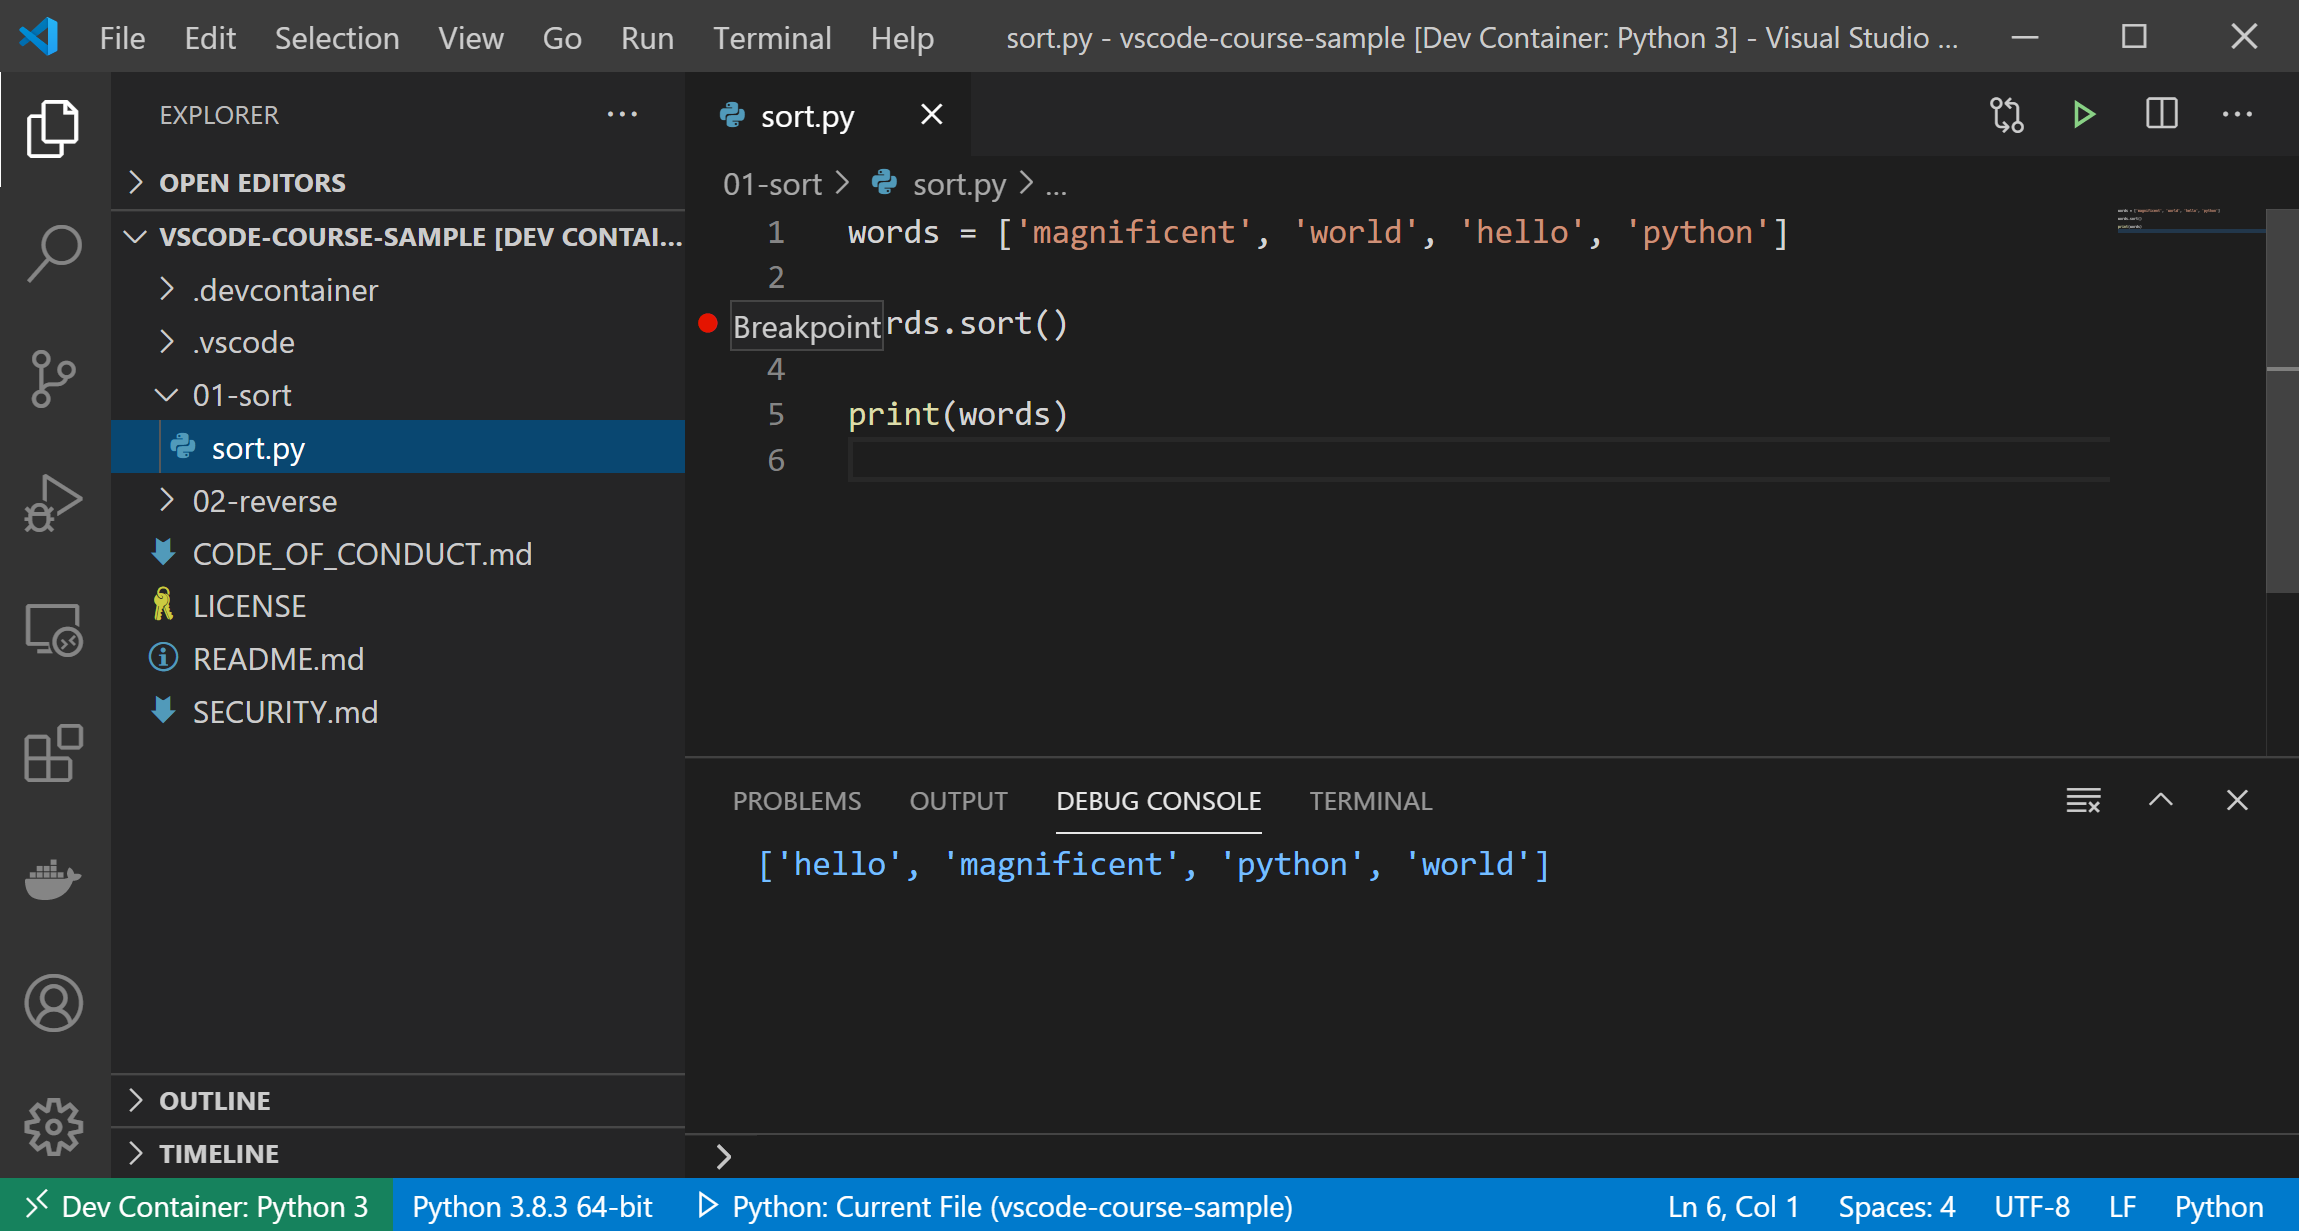
We also have access to all the benefits of VS Code, such as setting breakpoints to pause our program and help us debug. Let’s set a breakpoint when we sort our list of words.
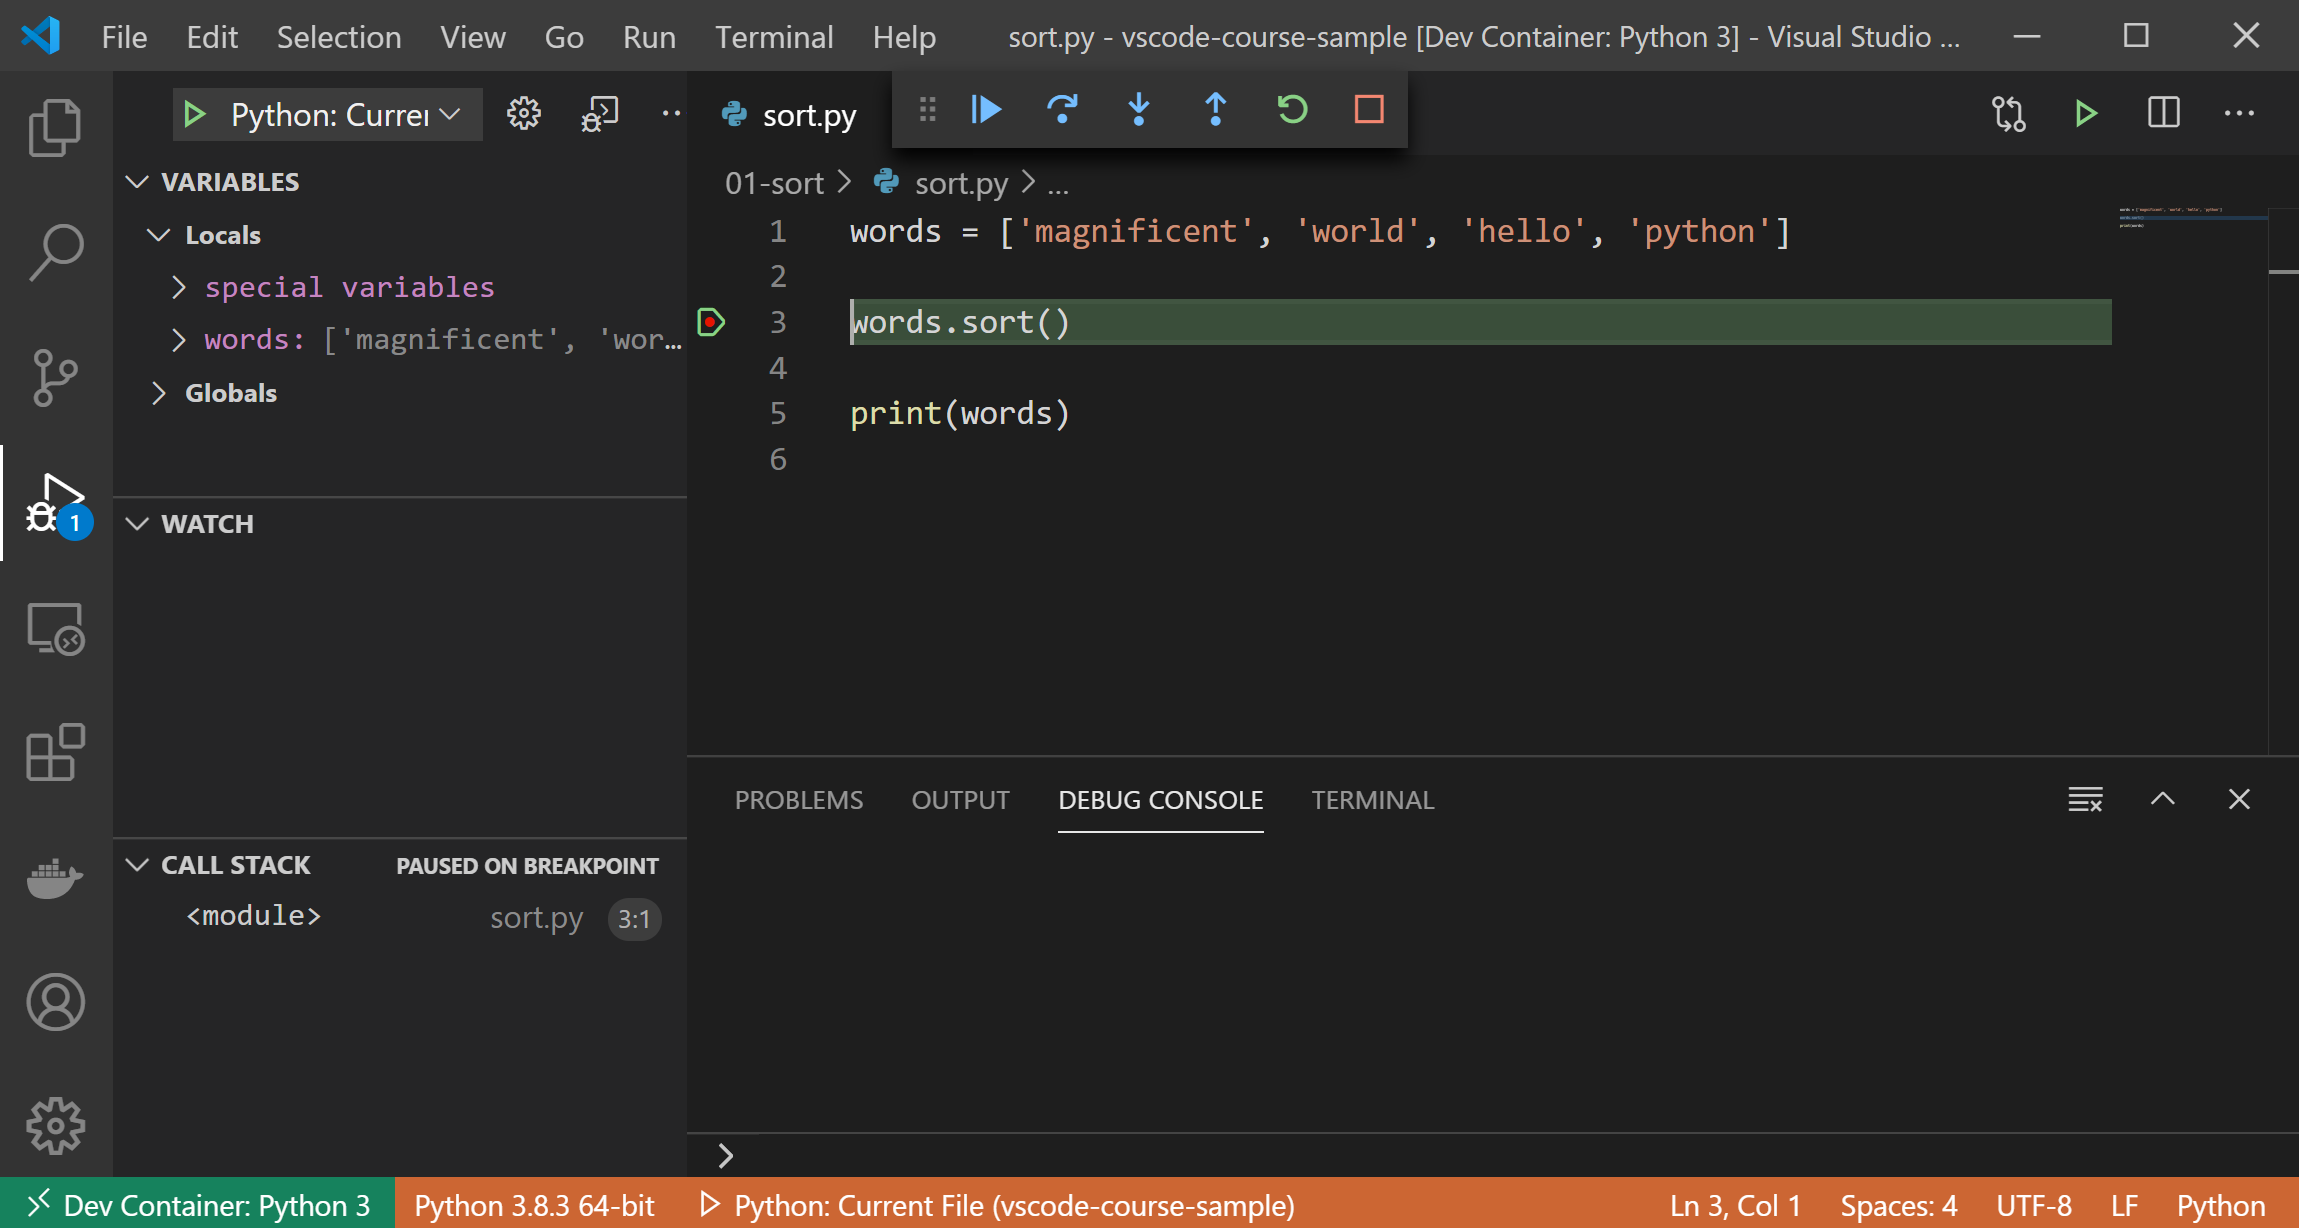
We can run our program with F5. Notice that the program stops once it hits the breakpoint:
Creating a container for your class
Now that we’ve seen a fantastic example of a container, let’s set up our first container ourselves using the Remote – Containers extension. Let’s start off in a “Hello World” Python application:
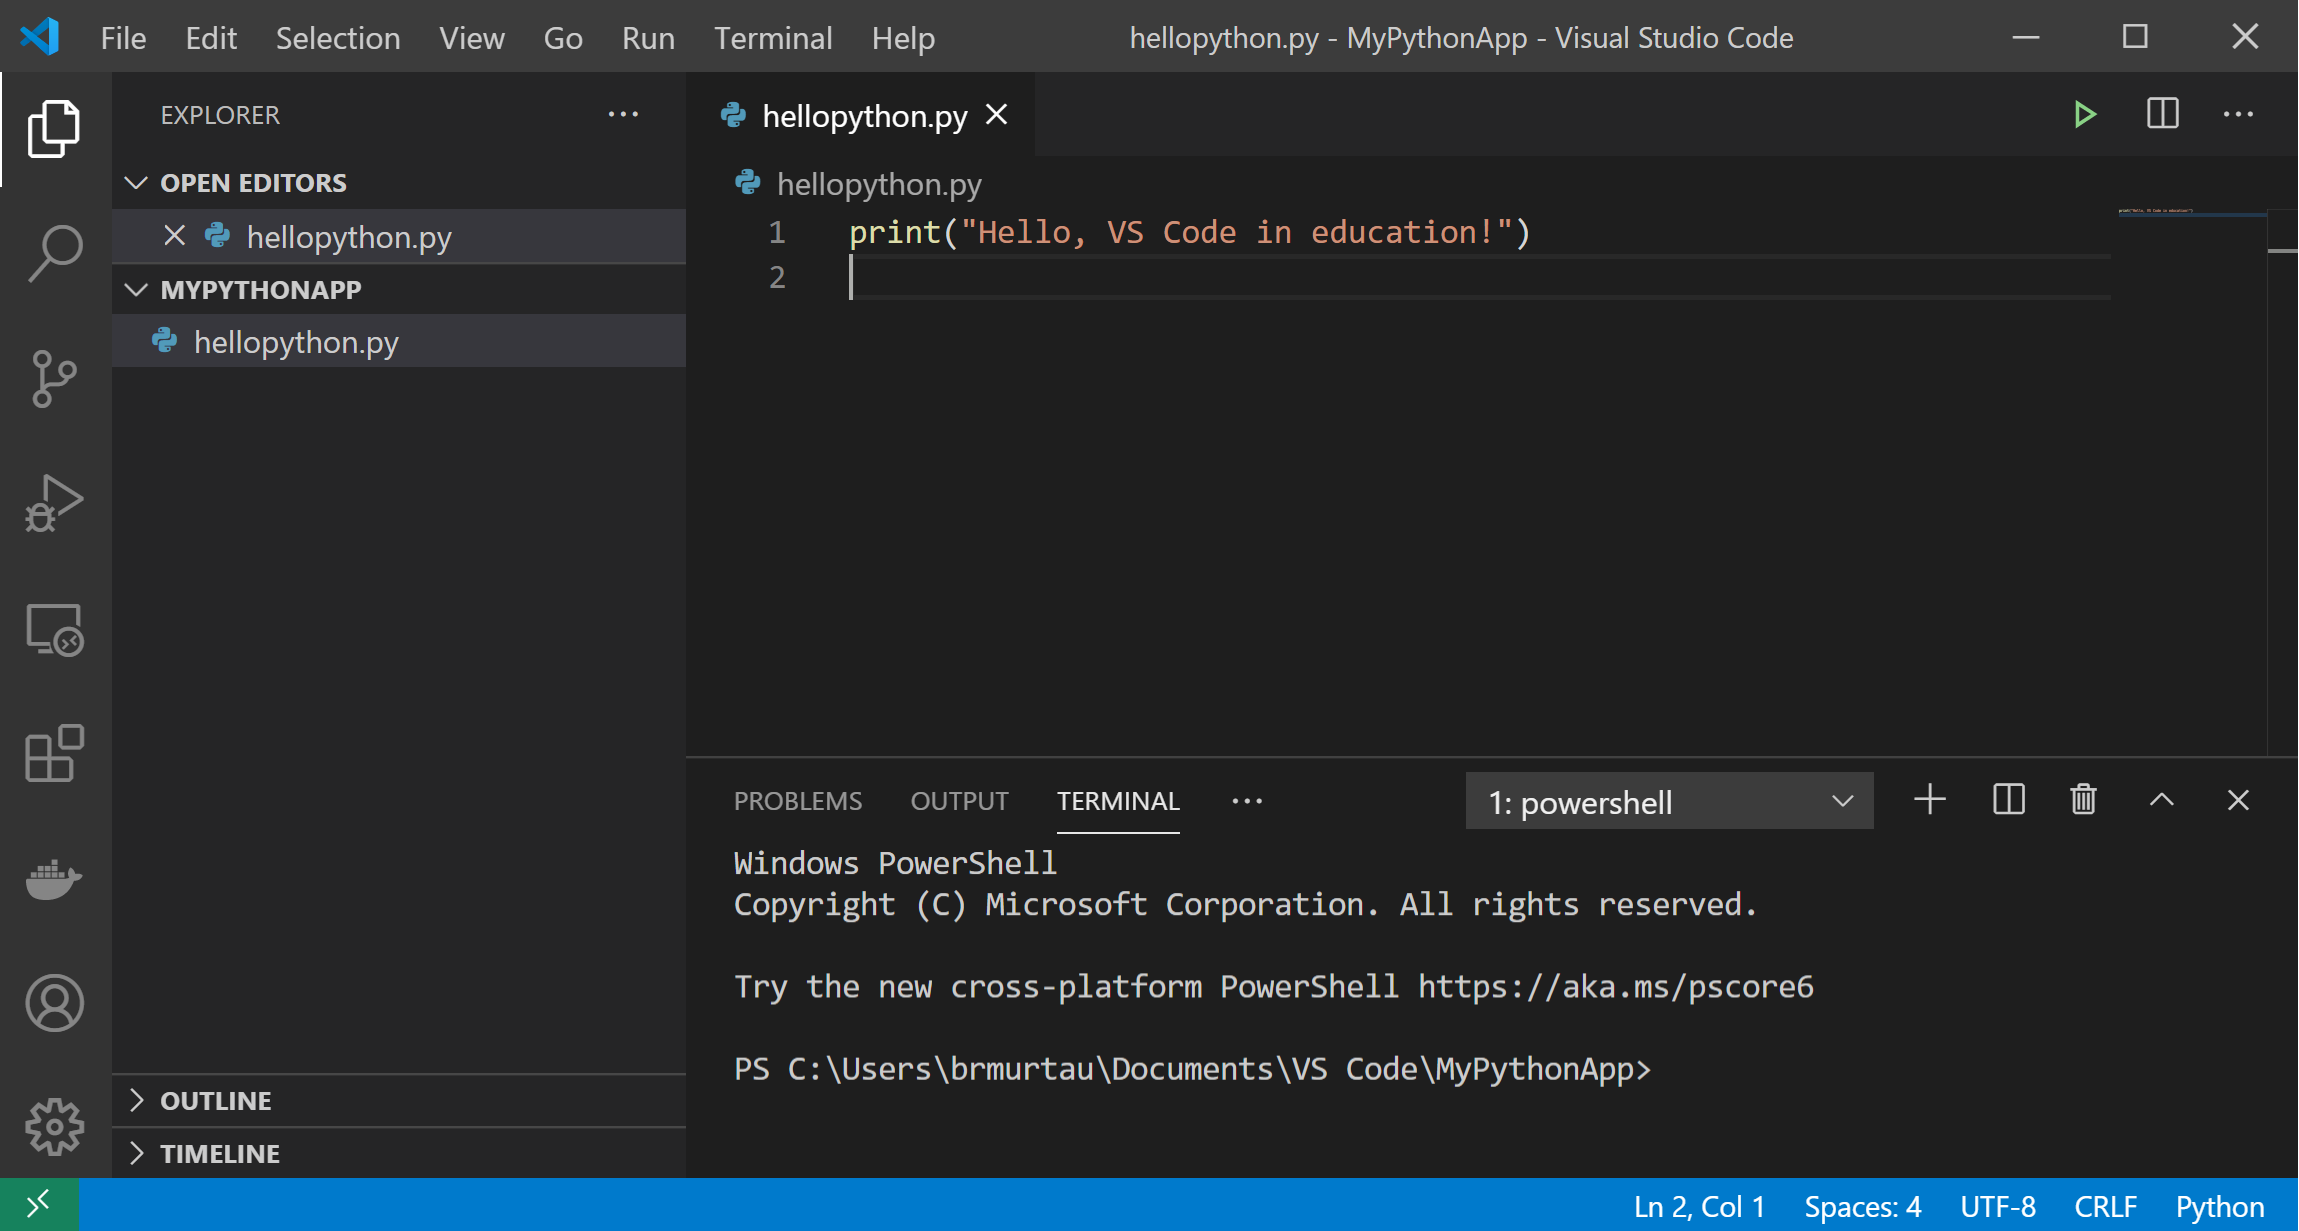
We’ll select Remote-Containers: Add Development Container Configuration Files… to begin setting up the files necessary for a development container:

Container configuration files are what’s needed to create and customize a development container. The list of container definitions that appears is filtered based on the contents of your application, which in our case is a Python file. Let’s select Python 3:
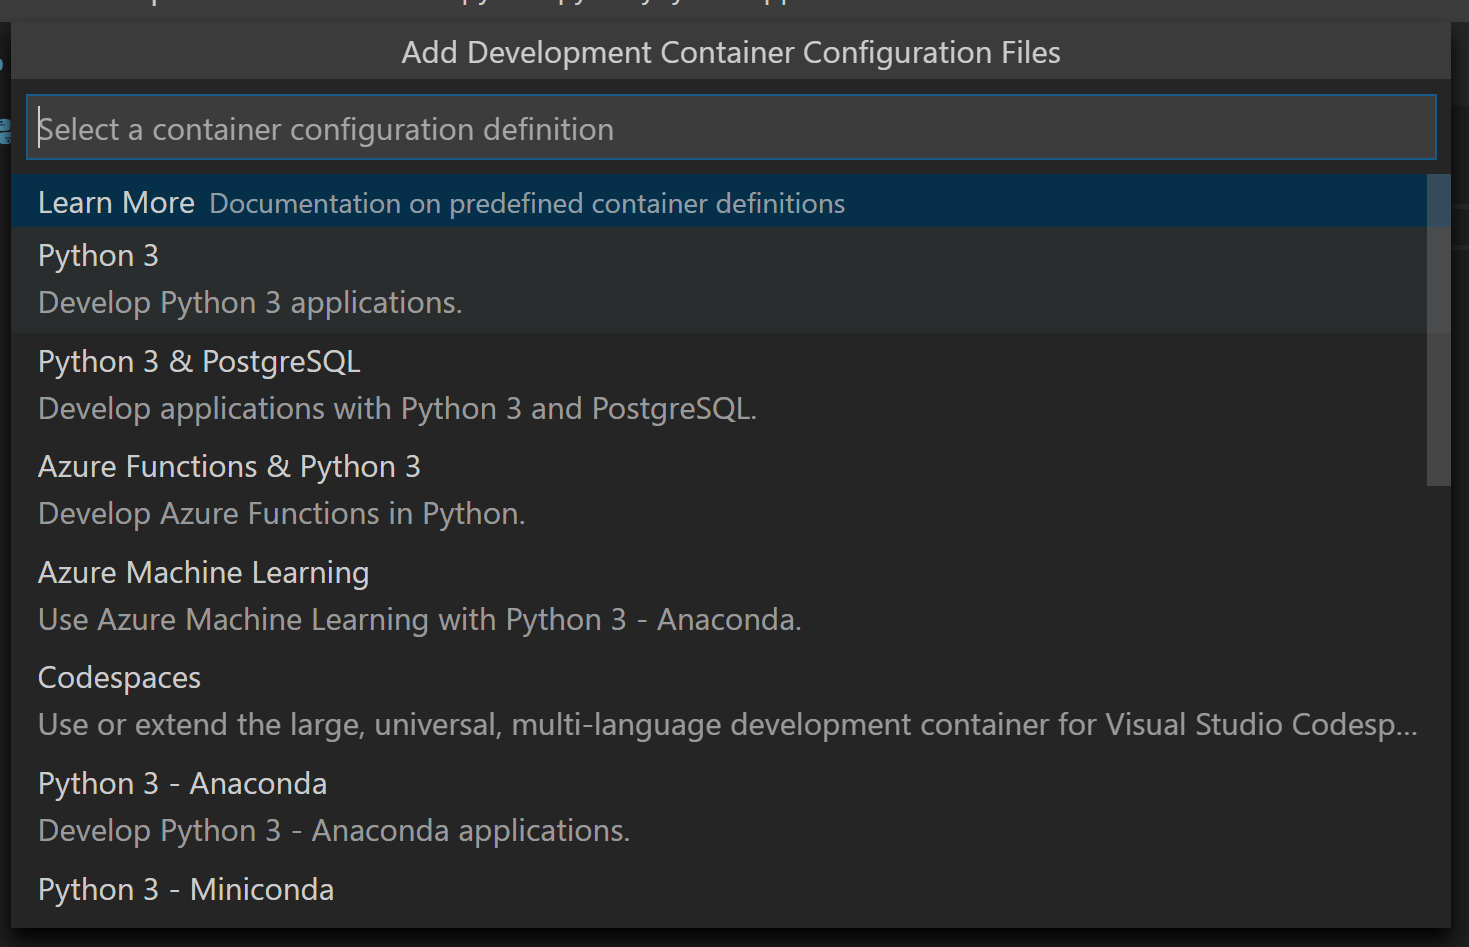
The Remote – Containers extension automatically adds a .devcontainer folder and two configuration files within it: devcontainer.json and a Dockerfile. Let’s take a closer look at both files.
devcontainer.json
devcontainer.json describes how VS Code should start our container and what to do after it connects. This file can be located under .devcontainer/devcontainer.json or stored directly as devcontainer.json in the root of a project.
Here is a simple example of a devcontainer.json. It pulls a preconfigured Node image, automatically sets up port forwarding for port 3000, and will install the eslint extension when the container is created:

Here is an example of what a slightly more elaborate devcontainer.json looks like for our Python project. It references a Dockerfile rather than an image directly using the dockerfile property. It also installs the Python extension automatically, and establishes a set of container-specific settings once the container is created, such as linting:
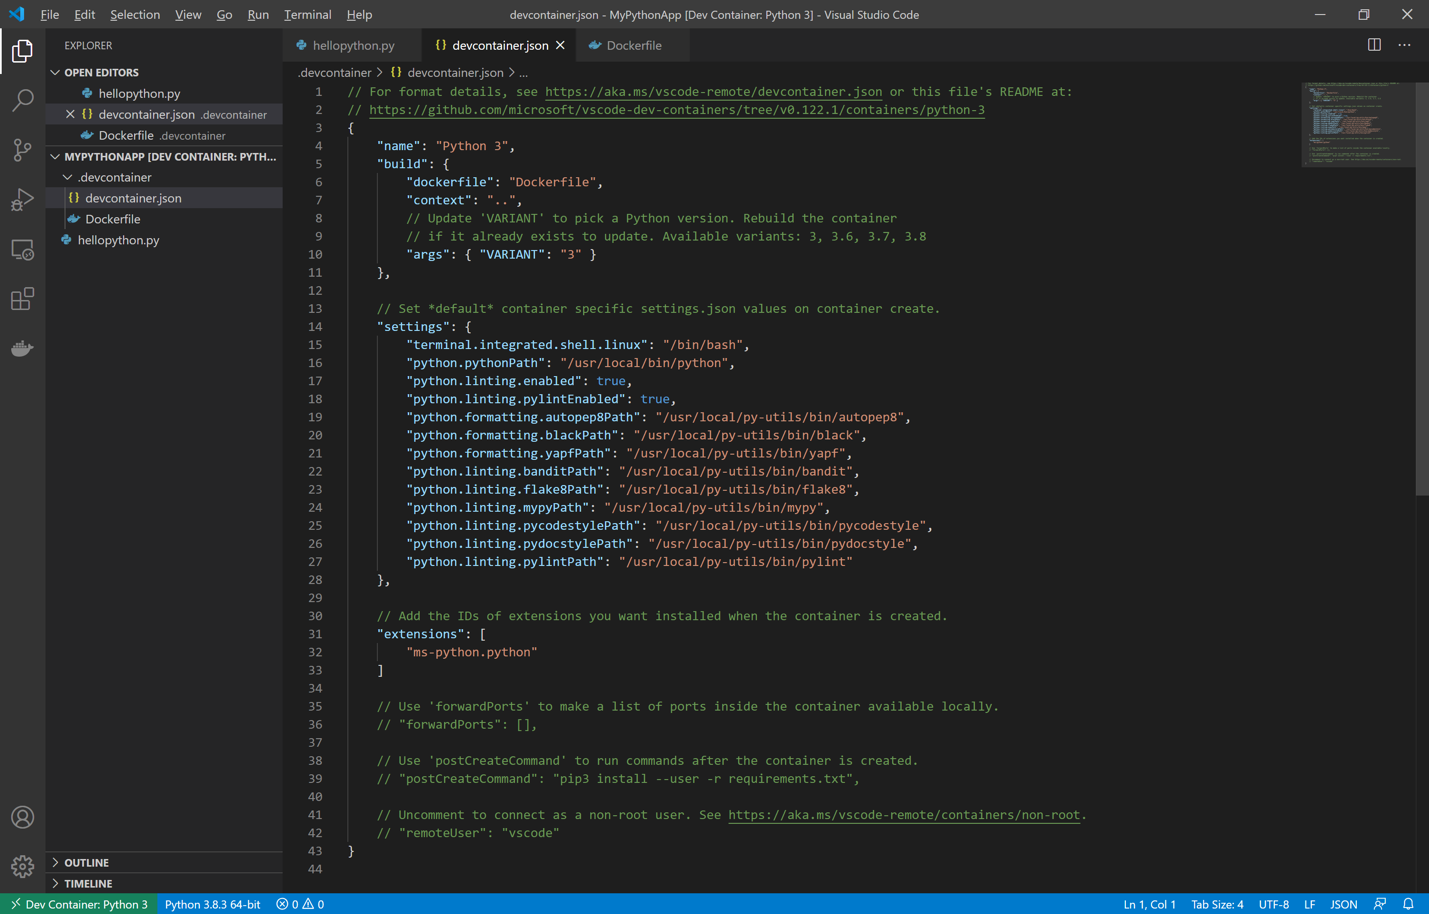
devcontainer.json is a great opportunity to create a customized coding environment to fit the specific needs of your students. You can specify a few variables to create a unique environment for each class or assignment.
Variables we’d recommend starting off with in a devcontainer.json for education are:
| Property | Type | Description |
|---|---|---|
image |
string | The name of an image in a container registry (i.e. DockerHub) that VS Code should use to create the dev container. |
dockerFile |
string | The location of a Dockerfile that defines the contents of the container. The path is relative to the devcontainer.json file. You can find a number of sample Dockerfiles for different runtimes in the vscode-dev-containers repository. |
name |
string | A display name for the container. |
extensions |
array | An array of extension IDs that specify the extensions that should be installed inside the container when it is created. Defaults to []. |
settings |
object | Adds default settings.json values into a container/machine specific settings file. |
Setting up a handful of variables in this file will save your class time in the long run. For example, you can use the extensions variable to ensure all your students automatically get the same set of extensions installed. Setting paths can also be challenging or lead to issues on students’ computers, but by specifying path information via the settings variable, you’ll save your class time and ensure their computers’ path variables aren’t harmed in the process.
There is a table in the devcontainer.json reference of all available properties you can include in this configuration file.
Dockerfile
Docker can build images automatically by reading the instructions from your Dockerfile. This file will at the very least have a base image specified using FROM, and it can include command-line instructions as well.
Here’s what the Dockerfile looks like in our Python app:
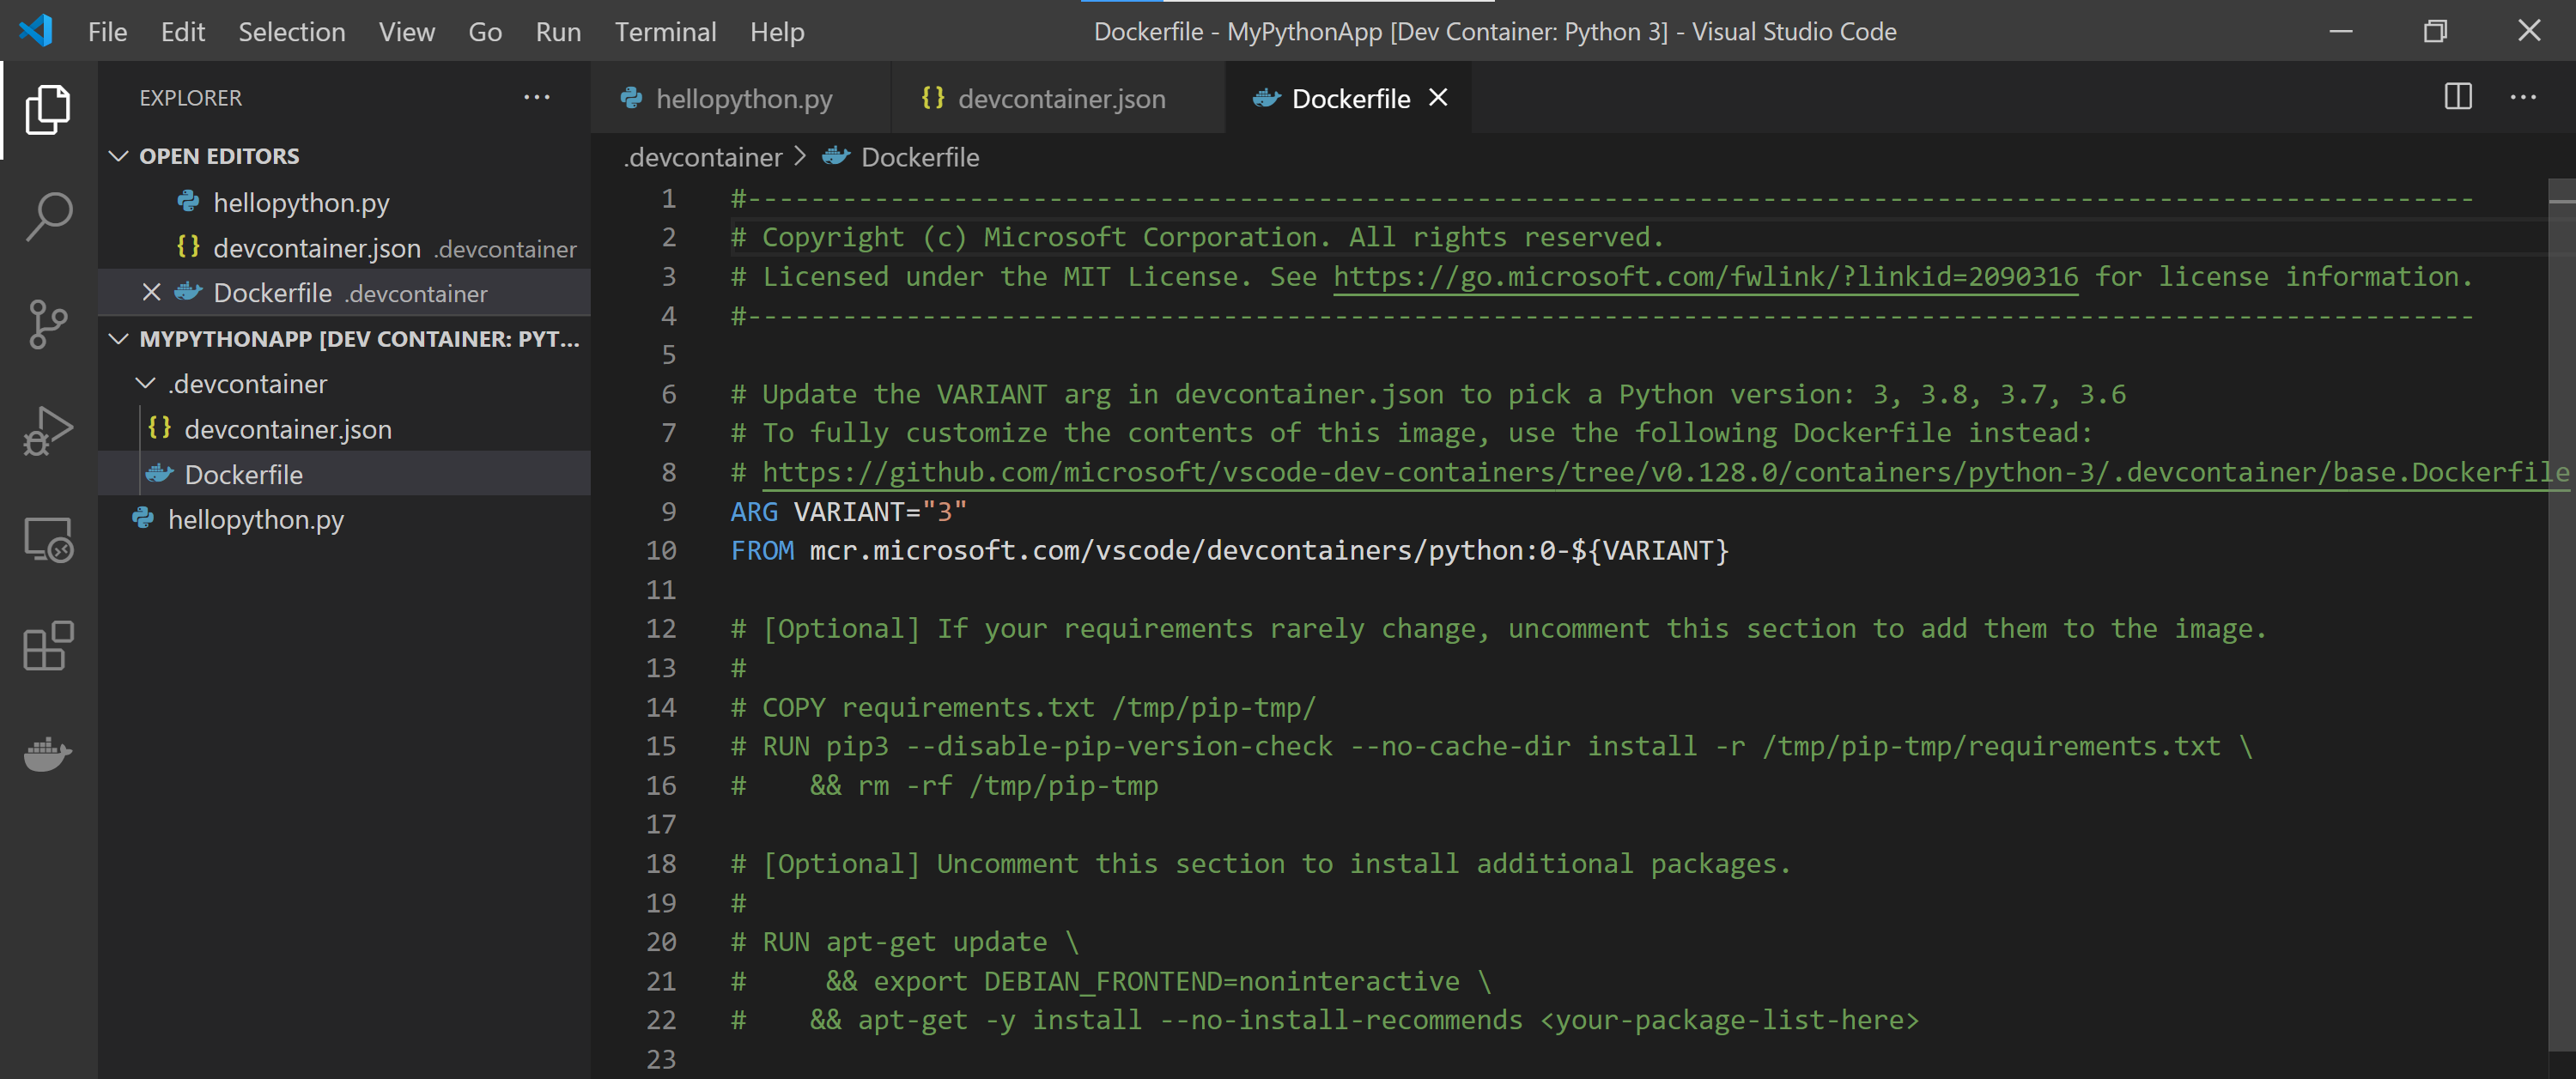
Opening the container
Once our container configuration files were added, we got a notification that our folder now has a devcontainer.json file. Let’s select Reopen in Container:
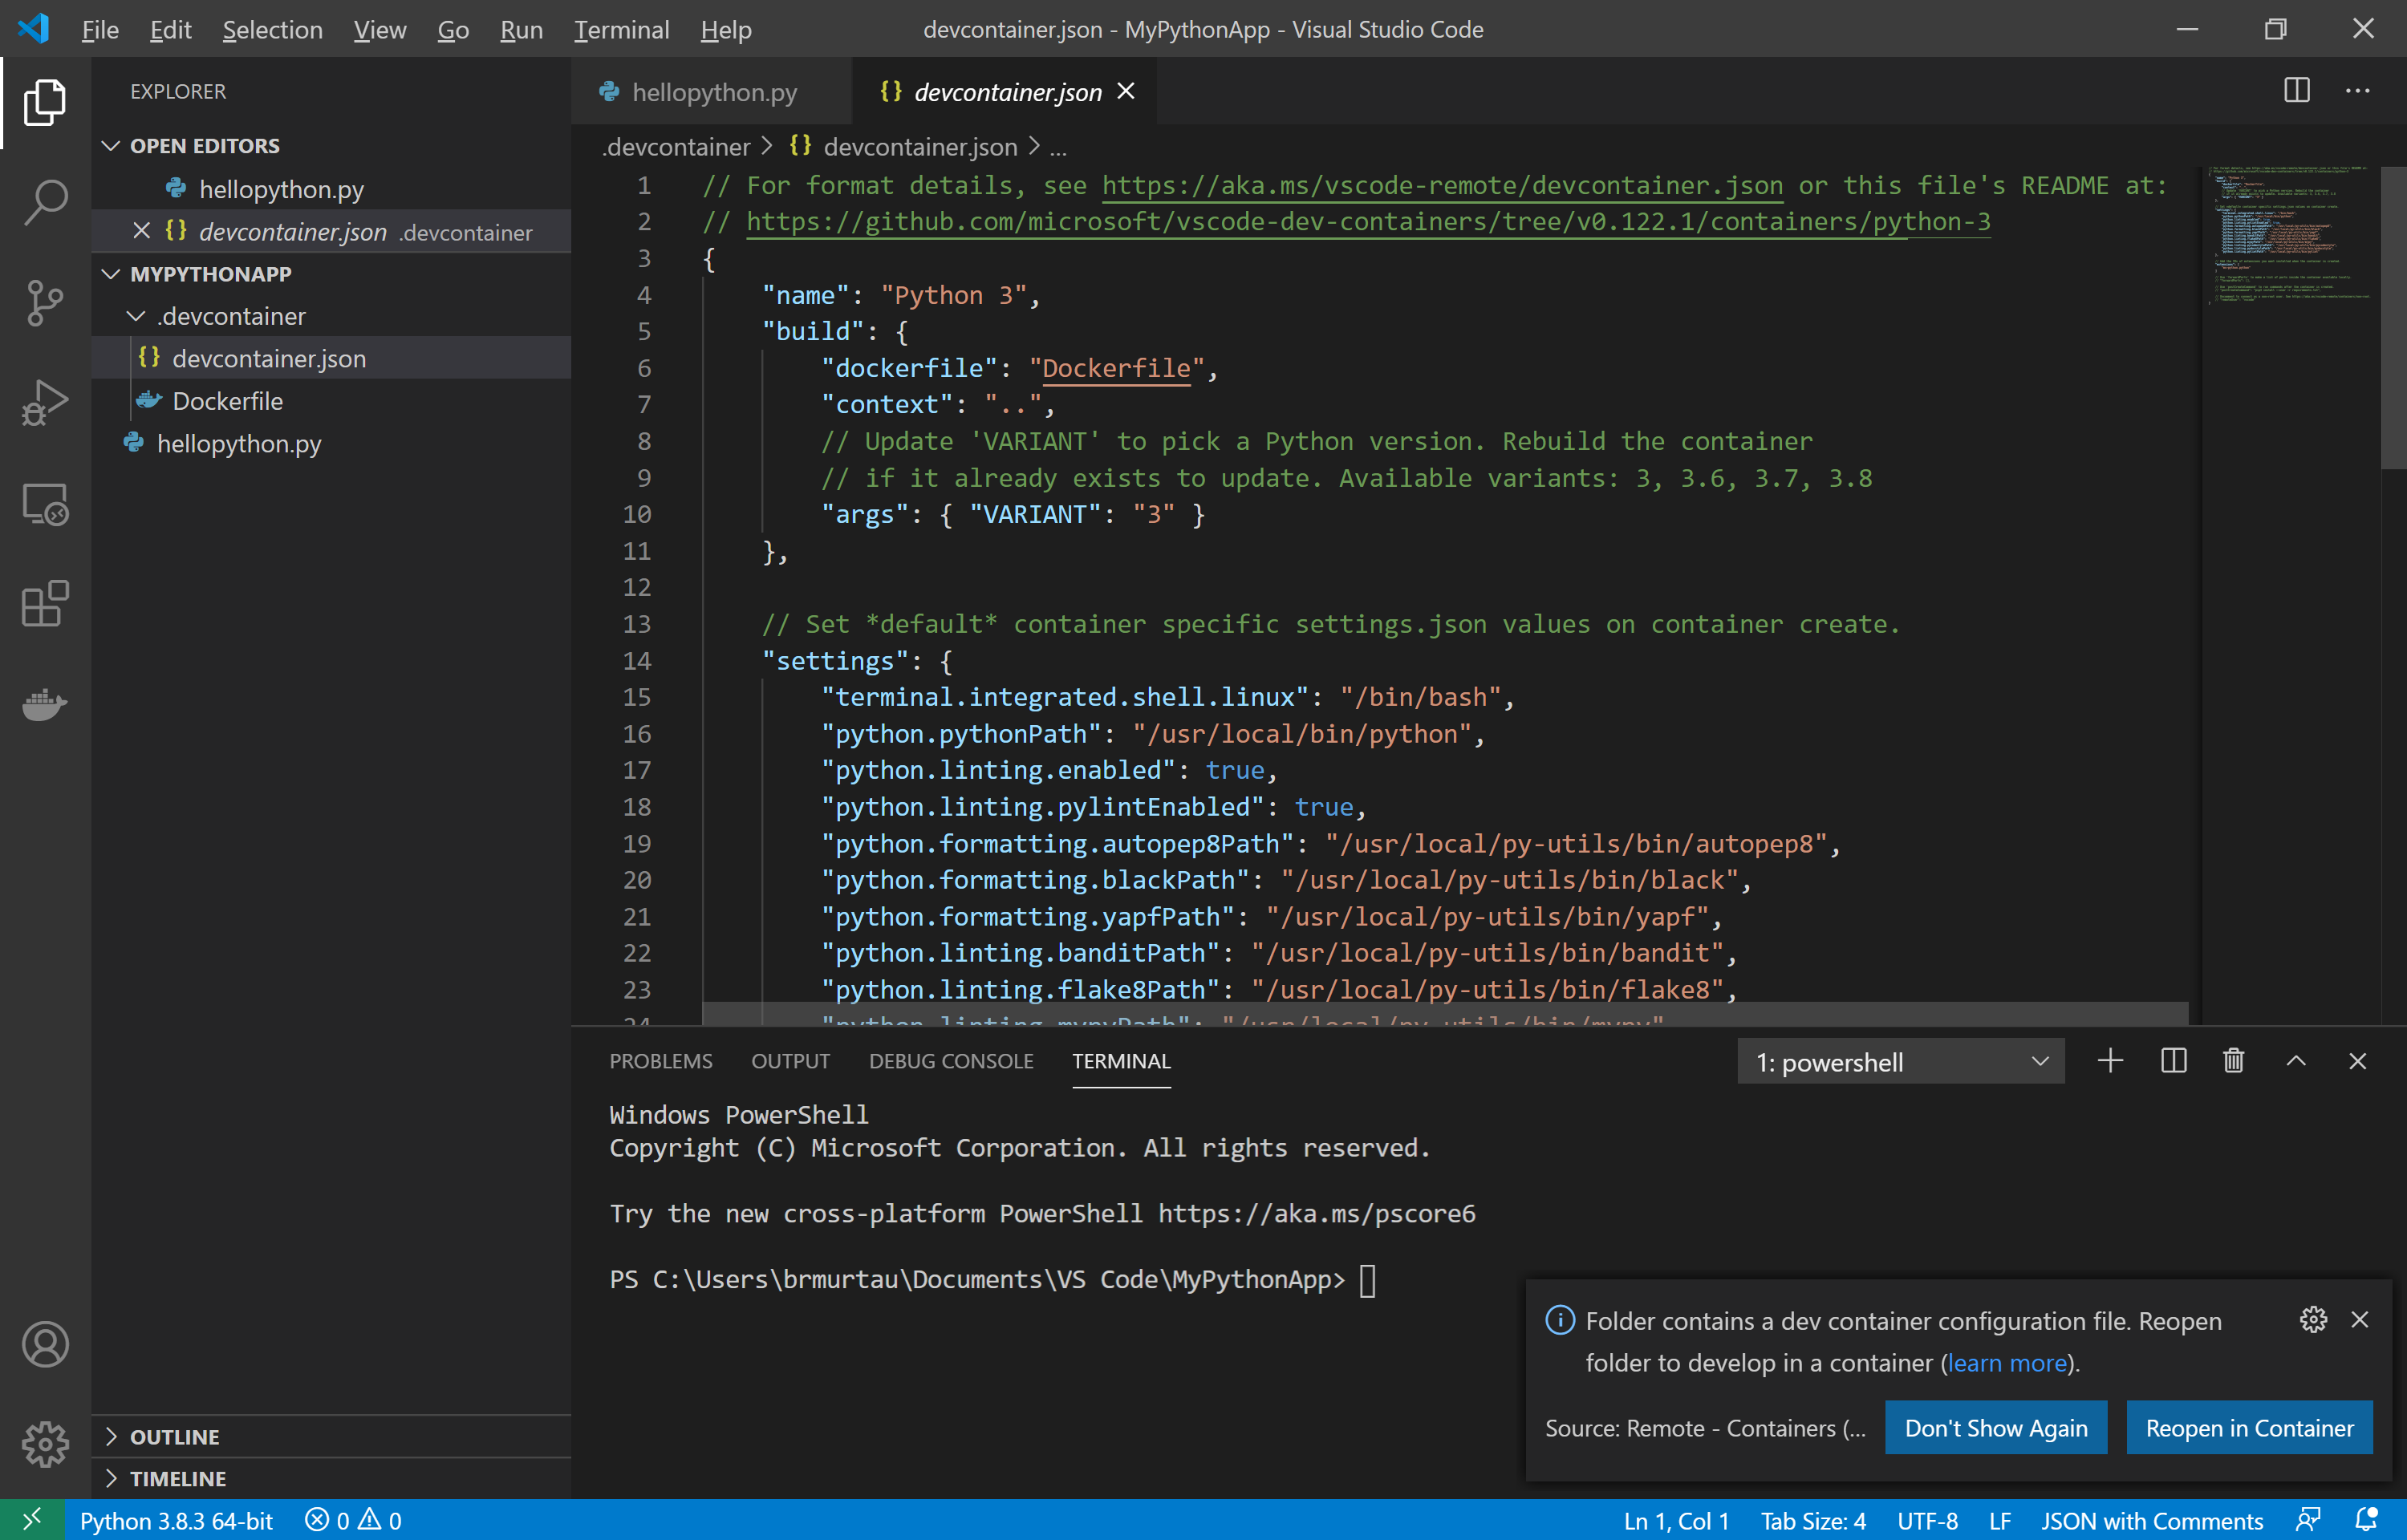
A new instance of VS Code launches, where our image is being built and our app is starting in our dev container:
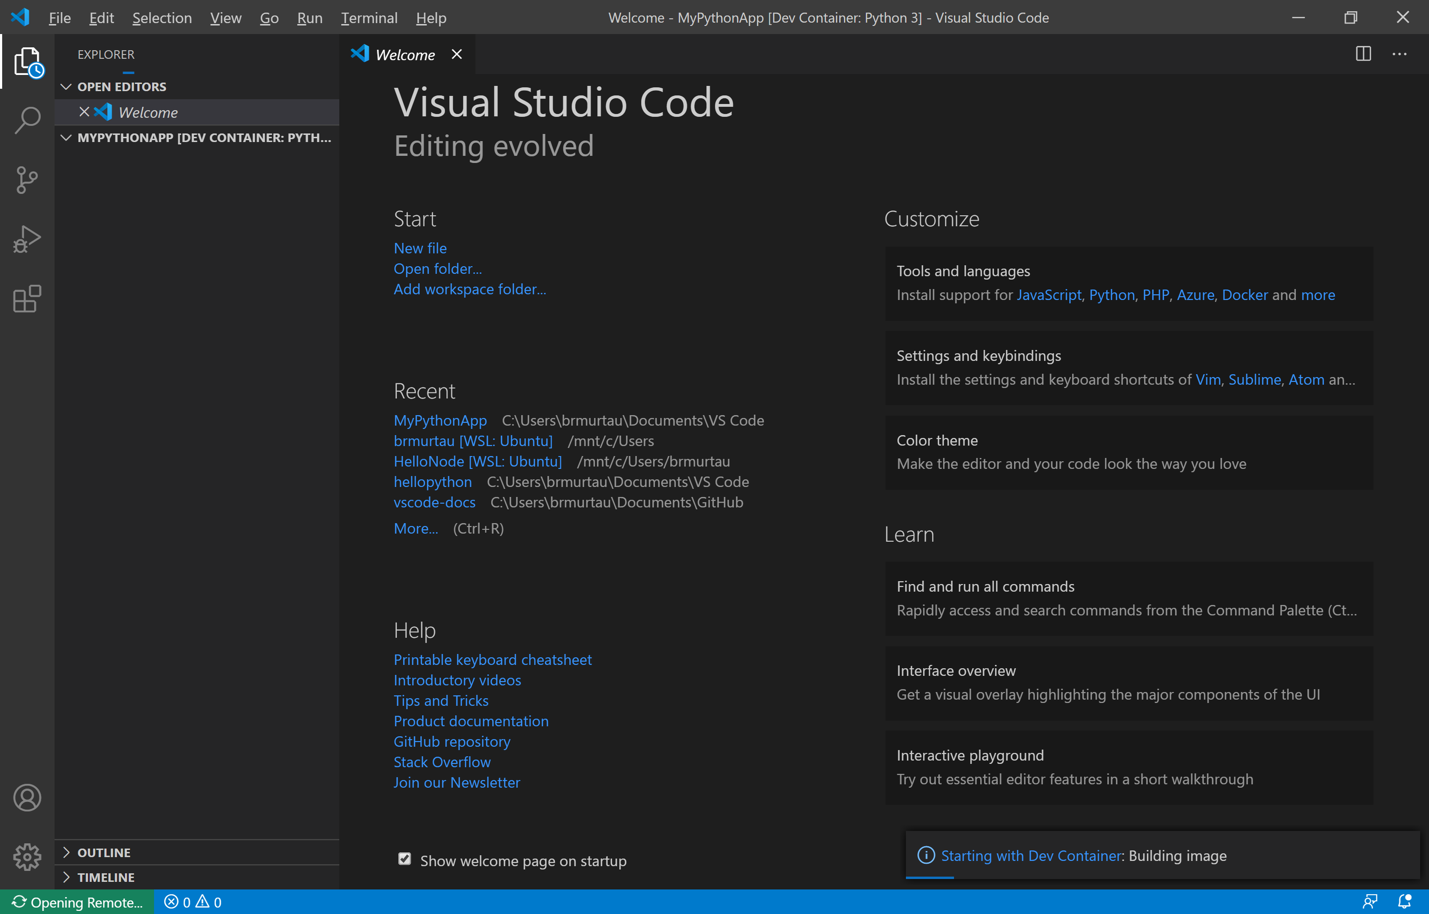
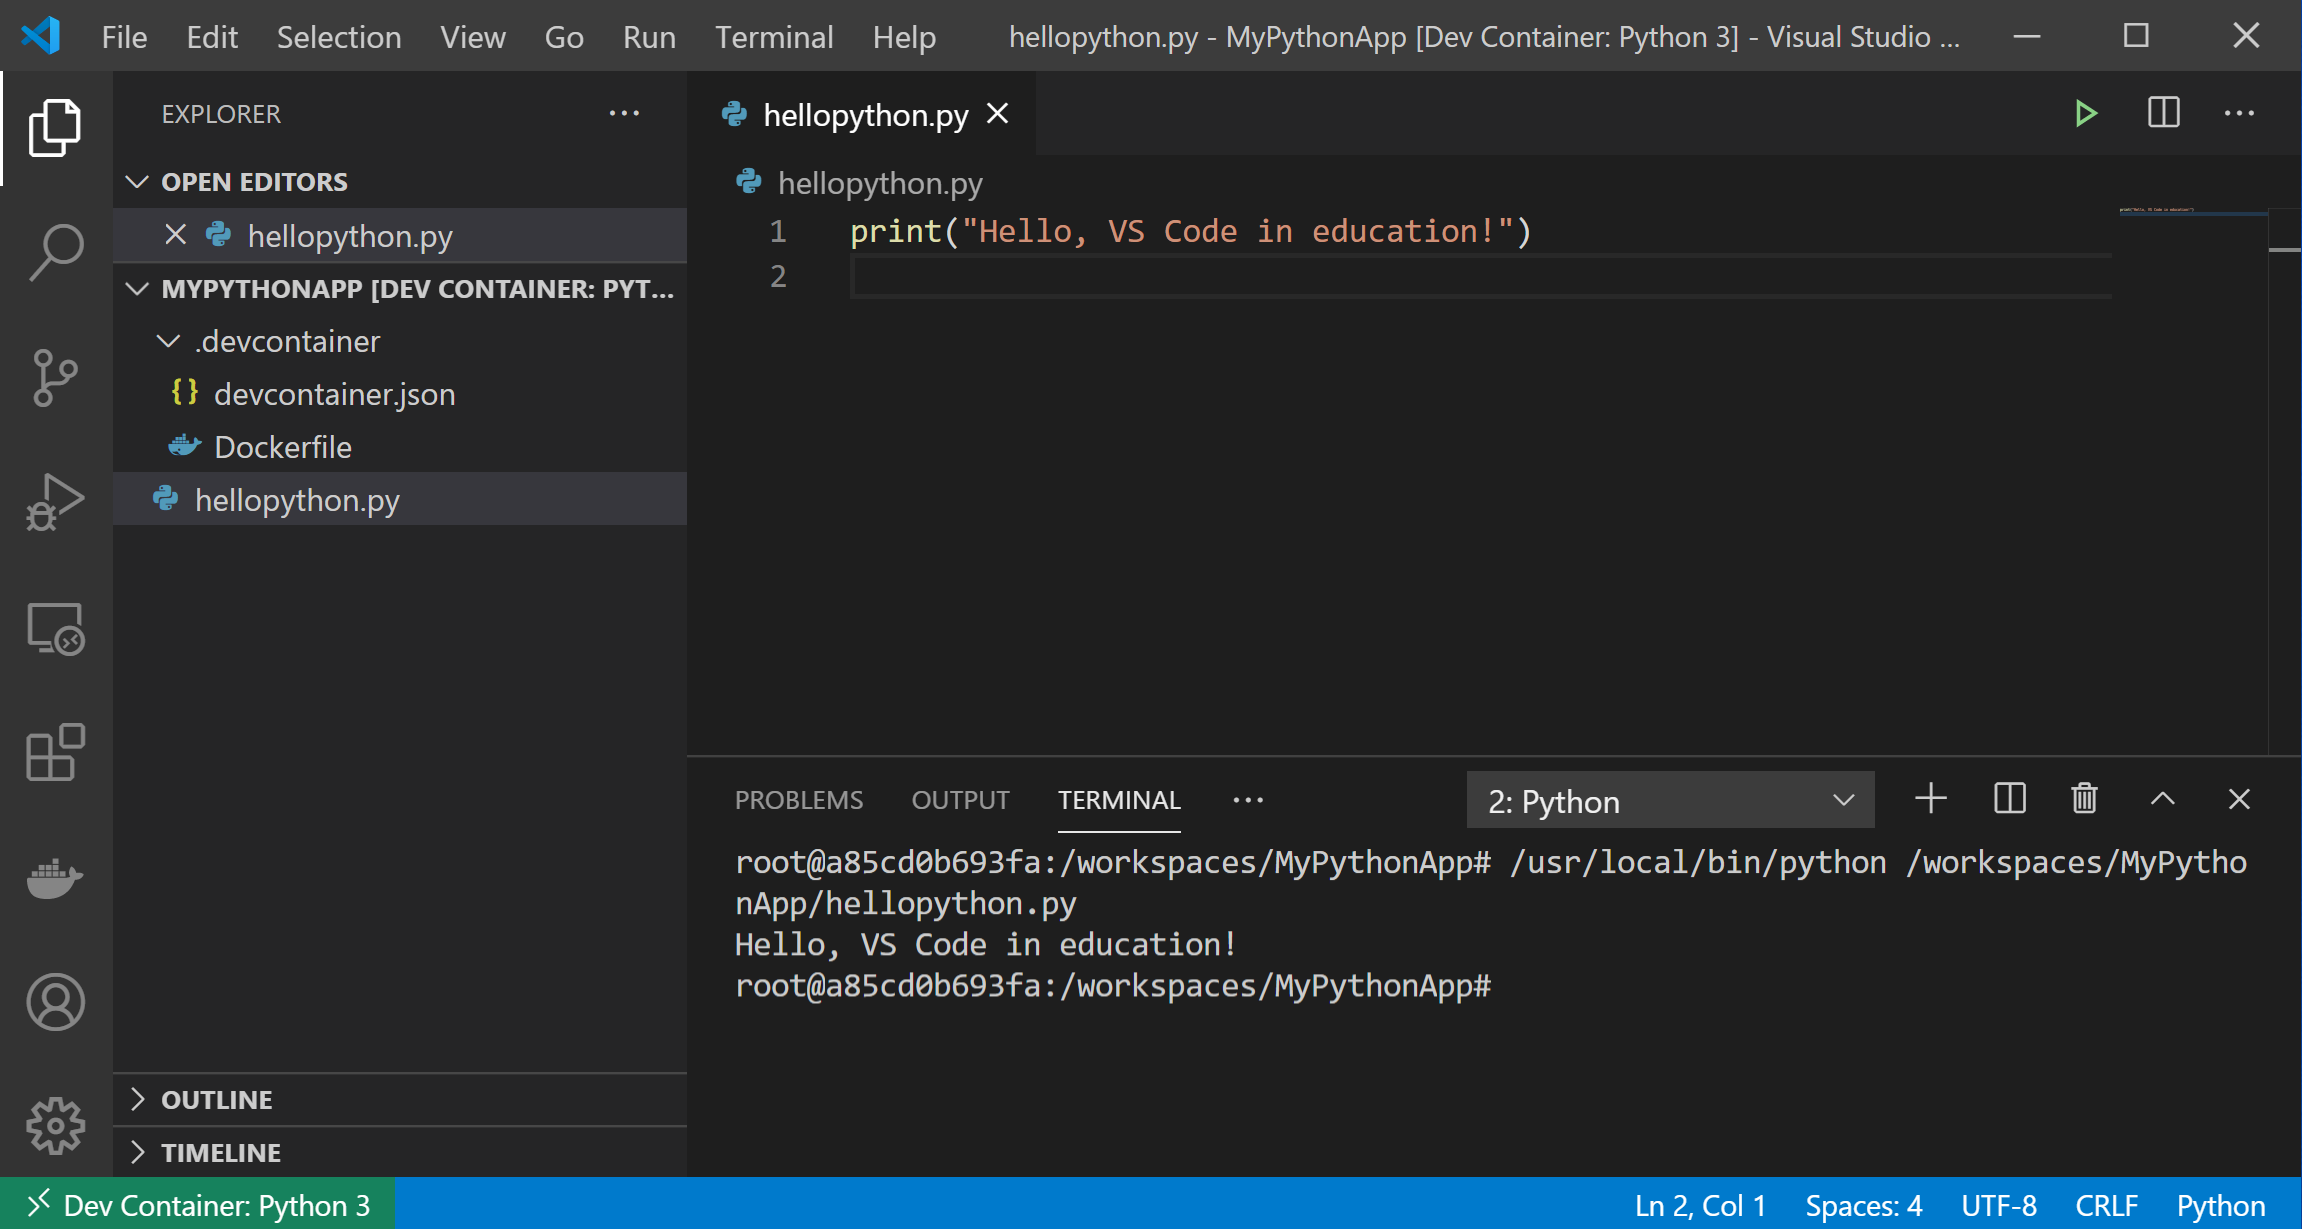
Once our container is built, we have all the same files, but now the bottom-left indicator reads, “Dev Container: Python 3,” signifying we’re inside our container. We can run our code with ease, regardless of which version of Python (if any) we have installed on our local machine!
Creating and sharing assignments
Now that you have a dev container, you can upload it to a repository so that your students can access it for their assignments. You can include assignment instructions in a README, as well as any base or template code needed for the assignment, and a .devcontainer folder so that they all have a consistent development experience. All of these files can be uploaded as a single repo.
Make sure you have Git installed. You can initialize a new Git repository from your container project in VS Code. Alternatively, you can use git init from your project’s directory in the command line.
The next step is to connect your local repository to a new repo from GitHub in your browser:
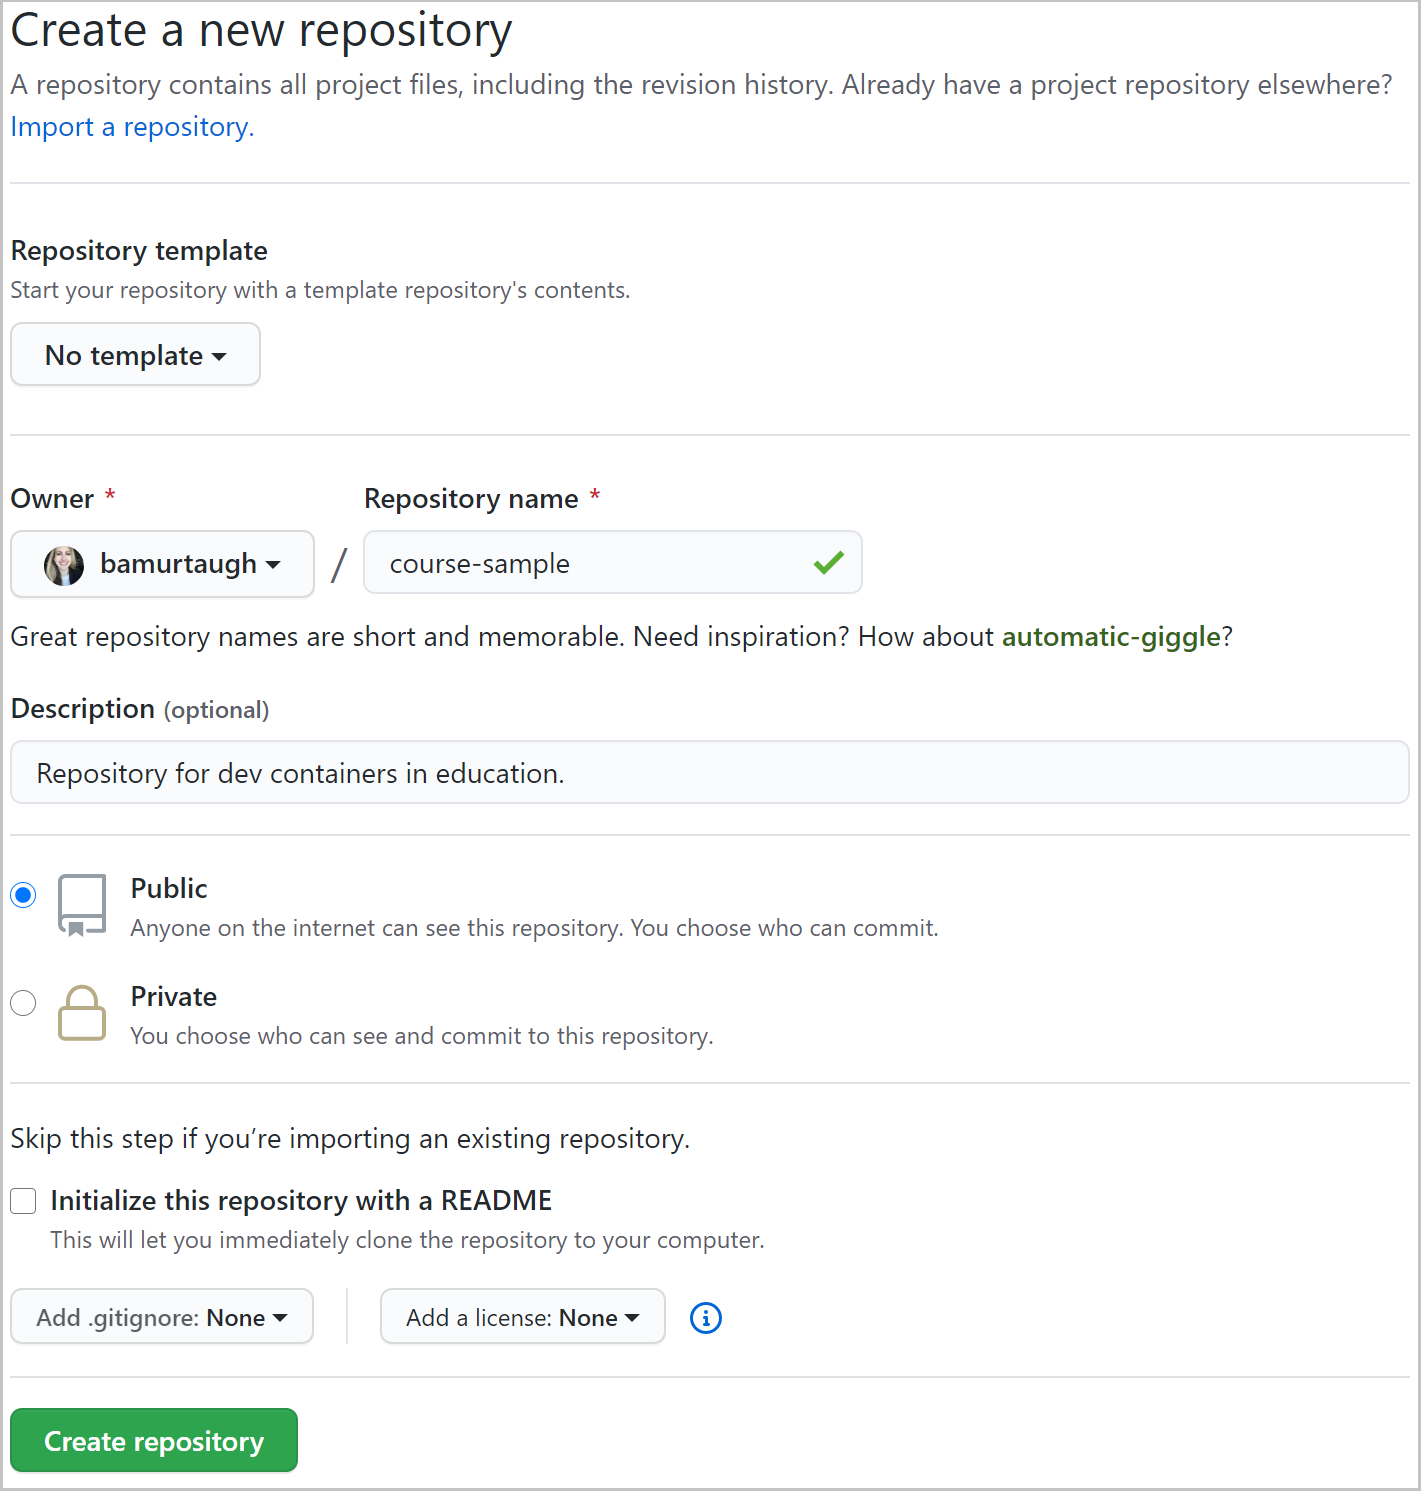
Then, we’ll connect our local Git repo (the container project on our computer) to the remote repo (the GitHub repo we created in the browser):

You may be prompted to log into GitHub. Once you sign in, your files can be added to your remote Git repository:

Now when I refresh GitHub in the browser, I can view my files!
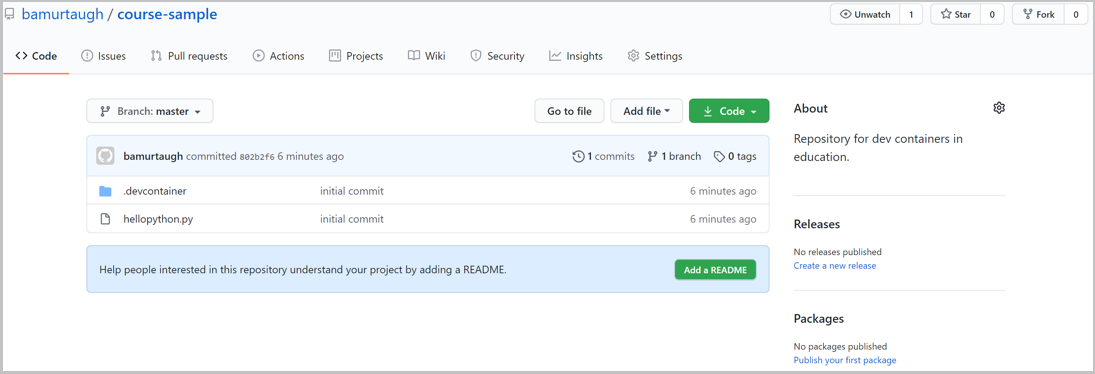
For more information on how to upload your repository to GitHub, check out this Adding an existing project to GitHub guide.
Accessing assignments
To see how students can access the dev container from GitHub and begin programming with ease, check out our quick 5-minute video.
Feedback & further resources
To help set up VS Code with containers, we have detailed articles on the VS Code Remote Development documentation. If you have any questions or feedback for our team, please feel free to open an issue on the VS Code Remote Development GitHub Repository or Tweet us @code.
Happy Coding!
Brigit Murtaugh, VS Code Program Manager @BrigitMurtaugh

