This blog originally appeared on VirtualNic, by Nic ODonovan.
Recently, VMware released vCloud Director 9.0 for Service Providers. I refer you to this vCloud Director 9.0 What’s New White Paper, this explains all the goodness packed into this latest release.
As the title suggests – in this post I’m going to cover the vCloud Director 9.0 for Service Providers vCloud API. There are a few articles out there that talk about APIs, but I plan to build on the basics covered in this post and go deeper in subsequent blog releases.
The goal of this post is to show you there is another way to consume vCloud Director for Service Providers using the vCloud API.
Working with APIs may seem daunting. By the end of this post, my hope is to show you working with APIs – in particular the vCloud API is fairly easy.
vCloud Director Constructs
Contents
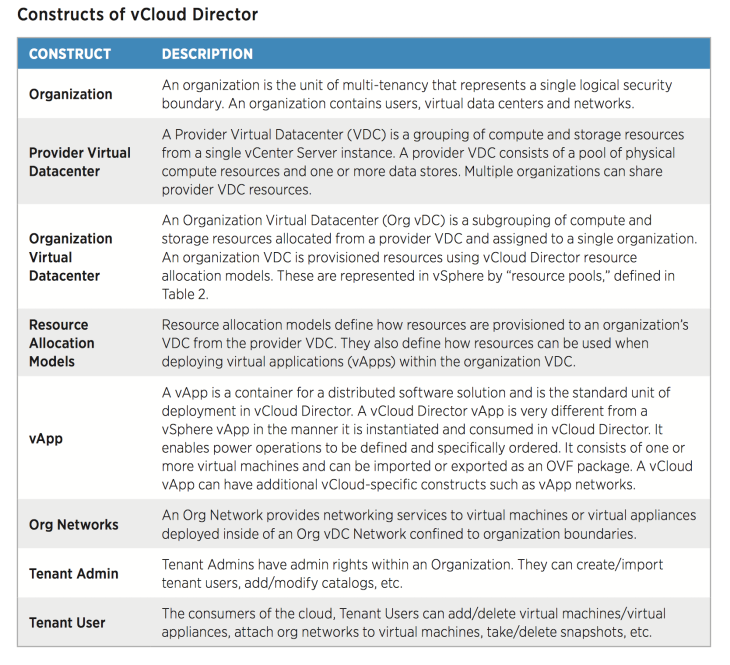
Before we get into the mechanics of the vCloud API, I need to talk about the constructs of vCloud Director for Service Providers. Understanding this is important to make the correlation of what you’re looking to within vCloud Director for Service Providers and the API. I encourage you to look at this White Paper: VMware vCloud Director for Service Providers Architecture Overview, page 5 has this detail. I’ve included a screenshot of this below.
Next, let’s talk about the the vCloud API. This is a RESTful API, meaning the HTTP protocol is used. To effectively manage the API, you need to find a REST based API Client. I like to use Postman. There are others that function as plug-ins to either Chrome or FireFox browsers that work well. Postman can be downloaded here.
Introduction to Postman
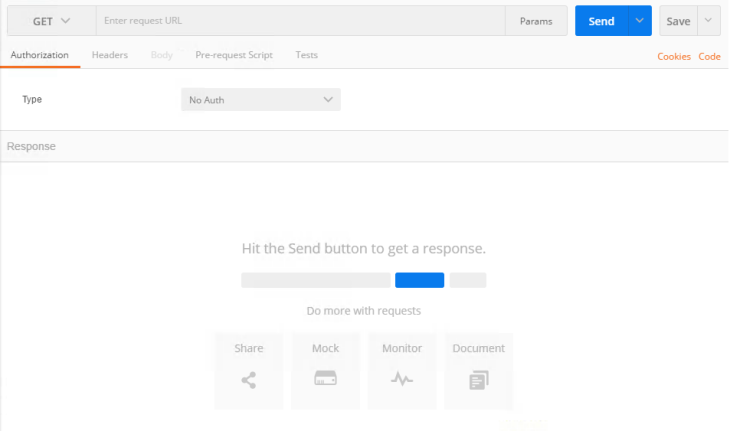
Looking at the Postman GUI, there is a section to enter the API request, authenticate to the API and a place to see the response. REST based APIs are made up of a simple set of commands some examples are: GET, POST, PUT, DELETE.
vCloud API
VMware have multiple versions of the vCloud API. They are up to vCloud API version 29 with the release of vCloud Director 9.0 for Service Providers (for a bit of nostalgia, I remember working with the vCloud API version 0.9). Each version of the API contains new API calls for newer features introduced- likewise, VMware may deprecate older API calls that are not valid anymore. Just a note – if you look at the vCloud Director 9.0 for Service Providers Release Notes there is a note stating this is the last version VMware will have support for the vCloud API versions 1.5 and 5.1.
Let’s get into the mechanics of the API. Once you have vCloud Director 9.0 for Service Providers installed and chosen a REST API Client, we can now start looking at the API. First, download the vCloud API Programming Guide for ServiceProviders. This guide contains the API calls you will need.
The first step is to figure out what type of authentication has been setup in the vCloud environment. In my environment, I have basic authentication with a username and password. Some environments may have multi-factor setup in which case you will need to get a token and place this into the header of each request. Choose one of the two authentication methods below:
Step 1: Authenticating to the API
Basic Authentication
If you are using Basic Authentication, connecting is as easy as selecting Basic Authentication and entering your credentials. If you are connecting to a specific Organization VDC (see above for constructs), credentials are entered as: “username@OrgVDC”. In my case, my username is Administrator and my Org VDC is VCPPCustomer1. So my username is administrator@vcppcustomer1 along with my password. Sometimes your login is your email address, in which case it would be “test@email.com@OrgVDC”. Yes, there are two @ signs in this string but it is not a problem. You can obtain the name of your Org VDC from the system administrator.
In this example, my credentials is the equivalent of a Tenant Administrator and I am connecting to my Org VDC.
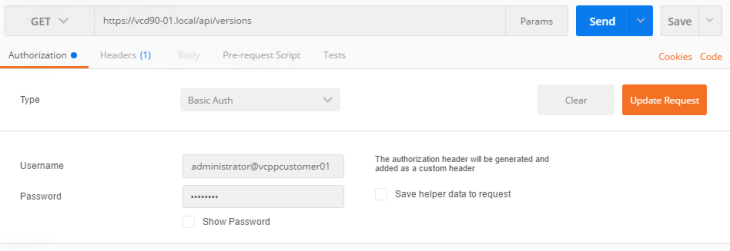
Once you have authenticated, click on the Headers tab and you will see your authorization key for this session. This is automatically inserted here when you authenticate by clicking the Update Request button.

oAuth Authentication
If oAuth is being used, you will need to get a token key. This is provided by the vCloud Director 9.0 for Service Providers Administrator.
Once you get your token (you will ignore the authentication dropdown under the authentication tab), go to the Headers tab and add your key to this section. The key name is always “x-vcloud-authorization” and enter your token key. This will ensure every API command that is sent, has this token with the header.

Step 2: Discovering the Supported APIs
Now that you are authenticated, we need to verify the API versions supported on this installation – it is always a good practice to take this step so as to avoid making API calls not supported.
First, we will use the drop down to select GET then you will enter our first request. Requests will consist of the FQDN of vCloud Director followed by API/Versions. Like this:
https://FQDN of vCD/API/Versions
Next, click the Send button and look at the XML output in the response window. You will receive a Status: 200 OK- this confirms you have successfully connected to the vCloud API.
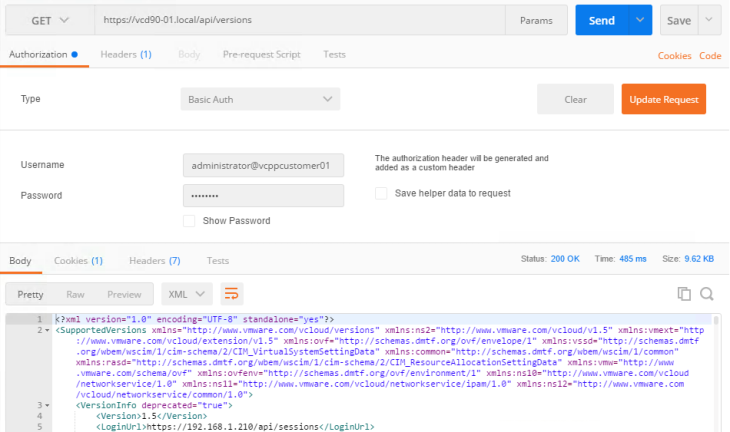
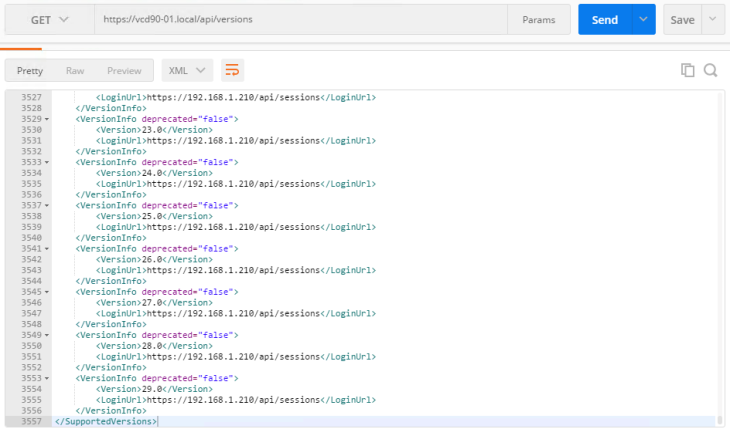
If you scroll down the list under the output section, you will see all the vCloud API Versions supported by this installation. Below, we see vCloud API Version 29 is the latest supported version.
Step 3: Establishing a Session
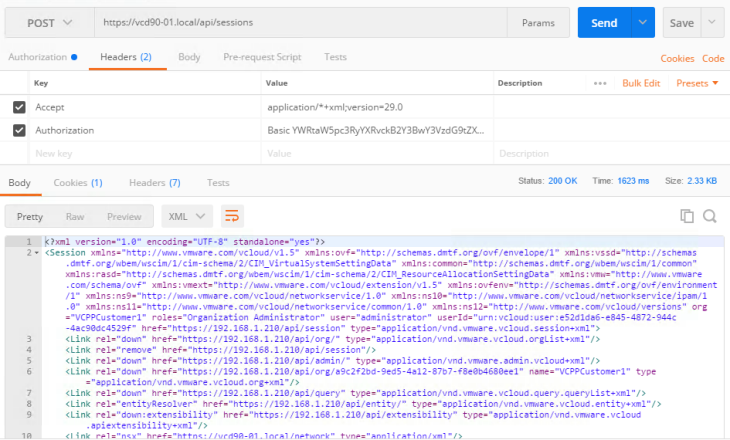
Once you have confirmed the vCloud API Version you are using is supported, the next step is to create an Accept Header. Under the Headers section and in the Key field, select an open line and start typing Accept (this will auto fill) and in the Value field type:
“application/*+xml;version=29.0” (without the quotes)

This header tells the vCloud API we are using calls supported by vCloud API Version 29. This header must accompany each query you make to the vCloud API.
Next, use the drop down to select POST and enter the following string: https://FQDN of vCD/API/Sessions
Click the Send button. Once you have a response, look at the XML output in the Body section. You will receive a Status: 200 OK, this confirms you have successfully created a session to vCloud Director. Well done! In future posts, we will dig deeper into these XML returns.
Step 4: Typed Queries
Now I am going to explore: Typed Queries. We have covered a lot of information but I would like to leave you with a little more than just authenticating and connecting to the vCloud API.
Let’s explore some of these typed queries. These queries are case sensitive.
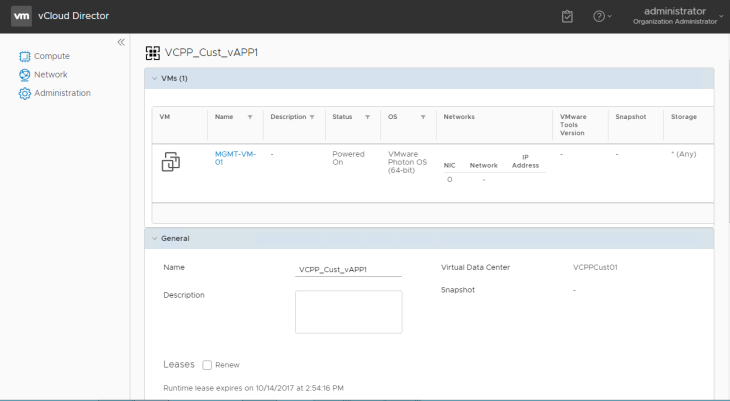
Turning our attention to vCloud Director, we have a screenshot of my vAPP in the vCloud Director HTML5 web interface below. We can also see some information about this vAPP- the name is VCPP_Cust_vAPP1, we have 16GB Storage, and 256MB Total Memory.
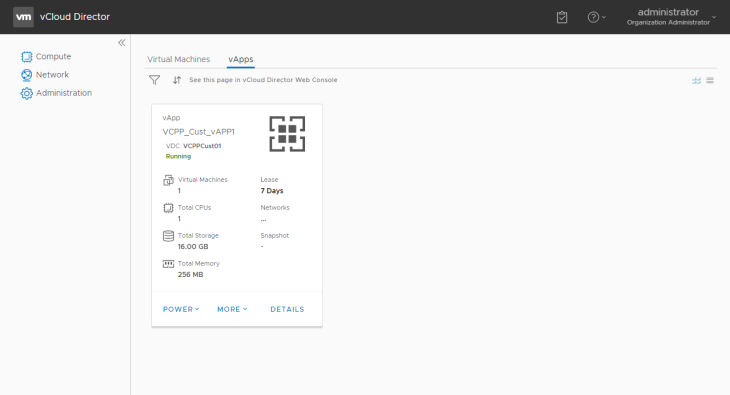
Next, I am going to query the vCloud API for this information to show you how this is done.
Step 5: Querying the vApp
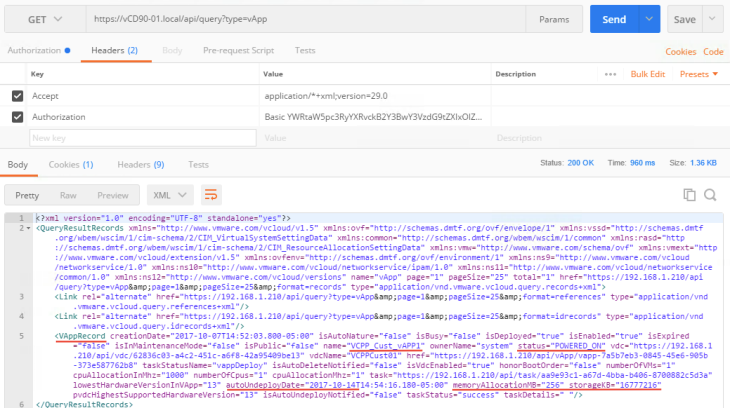
We bring up the Postman client and use the drop down to select GET because we are querying the API for information and enter the following string and click the Send button: https://FQDN of vCD/api/query?type=vApp (remember, these queries are case sensitive):
Look at the bottom half of the response. We see vAppRecord and under that, we can see the information about the vApp I have deployed: Name, Status, the date the lease for this vAPP runs out, memory size and storage size. These are just some examples of what you can get from the vCloud API using the vApp query.
Step 6: Querying the VMs
Next, we’ll need a listing of all the VMs in this VDC.
Below is what it looks like in the vCloud Director HTML5 web interface. The machine name is MGMT-VM-01, the OS is VMware Photon OS and tools are not installed.
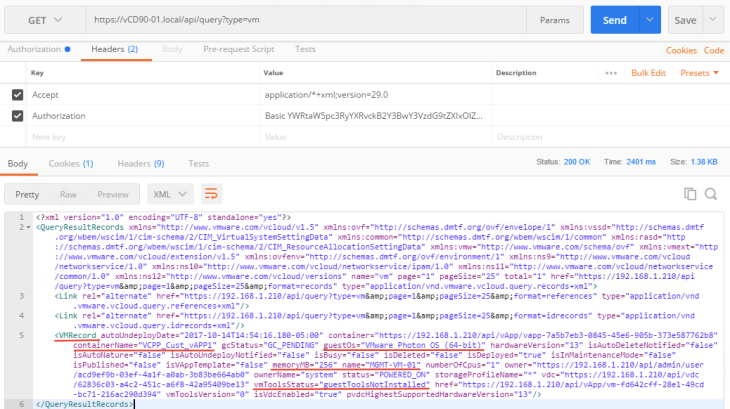
Now to look at this using the vCloud API. Enter the following string followed by the Send button: https://FQDN of vCD/api/query?type=vm
Look under VMRecord, this section will list all the information for this VM. We see the vAPP this VM resides in and we can also see the GuestOS along with the amount of memory. We can see that VM tools is not installed.
Conclusion
In closing, let me recap what we covered today:
Using Postman as the REST API client, we authenticated to the vCloud API. We then created a session, used the Typed Queries to query a vAPP and then queried a VM. Congratulations!
In future posts, we will be talking about blocking tasks and notifications and going deeper into the API. Stay tuned for a YouTube video walkthrough of this setup.

