DeepSeek, founded in 2023 by Liang Wenfeng, is a Chinese artificial intelligence company that develops open-source large language models (LLMs). Their flagship model, DeepSeek-R1, is gaining popularity for its advanced reasoning capabilities, with performance comparable to OpenAI-o1 across tasks like math, code, and general reasoning. In this guide, we’ll walk you through installing DeepSeek-R1 on a Linux system, along with important details about the model variants.
At the end of 2023, I wrote a similar article which you might find interesting: Install AI Models on Linux: Discover LLMs and Chatbots for Linux. I will continue to expand on this guide (Update: also read How to Self-Host DeepSeek). But first, here’s a no-nonsense 3-minute guide to get you up and running.*
In This Article
Prerequisites
Contents
Note: DeepSeek-R1 is a 671B model with a Mixture of Experts (MoE) architecture requiring 1.5 TB of VRAM, making it impractical for consumer hardware. DeepSeek-R1 distilled models, like DeepSeek-R1-Distill-Qwen-7B and DeepSeek-R1-Distill-LLaMA-70B, are fine-tuned versions of open-source models like LLaMA and Qwen, trained on data generated by DeepSeek-R1. Thus, inheriting DeepSeek’s reasoning capabilities while being far more efficient to self-host. Enjoy!
Before diving in, ensure the following:
- Operating System: Ubuntu 22.04 or a similar Linux distribution. (Debian/Debian-based will make your life easier)
- Hardware: Modern CPU with at least 16 GB of RAM; a dedicated GPU. (NVIDIA GPUs are already well tested)
- Software: Python 3.8 or later, and Git installed on your system. (Probably already installed, check first)
- Free disk space: At least 10 GB of for smaller models; larger models like
671brequire significantly more!!
Step 1: Install Ollama
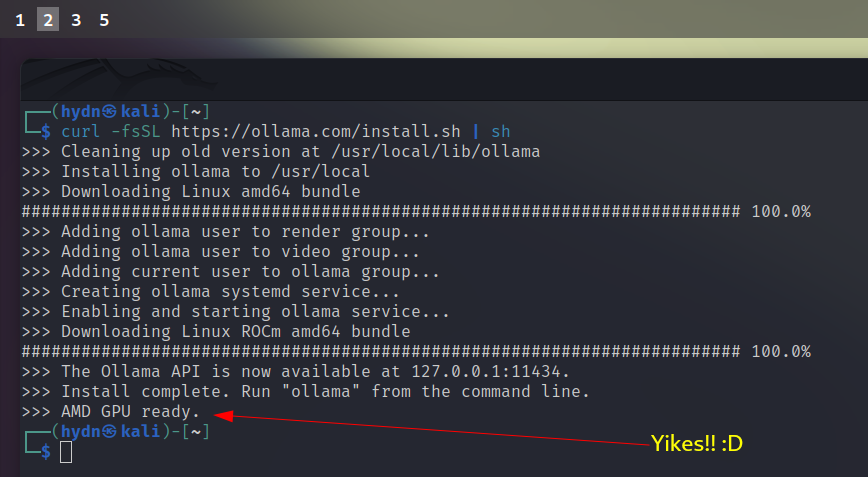
Ollama is a tool designed for running AI models locally. Open your terminal and run:
curl -fsSL https://ollama.com/install.sh | sh
This command downloads and executes the Ollama installation script. During the installation, Ollama will automatically configure itself and start the required services. After the process completes, verify the installation by checking the version:
ollama --version
To check if Ollama is already running, use:
systemctl is-active ollama.service
If the output is active, the service is running, and you can skip to the next step. If it’s not, start it manually:
sudo systemctl start ollama.service
To always start the service when your system boots run:
sudo systemctl enable ollama.service
Step 2: Download and Run DeepSeek-R1
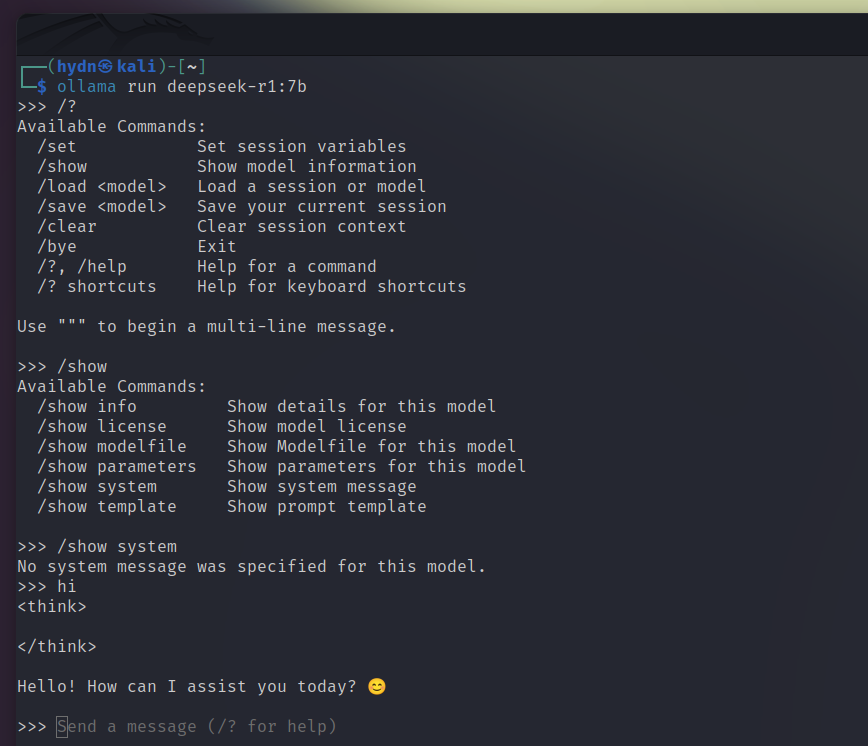
DeepSeek-R1 includes various distilled* models fine-tuned from Qwen and Llama architectures**, each optimized for specific performance and resource requirements. Here’s how to get started:
To download and run the 7b model, use the command:
ollama run deepseek-r1:7b
If your system has limited resources (like mine, 16 GB RAM and only 8 GB AMD GPU), you can choose a smaller model:
1.5b: Minimal resource usage.7b: Balanced performance and resource requirements.8b,14b,32b: Intermediate options for higher performance.
The download size for these models varies:
- 1.5b: ~2.3GB
- 7b: ~4.7GB
- 70b: ~40GB+
Visit the DeepSeek Model Library for a complete list of models, their sizes, and details.
Step 3: Begin Prompting DeepSeek

That’s it, done!
Once the installation command completes, it also automatically runs DeepSeek R1, meaning there’s nothing left to configure—your setup is complete. You’ve successfully installed DeepSeek on Linux! Go ahead and enter your first prompt.
Any time you would like to launch DeepSeek again, simply repeat the run command.
Listing and removing Models

To view all models downloaded, run the following command:
ollama listTo remove an installed model and free up disk space, use the following command:
ollama rm deepseek-r1:70b
Replace 70b with the appropriate model size, such as 7b or 8b. This will delete the specified model from your system. Once removed, you can proceed to download and run a different model. If you are looking for DeepSeek-R1 with no censorship or content restrictions, you can use open-r1.
Update: New screenshot added. DeepSeek offline mode on Linux: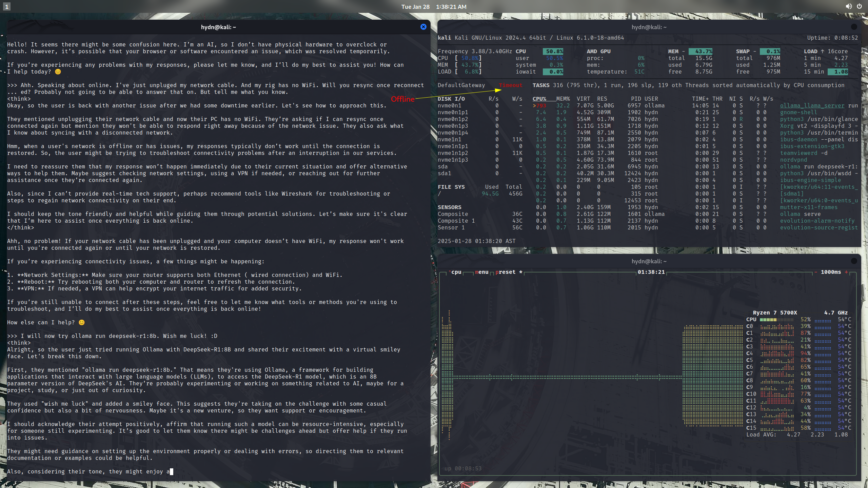
Updated: May 1st, 2025:
Step 4: GPU Acceleration & Systemd Config
When you need more horsepower than the CPU alone, Ollama can leverage your GPU. But, you’ll first have to install the proper drivers and runtime. On NVIDIA systems, ensure you have CUDA and the NVIDIA driver for your card; Ollama requires a compute capability of 5.0 or higher to enable GPU inference (ollama/docs/gpu.md at main – GitHub).
For example, on Ubuntu, you’d install the NVIDIA toolkit:
sudo apt install nvidia-driver-525 nvidia-cuda-toolkit
and verify with:
nvidia-smi
If you’re on AMD hardware, enable ROCm support or, for unsupported cards, you can often bypass compatibility checks by exporting HSA_OVERRIDE_GFX_VERSION=<major>.<minor> before starting Ollama
> Read: Running Ollama on Ubuntu with an Unsupported AMD GPU).
Once the drivers are in place, launch Ollama with:
OLLAMA_CUDA=true ollama serve
(or the analogous ROCm env var) and watch your inference throughput climb!
For production or long-running setups, you’ll want Ollama (and DeepSeek) to survive reboots and crash automatically. systemd is your friend here.
Create /etc/systemd/system/ollama.service with a [Service] block that launches ollama serve, then use systemctl edit ollama.service to add any necessary environment variables.
For example,Environment="OLLAMA_HOST=0.0.0.0:11434" or Environment="OLLAMA_EXPERIMENT=client2" to enable the new client-side downloader (Read ollama/docs/faq.md at main – GitHub).
After systemctl daemon-reload and systemctl enable --now ollama, your LLM server will boot itself and log to journalctl -u ollama.
Conclusion
With this guide, you’ve learned how to install DeepSeek-R1 on your Linux system and explore its versatile models. Whether you’re running the lightweight 1.5b model or the performance-driven 70b, DeepSeek offers cutting-edge reasoning capabilities directly on your machine. Ready to take the next step? Start experimenting with DeepSeek!

