Cloudflare is a great tool for website performance and security. They have a whole suite of tools to help with performance and security and are a staple in millions of DevOps professional’s toolbox.
But getting the most out of Cloudflare can be challenging. The platform has hundreds of settings and each one has its use case and impact. Navigating all those settings can be overwhelming, especially for those new to Cloudflare or less experienced in web optimization. This guide will break down each setting into 1) Function, 2) Benefit, and 3) Optimal Setting.
Note: I am not affiliated with nor am I compensated by Cloudflare for this guide. My insights and recommendations are based on professional experience and are meant to inform and help those looking to secure and optimize their website.
In This Article
Recommended Cloudflare Performance Settings
Contents
- 1 Recommended Cloudflare Performance Settings
- 2 Recommended Cloudflare Security Settings
- 3 Conclusion
Website speed can kill user engagement, while security threats are everywhere. Cloudflare provides a layer of protection and speed that’s hard to overstate. From small blogs to enterprise websites, the impact of well-configured Cloudflare settings is huge: Faster page loads, better user experience, more security.
As we dive into these optimization settings, we will also highlight some of Cloudflare’s noteworthy features, starting with one of its most powerful tools: the Speed Observatory. This is a testament to Cloudflare’s commitment to not just providing tools for performance, but also solutions to measuring and analyzing our results.
Cloudflare > Speed > Observatory

The Speed Observatory offers a comprehensive view of your website’s performance, laying the groundwork for informed decisions on configuration adjustments. This tool is not just about speed metrics; it’s a gateway to understanding the performance of your website in a detailed and actionable way.
As an alternative, you can also use pagespeed.web.dev—which Cloudflare provides a link to as well.
- Function: Monitors website speed and performance metrics.
- Benefit: Identifies areas for improvement, encourages enhancement of user experience.
- Optimal Setting: Enable the “Daily” testing feature.

Cloudflare > Speed > Optimization
Image Optimization
Polish
Automatically optimizes image loading by compressing pictures without sacrificing visual quality. Although I recommend enabling this setting, there’s no need to enable it if you are already serving images in optimized formats (AVIF & WEBP) from your origin server.
In my case, I’m serving images already optimized via my Nginx web server. However, in this case, a paid account (Pro or higher) is still required. This is because the Cloudflare free plan does not support the Accept header (read: Vary for Images: Serve the Correct Images to the Correct Browsers by Cloudflare). Available “Vary for Images” in your Cloudflare plan is necessary to use Cloudflare CDN Caching when loading WebP and AVIF files from your origin server.
- Function: Compresses images, strips metadata.
- Benefit: Reduces image file size, speeds up loading.
- Optimal Setting: Enabled + lossy compression for fastest speeds.
Mirage
Improves image loading on mobile devices and slow network connections. Replaces images with low-resolution placeholder images that have the same dimensions as the original (including third-party images).
Once the page renders completely, full resolution images are then lazy-loaded (prioritizing images in the browser viewport). This process allows pages to render quickly and minimizes browser reflow.
It also combines multiple individual network requests for images into a single request. Mirage also features lazy-loading. I found this particularly useful for the lazy loading of images on pages like: 100 Top Observability Tools (+ Server Monitoring and APM solutions) which has over 100 images.
- Function: Lazy loads and virtualizes images.
- Benefit: Enhances mobile and slow connection performance.
- Optimal Setting: Enable for mobile-focused or image-heavy sites.
Protocol Optimization
HTTP/2
Utilizes the modern HTTP/2 protocol for improved loading efficiency over traditional HTTP. Don’t forget to make this improvement on your origin server as well. See this article: Enable HTTP/2 and HTTP/3 & QUIC on Nginx.
- Function: Allows multiplexing, server push.
- Benefit: Parallel resource loading, faster delivery.
- Optimal Setting: Enabled, as it’s broadly supported.
HTTP/3
Enables the latest internet protocol, further enhancing speed and reliability.
- Function: Introduces QUIC for reduced latency.
- Benefit: Improves mobile network performance.
- Optimal Setting: Enabled. Particularly for mobile users.
HTTP/2 to Origin
If the toggle is disabled, or your origin server does not support HTTP/2, Cloudflare will initiate a slower HTTP/1.1 connection to your orgin. As such, make sure to enable HTTP/2 on your orginal as per above link.
- Function: Extends HTTP/2 benefits to origin server.
- Benefit: Speed. Reduces connection overhead.
- Optimal Setting: Enable if origin server supports HTTP/2.
Enhanced HTTP/2 Prioritization
With Enhanced HTTP/2 Prioritization enabled, resources will be delivered in the optimal order for the fastest experience across all browsers. See: Cloudflare blog post.
- Function: Optimizes resource delivery order.
- Benefit: Faster perceived load times.
- Optimal Setting: Enabled. Especially for intricate resource loading.
Brotli
Implements Brotli compression for reduced file sizes and faster content delivery. See How does Cloudflare compress content?
- Function: Compresses files more effectively than Gzip.
- Benefit: Reduced file sizes, faster downloads.
- Optimal Setting: Enabled.
0-RTT Connection Resumption
Enabling 0-RTT Connection Resumption allows for faster subsequent connections by permitting clients to send encrypted data to the server during the initial handshake, before the connection has been fully established. The “0-RTT” stands for “zero round-trip time,” meaning that data can be sent without waiting for the handshake to complete, which usually takes one full round-trip (1-RTT).
There is a security trade-off because this can expose the connection to replay attacks. In a replay attack, an attacker intercepts the 0-RTT data and replays it to the server. Since the server accepts 0-RTT data without a completed handshake, it can’t be sure if the data was sent in a new connection or simply replayed by an attacker. The data sent during the 0-RTT phase is not protected by the full TLS 1.3 handshake’s forward secrecy guarantees.
That being said, the risk of such an attack may be acceptable for non-sensitive data. So only use 0-RTT for requests that don’t change the state on the server if they were to be replayed (like GET requests in HTTP). For state changing requests (like POST) it’s safer to wait for the full handshake to complete.
Also, read: Even faster connection establishment with QUIC 0-RTT resumption.
- Function: Speeds up connections.
- Benefit: Faster repeat visit load times.
- Optimal Setting: Enable, with awareness of slight security trade-off.
Always use HTTPS
301 redirects all “http” traffic ti “https”.
- Function: Redirects all traffic to HTTPS.
- Benefit: Secures and potentially speeds up connections.
- Optimal Setting: Enable, to leverage HTTP/2 optimizations.
TLS 1.3
Activates the most recent version of TLS, ensuring enhanced security and speed.
- Function: Streamlines the TLS handshake process.
- Benefit: Enhanced security, reduced connection time.
- Optimal Setting: Enable for cutting-edge security and speed.
Tool Enhancements
Early Hints
Sends preliminary resource hints to browsers to initiate early page resource fetches. See Cloudflare’s blog annoucnement.
- Function: Preloads critical resources early.
- Benefit: Shortens time to first paint.
- Optimal Setting: Enable, to anticipate resource loading.
The optimal settings provided above are general recommendations. The actual best setting may vary depending on the specific nature of your website, including your content, audience, and their typical connection types. It is always wise to test changes and monitor their impact through tools like Cloudflare’s Speed Observatory to ensure they are providing the desired benefits.
Cloudflare > Caching > Configuration
Purge Cache
This feature allows you to clear the cached content. Using “Custom Purge” enables you to selectively clear specific files or paths from Cloudflare’s cache, which is preferable because it allows you to remove only the outdated or changed content without affecting the rest of the cached data. On the other hand, “Purge Everything” clears the entire cache, forcing Cloudflare to refetch resources from the origin server, which will temporarily degrade your website’s performance.
- Recommendation: Only use “Purge Everything” if there are substantial changes across the entire site that necessitate a complete refresh.
Caching Level
This setting determines how Cloudflare caches the static content of your site. The options are “No query string,” “Ignore query string,” and “Standard.” The “Standard” setting will cache resources based on the filename and query string, which works well for most websites.
- Optimal Setting: “Standard” for typical use cases, adjusting as needed based on how your site uses query strings. That said, use custom rules to adjust sub domains, directories etc.
Browser Cache TTL
This setting specifies how long Cloudflare instructs a visitor’s browser to cache files. A longer TTL means that the browser will store the files for more extended periods, reducing the number of requests to Cloudflare’s servers.
- Function: Directs the browser on how long to locally cache files.
- Benefits: Reduces load times for repeat visitors and decreases bandwidth usage and server requests.
- Optimal Setting: Respect existing headers. Or, adjust based on content update frequency—longer TTL for static content, shorter for dynamic.
No need to play around much with the other setting on this page. I usually enable “Always Online.”
Cloudflare > Caching > Tiered Cache Topology
Who Should Enable It
- Websites with high traffic volumes and global reach should enable Smart Tiered Caching. It is especially useful for sites that serve a large amount of static content (like images, CSS, and JavaScript files) that can be cached and delivered quickly from a local data center.
- Websites that frequently update content but still want to benefit from caching without overwhelming the origin with requests.
Who Should Leave It Off
- Small websites with low traffic that primarily serve a local or regional audience may not see significant benefits.
- Sites where content is highly dynamic and personalized, where caching would not be beneficial or might lead to stale content being served.
In essence, the cost-benefit ratio of enabling advanced caching features like Tiered Cache Topology may not be favorable for small, regionally focused websites with modest traffic levels.
- Function: Tiered Cache leverages Cloudflare’s regional data centers to cache content intelligently, reducing requests to the origin server.
- Benefit: Reduces origin server load, saves bandwidth, and improves content delivery speed by serving from closer caches.
- Optimal Setting: For high-traffic sites, enable Smart Tiered Caching to maximize cache efficiency and reduce latency. For smaller, low-traffic sites, or those with highly dynamic content, it may be optimal to disable it to ensure the most up-to-date content is served without unnecessary complexity.
Cloudflare > Traffic > Argo Smart Routing
Cloudflare > Rules > Page Rules
Recommended Cloudflare Security Settings
Security threats are becoming increasingly sophisticated, making it paramount for websites to fortify their defenses. The vast expanse of security features provided by platforms like Cloudflare offers a comprehensive shield, guarding against a multitude of threats ranging from opportunistic bots to coordinated DDoS attacks. Let’s review Cloudflare’s main security settings. Followed by the security events page, WAF (Web Application Platform), Bots and DDoS.
Cloudflare > Security > Settings

In the Security Settings of Cloudflare, you have the ability to adjust your website’s defense mechanisms according to the threat landscape and your specific security needs. The settings in the screenshot are critical components of Cloudflare’s security posture.
Security Level
This setting allows you to adjust the sensitivity of the security measures applied to your site. A medium level typically strikes a balance between protection and accessibility, challenging only the most suspicious traffic.
- Function: Determines the threshold for challenging visitors.
- Benifit: Balances user experience with security by filtering traffic based on threat level.
- Optimal Setting: Set to medium for general use, higher during an attack, or lower for minimal interference with users.
Challenge Passage
This specifies how long a visitor has access to your website after passing a security challenge. It’s a way to ensure that once a user is verified as legitimate, they can browse without being challenged again for a set period.
- Function: Sets duration of access post-challenge verification.
- Benifit: Enhances user experience for verified visitors, reducing friction.
- Optimal Setting: Set to 1 hour for most websites; adjust based on user behavior and threat intensity.
Browser Integrity Check
This feature scrutinizes HTTP headers from incoming requests to detect and block malicious threats, ensuring that only clean traffic reaches your site.
- Function: Filters out malicious traffic based on header anomalies.
- Benifit: Protects against common web threats and reduces malicious traffic.
- Optimal Setting: Keep enabled to consistently safeguard against header-based vulnerabilities.
These settings form the first line of defense, offering a robust framework to protect your web assets while maintaining a seamless user experience. They are the groundwork upon which more specific and advanced security features are built, including WAF (Web Application Firewall), bot management, and DDoS protection, each of which we will explore next.
Cloudflare > Security > Events

Below that, there’s a breakdown of ‘Top events by source,’ (see above screenshot) detailing the origin of security events, categorized by IP addresses, User Agents, paths, Countries, etc. This is crucial for identifying potential sources of attacks or malicious behavior. To recap:
- Function: Provides real-time monitoring of security events, identifies patterns and sources of potential threats and enables targeted security responses.
- Benifit: Assists in recognizing and responding to attacks swiftly, helps refine WAF rules and other security settings based on actual data, and supports proactive measures against specific threats.
- Optimal Setting: N/A (This is a monitoring tool, so there are no “settings” to optimize; instead, it informs the optimization of other security features.)
By monitoring the data presented in the Security Events section, administrators can make informed decisions to implement better WAF security settings. For example, if there is a high number of events from a particular country that does not align with your expected traffic patterns, you could create a Geo-Blocking rule in the WAF to mitigate this. Similarly, if certain user agents are consistently linked to malicious activities, they can be set up in the WAF to challenge or block them proactively. The goal is to use the insights gained from this dashboard to enhance your security posture continuously.
Cloudflare > Security > WAF (Web Application Firewall)
” src=”https://linuxpunx.com/wp-content/uploads/2025/05/recommended-cloudflare-performance-and-security-settings-guide-11.png” alt=”Cloudflare > Security > WAF (Web Application Firewall)” width=”868″ height=”591″ srcset=”https://linuxpunx.com/wp-content/uploads/2025/05/recommended-cloudflare-performance-and-security-settings-guide-11.png 868w, https://linuxpunx.com/wp-content/uploads/2025/05/recommended-cloudflare-performance-and-security-settings-guide-38.png 300w, https://static.linuxblog.io/wp-content/uploads/2023/12/cloudflare-security-WAF-560×381.png 560w” sizes=”auto”><br /><em>Improve your custom rules over time.</em></p>
<p>Cloudflare’s Web Application Firewall (WAF) is a robust security layer that safeguards websites and APIs from a myriad of threats, including cross-site scripting (XSS), SQL injection, and DDoS attacks. The WAF operates at the network edge, making it possible to detect and block potential attacks before they reach a site’s server. It’s an essential tool for any website looking to protect its data and maintain its integrity in the face of ever-evolving online threats.</p>
<p>The above screenshot shows some highlights the WAF’s user interface, with a particular focus on the “Custom rules” tab. This section allows for the creation of tailored rules that address specific security concerns. For example, the listed “Spam countries v2” and “Spam countries” rules suggest configurations designed to challenge traffic from regions known for generating spam or participating in malicious activities. Not all custom rules are visible in the screenshot, I will share the rest later. I recently changed domain names about 2 weeks ago so still setting up Cloudflare config for LinuxBlog.io.</p>
<p>Notice in the example above, I’m adding instead of editing when making notable rule changes. Simply disable the previous version of the rule. Make use of your “available rules” so that you can quickly revert to previous rules if you need to. Don’t delete your previous rules until you run out of avaiable rules.</p>
<p><img loading=")
Custom rule to present a managed challenge. Ref: Cloudflare Security Level.

Managed challenges over a 30-minute period.
I blurred 5 of the countires, I just don’t want to encourage mass blocking of countries. Remember: Threats will differ from site-to-site. The best approach is to select countries based on your event logs. There are no bad countries that should always be singled out.
Custom rules
- Function: Custom rules allow for precise control over how traffic is handled, letting administrators set criteria to challenge or block requests based on factors like country of origin, IP reputation and requests.
- Benefit: These rules offer a granular level of security, enabling targeted protection against spambots, automated threats, and specific vulnerabilities unique to your site. They are instrumental in preventing unwanted traffic and ensuring that resources are served to legitimate users only.
- Optimal Setting: Custom rules should be tailored to the specific security needs of a site. The optimal setting varies based on the website/application, threat landscape and traffic patterns. It’s best to analyze traffic and threat reports to identify trends that warrant custom rules.
Here for example is a rule I use to block IPs that make requests to WordPress files that should not be accessed publicly. Remember, even thought the file does not exist, for example, xmlrpc.php is deleted on our server, but we still want to block IPs that request it. In any case, here’s the custom rule:
(http.request.uri.path contains "/wp-login.php") or
(http.request.uri.path contains "/wp-register.php") or
(http.request.uri.path eq "/wp-admin/") or
(http.request.uri.path contains "/wp-admin/install.php") or
(http.request.uri.path contains "/wp-admin/upgrade.php") or
(http.request.uri.path contains "/wp-admin/theme-editor.php") or
(http.request.uri.path contains "/wp-admin/plugin-editor.php") or
(http.request.uri.path contains "/wp-config.php") or
(http.request.uri.path contains "/xmlrpc.php") or
(http.request.uri.path contains "/backup/") or
(http.request.uri.path contains "/wp-backup/")

Here’s a breakdown of the rule:
- The rule uses the
containsoperator for several paths, such as/wp-login.php,/wp-register.php,/wp-admin/install.php, and others. This means it will block or manage access to requests that include these specific strings. - The rule uses
eqfor/wp-admin/, which means it will only block requests that exactly match the/wp-admin/path. This would not include/wp-admin/admin-ajax.php, or any other subdirectories likejs/orcss/. - The action isn’t included in this rule. I suggest you skip, then challenge, then block after monitoring rules like this over several days or weeks.
Rate Limiting Rules

Rate Limiting Rules within Cloudflare’s Web Application Firewall (WAF) offer a robust mechanism for controlling the flow of traffic to your website or API. By setting thresholds for how many requests a user can make within a certain time period, rate limiting is essential for preventing abuse and ensuring that resources are not overwhelmed by excessive traffic, which could be indicative of malicious intent.
The above screenshot indicates two rules (Pro account limit): “WP Login” and “Flood.” The “WP Login” rule blocks excessive login attempts, protecting against brute force attacks on the WordPress login page. The “Flood” rule is currently set to issue a Managed Challenge instead of a block as I’m still in the testing phase. This is a approach is to ensure that legitimate users are not inadvertently blocked due to overzealous rate limiting. When implementing new rate-limiting rules, it’s crucial to adopt a cautious and measured approach.
- Function: Regulates the number of requests to prevent abuse and mitigates brute force and DDoS attacks.
- Benifit: Preserves website and API availability and enhances security without affecting normal user access.
- Optimal Setting: Initially set rules to Skip or Log to monitor impact. Use Managed Challenge as an intermediate step for testing. Proceed to Block only after confirming the rule’s accuracy and necessity.
Recommended approach when adding WAF rules
It’s important to monitor new rules carefully, starting with less restrictive actions like ‘skip’ or ‘log’. This allows you to gather data on the rule’s impact without disrupting user access. Managed Challenges can then be implemented to challenge suspicious traffic, which still allows access once the challenge is passed. This step is vital to fine-tune the rule’s sensitivity and to avoid false positives that could block legitimate users.
Only after thorough testing and assurance that the rule targets only the intended malicious or unwanted traffic should you consider escalating to a Block action. This progressive strategy ensures that security measures do not compromise user experience and that access is maintained for genuine traffic.
In the case of the “Flood” rule, this testing phase is particularly important. A week ago it was set to ‘skip’. It allows for the adjustment of thresholds and the evaluation of whether a challenge is an effective deterrent for the unwanted traffic observed. This careful approach to rule implementation is key to maintaining a secure yet accessible online environment.
Managed Rules

Managed rules within Cloudflare’s WAF serve as a comprehensive line of defense, automatically updated by the Cloudflare team to protect against emerging threats. The above screenshot highlights three key managed rules provided by default (Pro accounts and above):
- Cloudflare OWASP Core Ruleset: A set of rules designed to protect against widespread web application security risks as identified by the Open Web Application Security Project (OWASP).
- Cloudflare Managed Ruleset: Cloudflare’s own set of rules that protect against various exploits and vulnerabilities known to the Cloudflare community.
- Cloudflare Leaked Credentials Check: A safeguard that checks for credentials that have been exposed in known data breaches, helping prevent unauthorized access.
These managed rules analyze characteristics of each incoming request and determine the appropriate action to ensure the application’s security. However, applying these rules globally across your entire site can sometimes be overly restrictive, especially for areas of your site that are not sensitive.
Best Practices for Managed Rules Implementation

To strike a balance between security and functionality, it’s often better to restrict the scope of managed rules to only cover areas of your site that are particularly sensitive, such as admin panels (/wp-admin/), file upload endpoints (/uploads/), and forms that submit sensitive information (web form, login areas, checkout pages etc).
This targeted approach ensures that the rules are applied where they’re most needed, reducing the likelihood of false positives and unnecessary challenges to legitimate users. I’m not sure of the overhead involved, so I cannot speak to that, but its probably best not to be have these rules enabled globally. For example, on your static directories and files. Feedback welcomed.
When first implementing managed rules, it’s recommended to set them to “Log” mode instead of “Challenge” or “Block”. This allows you to observe the rules’ impact and gather data on potential false positives or legitimate requests that could be affected. The duration for this observation period can vary:
- For high-traffic websites, up to a day of logging may suffice to collect a representative sample of data.
- For low-traffic websites, a longer period may be necessary to ensure enough data is collected to make informed decisions about the rules’ configurations.
By monitoring the logs via the “Events” page, you can fine-tune the rules to minimize disruptions to user experience while maintaining robust security measures. Once you’re confident in the rules’ accuracy and efficacy, you can then transition from logging to enforcing actions like “Challenge” or “Block.”
WAF Tools
I’m still setting up the section and prefer to take screenshots a week or two after. So this section is coming soon. For now, “Tools” section of Cloudflare’s WAF includes some additional features that enhance the firewall’s functionality, allowing for greater control and customization of security settings.
- IP Access Rules: Use these rules to block known malicious IPs or allow traffic from known good IPs. It’s important to regularly update these lists to adapt to changing traffic and threat patterns.
- User Agent Blocking: Before creating blocking rules, analyze your site’s traffic to identify any user agents associated with suspicious behavior. Be cautious to avoid blocking legitimate crawlers like search engine bots.
- Zone Lockdown: Implement lockdown rules for URLs that should only be accessed by your team or specific systems. This ensures sensitive areas are not exposed to potential attackers.
Cloudflare > Security > Bots
Cloudflare > DNS > Settings > DNSSEC
Cloudflare > SSL/TLS
Edge Certificates

The “Edge Certificates” section is pivotal for ensuring that your website is securely served over HTTPS. The screenshot above highlights two essential security features: “Always Use HTTPS” and “HTTP Strict Transport Security (HSTS).”
Always Use HTTPS
This feature enforces the use of HTTPS by redirecting all HTTP requests to HTTPS, ensuring that data between your users and Cloudflare is encrypted.
This setting is a fundamental step towards securing user traffic on your site. It is particularly useful for preventing users from accidentally accessing a non-secure version of your site. This setting is a best practice for all websites and should be enabled as part of a basic security posture.
- Function: Redirects HTTP requests to HTTPS automatically.
- Benefits: Guarantees secure, encrypted connections for all users.
- Optimal Setting: Enabled, to ensure all traffic is secure by default.
HTTP Strict Transport Security (HSTS)
HSTS is a security policy mechanism whereby the web server declares that browsers should only interact with it using secure HTTPS connections.
HSTS further reinforces this security by ensuring that once a user has accessed your site, their browser remembers to always use HTTPS, not just for the initial request but for all subsequent requests for the duration specified by the max-age parameter. Including subdomains ensures that the HSTS policy is applied uniformly across your entire domain, and enabling preload tells browsers to enforce HTTPS even on the first visit before any interaction with your site.
When setting the max-age parameter for HSTS, it’s important to consider how often your site’s users visit and how likely you are to maintain HTTPS availability. A longer max-age increases security, but requires a commitment to keeping your HTTPS infrastructure in good order. Preloading should be used with caution, as it commits your site to HTTPS permanently, which can be an issue if you ever need to revert to HTTP. You’ve been warned!!
- Function: Instructs browsers to only use HTTPS for all connections.
- Benefits: Prevents SSL stripping and man-in-the-middle attacks.
- Optimal Setting: Enabled with a long
max-age(at least 6 months), include subdomains, and consider enabling preload for added security.

The features shown in the above screenshot are also critical for ensuring secure and efficient communication. Full disclosure, you can use “SSL/TLS Recommender” which will email you a recommended TLS minimum version. Or, take a look at the “Traffic Served Over TLS” bar and decide based on current active versions used to connect to your website. Do not use TLS below version 1.2.
Minimum TLS Version
This setting dictates the oldest version of the TLS protocol that visitor connections must use to access your site.
- Function: Sets the lowest acceptable TLS version for connections.
- Benefits: Enhances security by using newer, more secure protocols.
- Optimal Setting: TLS 1.2 or higher for a good balance between compatibility and security.
Opportunistic Encryption
This option allows HTTP/2 connections over TLS without altering the URI scheme to HTTPS in the browser’s address bar.
- Function: Provides HTTP/2 benefits over encrypted connections.
- Benefits: Improves loading times while maintaining encryption.
- Optimal Setting: Enabled, to offer performance improvements of HTTP/2.
TLS 1.3
TLS 1.3 is the latest version of the TLS protocol, offering improved security and speed.
- Function: Activates the latest TLS protocol for connections.
- Benefits: Increases security and connection speed.
- Optimal Setting: Enabled, to ensure the highest security standard.
Automatic HTTPS Rewrites
This feature helps to prevent mixed content issues by rewriting HTTP URLs to HTTPS automatically, where possible.
-
- Function: Converts insecure links to secure ones on your site.
- Benefits: Resolves mixed content issues, enhancing site security.
- Optimal Setting: Enabled, to ensure secure content delivery.
These settings are crucial for safeguarding data in transit and ensuring that your website’s encryption protocols meet current security standards. By correctly configuring your edge certificates and related settings, you provide a secure environment for your users and improve their trust in your site.
Cloudflare > Security > DDoS
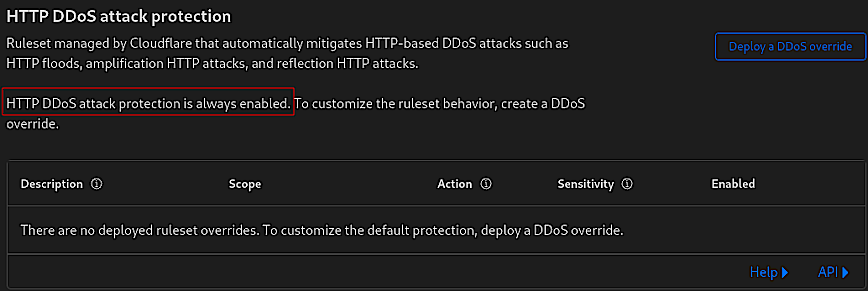
Not that automatic DDoS protection is always enabled by default and is constantly analyzing traffic, generating real-time signatures to mitigate attacks across the network and application layers. No action necessary. Feedback/tips welcomed.
Cloudflare > Security > Page Shield
Conclusion

Cloudflare Security Analytics page.
Cloudflare’s full suite of performance and security tools is an invaluable resource for web developers and webmasters looking to speed up their website, user experience and security. This guide walked you through these settings and what each does to help speed up and secure your website from the ever-changing online threats.
Remember, the recommended settings are a good starting point, but every website is unique. Regular monitoring and adjustments, with tools like Cloudflare’s Speed Observatory, Security Events, Google PageSpeed insights and observability will help you keep these settings in line with your needs.
By leveraging these tools, webmasters can not only meet but exceed user expectations and deliver seamless and secure experiences.


