This is a comprehensive guide explaining the step-by-step procedure to set up Dual Boot Windows and Debian 12. Our focus in this guide will be on the new Debian release version 12 code-named Bookworm. Dual-booting Debian 12 and Windows will give you the choice to switch between Windows and Debian Linux leveraging the power of both worlds.
As you may know already, Debian 12 is released two days ago. Debian 12 comes with a set of exciting improvements and you can get to know about it from our Introductory article using the following link.
Introduction
Contents
In today’s technology-driven world, having the flexibility to choose between different operating systems on a single device is becoming increasingly important. One such popular choice is the dual boot setup, enabling users to run both Windows 10 and Debian 12 on their computer simultaneously.
Debian, known for its stability, security, and robustness, is a free and open-source operating system that has gained immense popularity among developers, system administrators, and enthusiasts. Its vast software repository and strong community support make Debian an excellent choice for those seeking a reliable and customizable Linux-based environment.
On the other hand, Windows, developed by Microsoft, dominates the desktop operating system market, providing a user-friendly interface and a wide range of software compatibility. Many users rely on Windows for its extensive software support, gaming capabilities, and seamless integration with various hardware devices.
By dual booting Windows and Debian, users can enjoy the best of both worlds. They can leverage the power and familiarity of Windows for specific tasks while benefiting from the flexibility, security, and customizability offered by Debian 12. This setup allows users to switch between operating systems as per their requirements, ensuring a tailored computing experience that meets their diverse needs.
In this guide, we will explore the steps to install Debian alongside Windows. Whether you are a developer seeking a Linux environment alongside Windows or a user looking to explore the world of open-source software while retaining Windows functionality, this guide will help you navigate the process successfully.
Advantages of Dual Booting Debian and Windows
Dual booting Debian and Windows offers several advantages:
- Versatility: With a dual boot setup, you have the flexibility to switch between Debian and Windows, allowing you to utilize the strengths of both operating systems based on your specific needs.
- Compatibility: Dual booting ensures compatibility with software and applications that may be exclusive to either Debian or Windows, enabling you to access a wider range of software options.
- Testing and Development: Dual booting provides an ideal environment for testing and developing software across different operating systems, allowing you to ensure compatibility and optimize performance.
- Privacy and Security: Keeping Debian and Windows separate through dual booting helps maintain privacy and security. For example, you can use Debian for sensitive tasks or accessing secure networks, while keeping Windows for everyday use.
- Learning and Exploration: Dual booting allows you to explore and learn about different operating systems, expanding your knowledge and proficiency in both Debian and Windows.
- Customization: Each operating system has its own set of customization options. Dual booting allows you to personalize each OS according to your preferences, enhancing your overall user experience.
- Performance: Dual booting allows you to utilize the full capabilities of your hardware, maximizing performance for specific tasks or applications that may perform better on Debian or Windows.
- Backup and Recovery: In the event of system issues or data loss, having a dual boot setup provides the advantage of accessing and recovering data from either operating system, increasing your chances of successful recovery.
Overall, dual booting Debian and Windows empowers you with a versatile computing environment, combining the strengths of both operating systems to enhance productivity, compatibility, and customization options.
Without further ado, let’s delve into the world of Debian and Windows dual boot setup. For the purpose of this guide, I will be using Debian 12 and Windows 10. The steps provided here is also suitable for Dual Boot Debian 12 and Windows 11.
Download Debian 12 ISO Image
The first step in setting up the dual boot is to download the Debian iso image. Go to the Debian Official Downloads page where you will see different architectures. Choose the one that supports your machine and download the ISO image.
Debian also supports other download options for different use cases. You can choose any of the following installers.
- Live Installer.
- Offline Installer for machines without a network connection.
- Installer for alternative CPU architecture.
- Debian cloud instances.
Here, I have included the direct Debian 12 download links for various formats:
I always prefer to download the Debian iso image through torrent. The reason is when you choose to download the iso image directly from the web browser, there are chances that the download may be interrupted. In such cases, you have to download the image from scratch considering no resume options in the browser.
My machine supports AMD architecture, so I choose to download the amd64 iso image through the torrent.
Create Debian 12 Bootable USB Medium
The second step in dual boot setup is to write the downloaded iso image to an external device like a USB drive. There are a couple of popular tools available to create a bootable medium. One such tool is Etcher which is a simple and cross-platform.
Download the Etcher executable file from the official site.
If you are running Etcher from Windows, the installation should be the same as any Windows software installation. Launch Etcher from the start menu once the installation is completed.
You should see an Etcher interface similar to the below image.
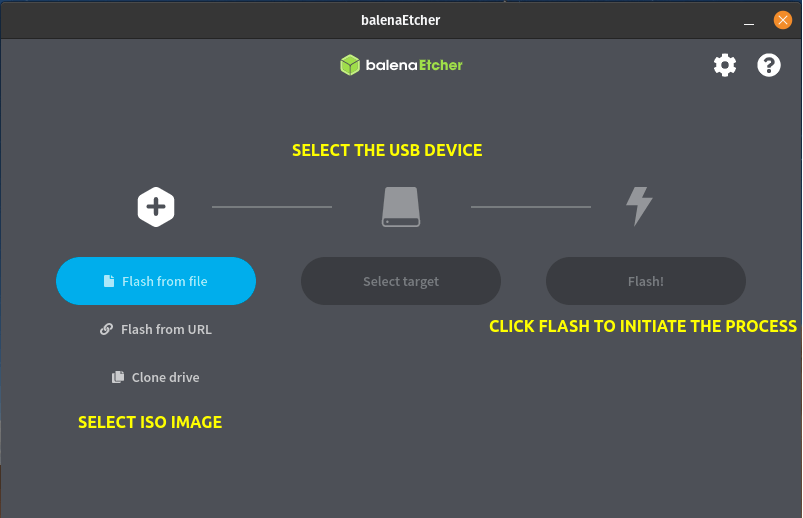
- Click “Flash from file” and choose the downloaded Debian iso image.
- Click “Select target” and choose the USB device.
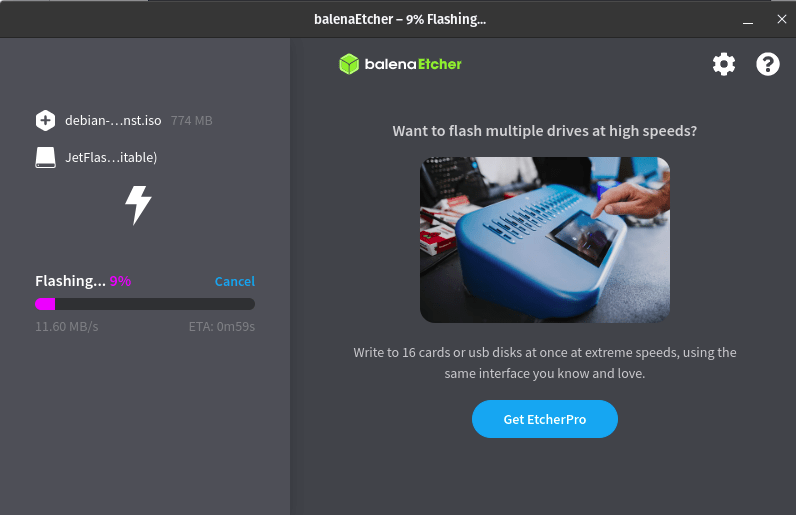
- Click “Flash” to write the iso image to the USB device.
If you happen to have an extra Linux desktop system at your disposal, you can easily create a bootable USB using various USB creation tools available. Many Linux operating systems come with native image writers, simplifying the process further. For instance, Fedora offers Media Writer, while Pop!_OS includes Popsicle as a native tool.
To assist you in creating a bootable USB, we have dedicated articles that cover a wide range of image-creation tools specifically for Linux. Feel free to explore these resources and select the tool that best meets your requirements for creating a bootable USB with Debian 12.
Command line bootable USB creation tools:
Graphical bootable USB creation tools:
If your goal is to install and test Debian on a hypervisor like VirtualBox, KVM, or Proxmox, there’s no need to create a bootable media. You have the option to boot the Debian 12 ISO image directly within your chosen virtualization software.
Preparing Windows for Dual Boot Setup
Before proceeding with the Debian installation for dual booting, there are certain essential steps that need to be completed on the Windows side. This two-step process ensures a smooth and successful setup. Here is a checklist of the necessary preparatory steps:
- Verify the Partition Scheme: This guide focuses on disks that utilize the GPT (GUID Partition Table) partition style. It is important to confirm that your disk is using this partition scheme.
- Check UEFI Mode: This article is specifically tailored for systems running in UEFI (Unified Extensible Firmware Interface) mode. Ensure that your machine is configured to run in UEFI mode for compatibility with the dual boot setup.
- Disable Hard Drive Encryption: If you have enabled any form of hard drive encryption on your Windows operating system, it is necessary to disable it before proceeding with the dual boot installation.
- Disable Secure Boot: In your system’s BIOS or UEFI settings, locate the option for Secure Boot and disable it.
- Create a Separate Disk Partition: To ensure the independent functioning of both operating systems without interfering with each other, it is recommended to create a separate disk partition specifically for the Debian installation.
In the upcoming sections of this guide, I will explain each of the aforementioned steps in detail.
Step 1 – Check Disk Partition Scheme in Windows
To identify the partition scheme of your disk in Windows, open PowerShell on your Windows system and execute the following command:
$ Get-Disk

From the output above, you can see that the last section displays the disk partition type. In my case, the partition style is GPT.
Step 2 – Check if Windows is using BIOS or UEFI
To find whether your Windows system is using BIOS or UEFI, do the following steps:
- Click on the Start menu and search for “System Information.”
- Open the “System Information” application from the search results.
- In the System Information window, locate the “System Summary” section.
- Look for the “BIOS Mode” field in the system summary.
- If the BIOS mode is set to “UEFI,” it indicates that your system is using UEFI.
- If the BIOS mode is set to “Legacy,” it indicates that your system is using BIOS.

As you can see in the screenshot above, my system uses UEFI as BIOS mode.
Step 3 – Disable Secure Boot
The next step in the process is to disable Secure Boot. Secure Boot, when enabled, only allows the loading of OEM-signed bootloaders.
Installing Debian with Secure Boot enabled typically does not cause any issues. However, there are certain scenarios where Secure Boot may not function smoothly. One such case involves the incompatibility between Secure Boot and hibernation.
To disable Secure Boot and restart your machine in UEFI mode, follow these steps:
- Open the Start menu and go to “Settings.”
- In the Settings menu, select “Recovery.”
- Under the Recovery options, click on “Advanced startup” and then choose “Restart now.”
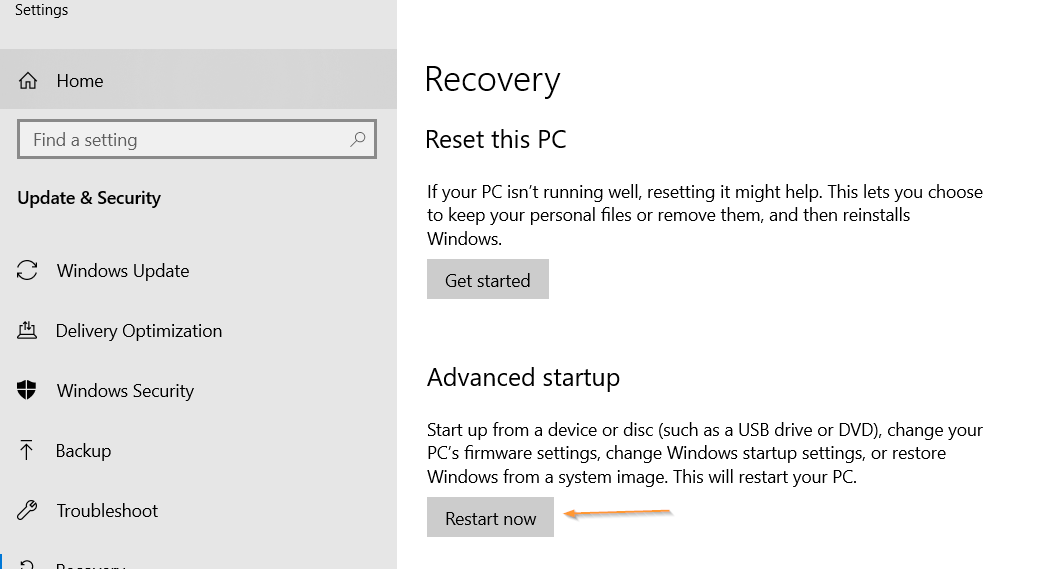
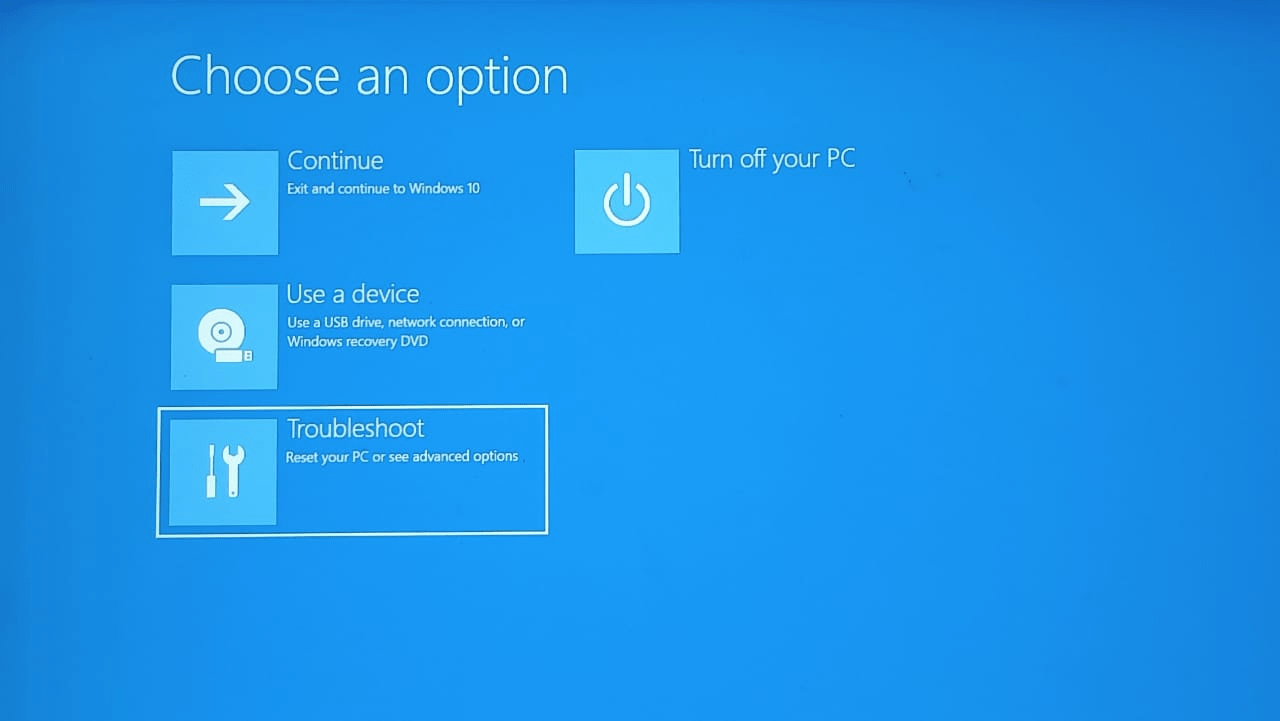
Upon restarting, your system will enter the Advanced startup mode.
In the Advanced startup options, select “Troubleshoot”.
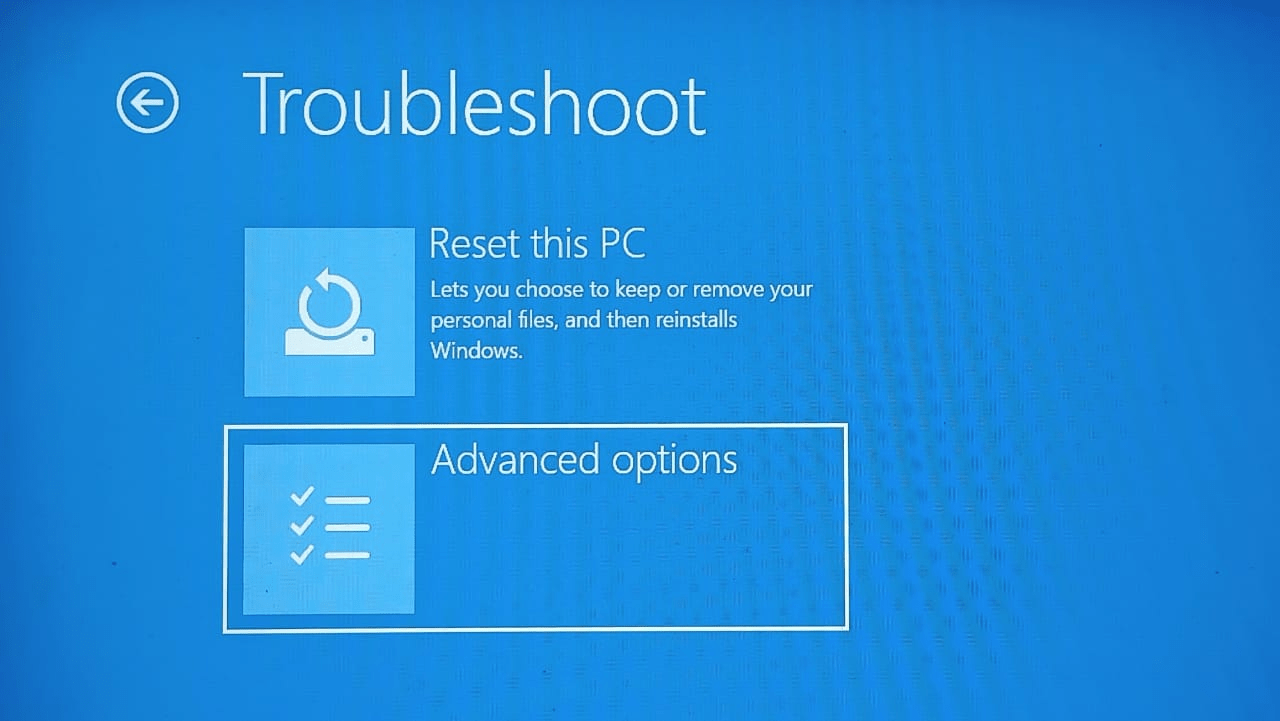
Next, choose “Advanced options”.
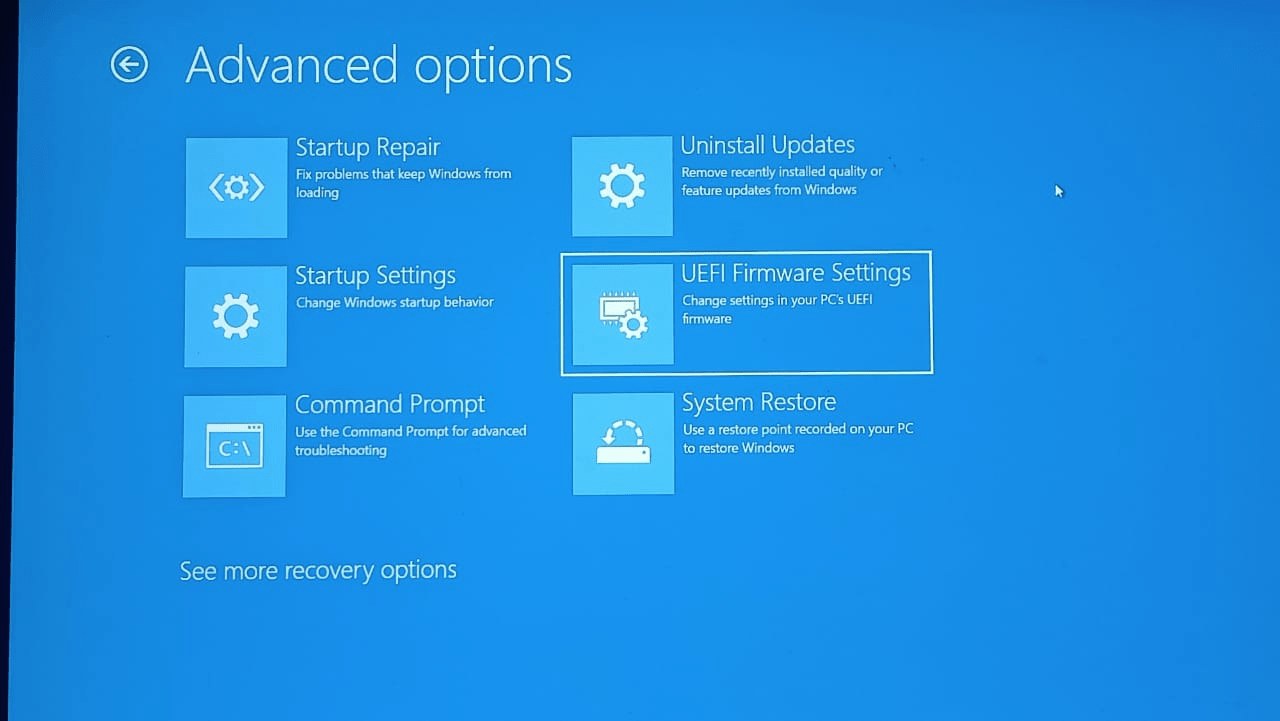
And then select “UEFI Firmware Settings”.
Click on “Restart” to enter the UEFI/BIOS settings.
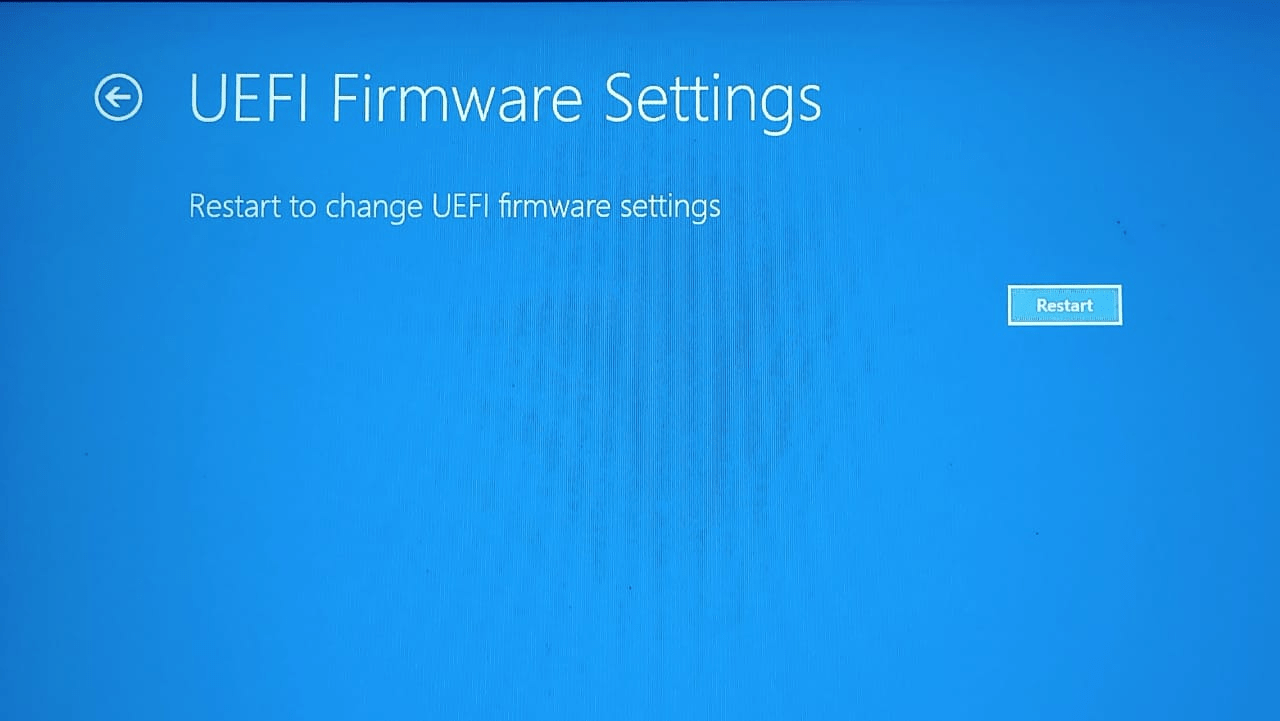
Once your system restarts, you will be directed to the UEFI/BIOS settings. It’s important to note that the appearance and layout of the BIOS/UEFI window can vary depending on the manufacturer of your desktop or laptop. In the case of Dell laptops, you can typically find the option to enable or disable Secure Boot under the “Boot Configuration” section.
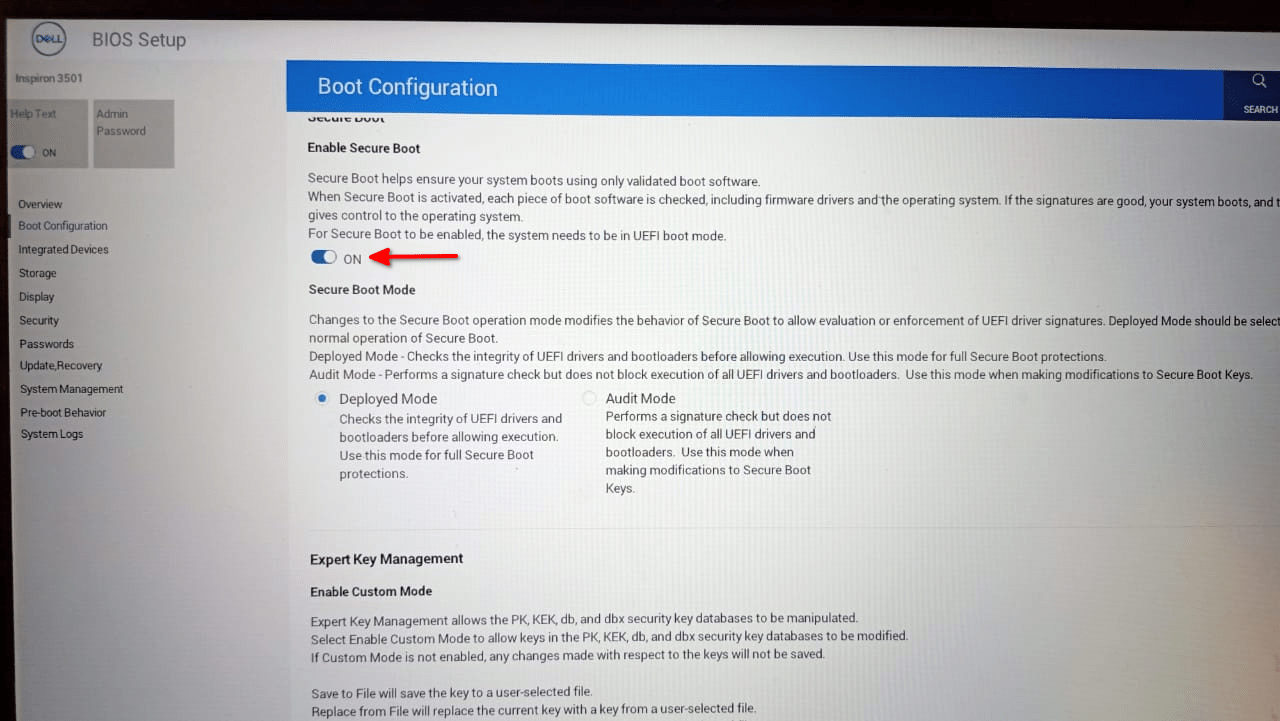
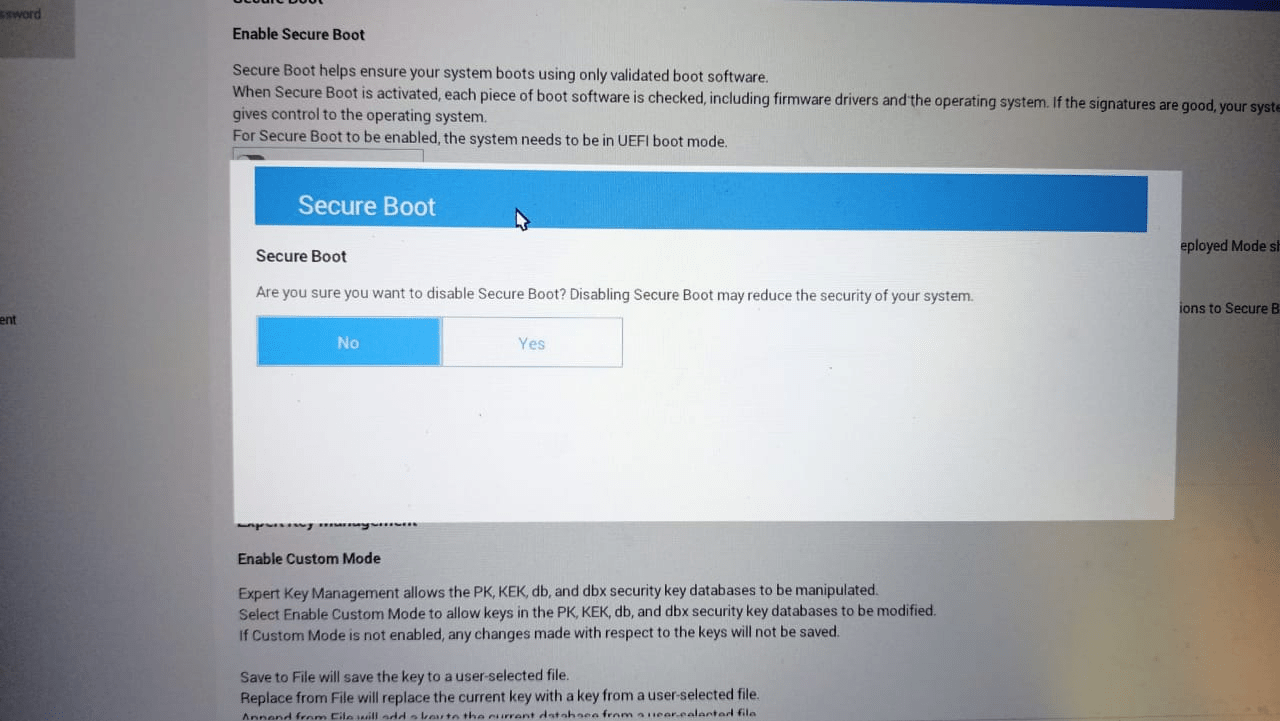
To disable Secure Boot, toggle the switch to the “OFF” position. Confirm the action by selecting “Yes” to disable secure boot and save the profile. Lastly, press the “Exit” button to restart the machine, applying the saved settings.
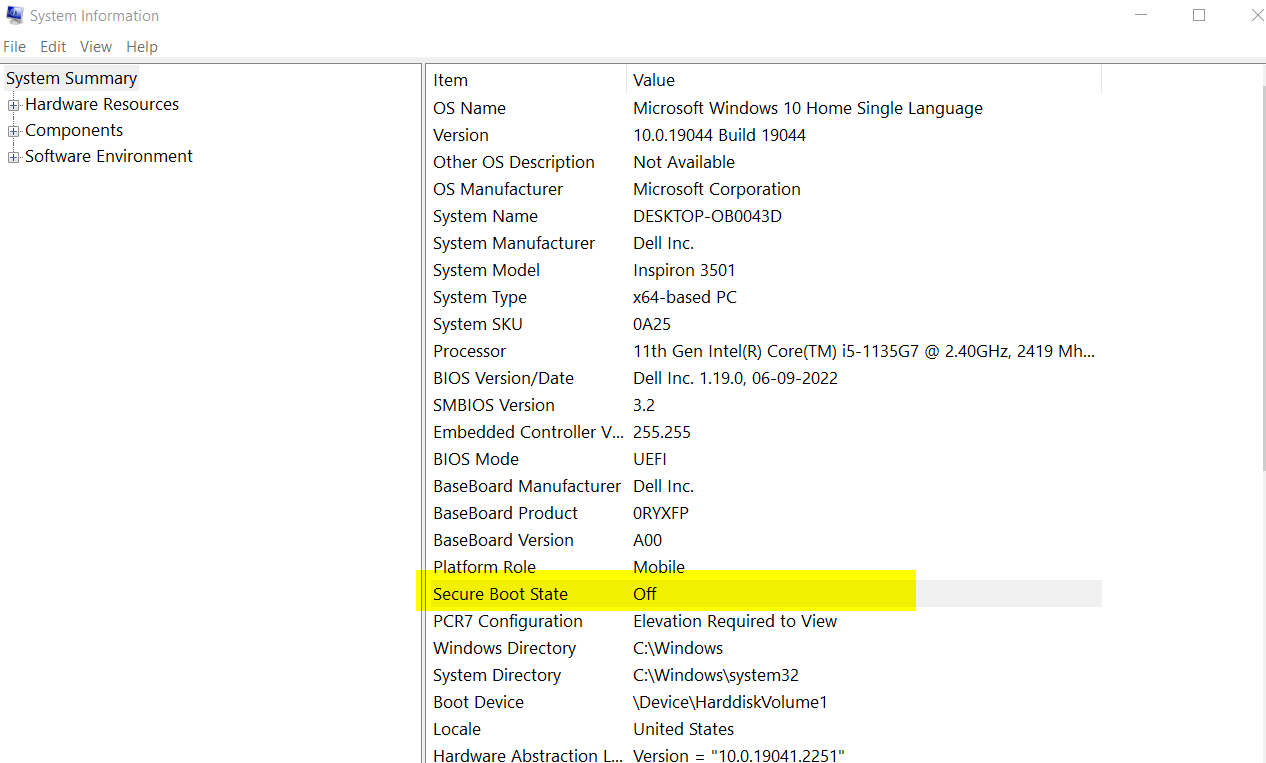
You can also check the state of the secure boot from within Windows. To verify the status of secure boot from within Windows, follow these steps:
- Open the “RUN” dialog by pressing the Windows key + R.
- Type “msinfo32” in the dialog box and hit Enter.
- In the System Information window that appears, search for the “Secure Boot State” entry.
- In your case, if the state shows as “OFF,” it indicates that secure boot is currently disabled on your system.
Step 4 – Turn Off Device Encryption
By default, Windows encrypts your drives for enhanced security. However, to prevent any potential conflicts during the dual-boot setup, it is recommended to turn off drive encryption.
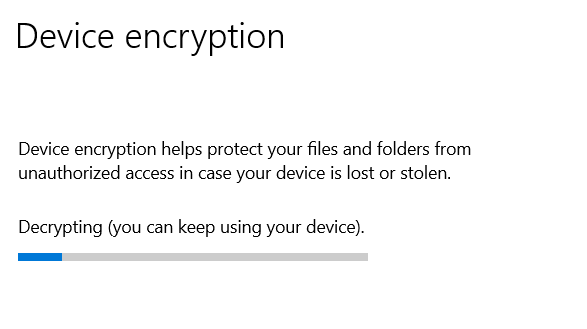
To do so, open the Settings menu, search for “Device Encryption”, and then click on “Turn Off” to disable the encryption.
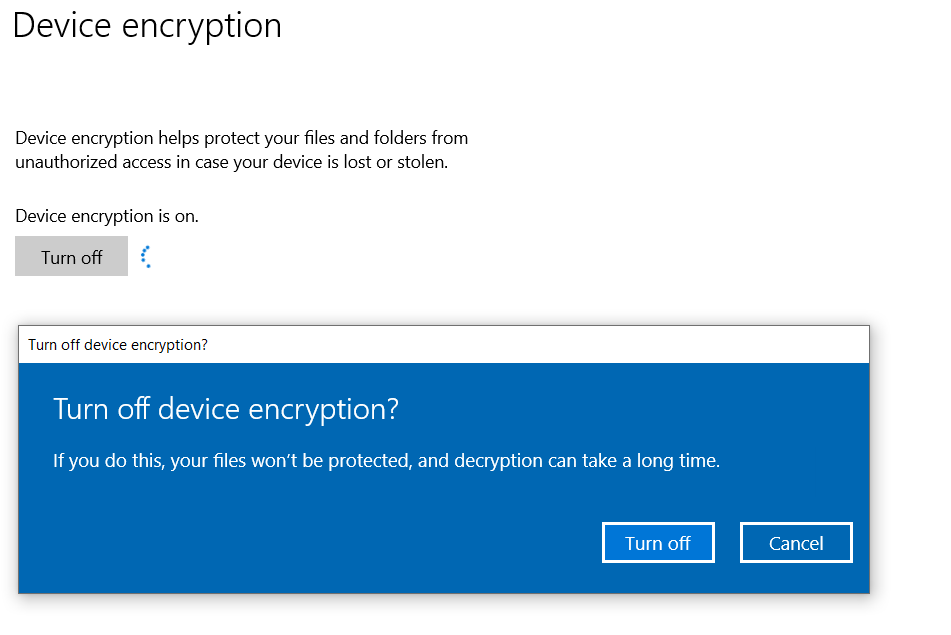
Windows will now start the process of decrypting the existing files. Please note that the duration of this process will vary depending on the size of your data.
Step 5 – Create Partitions for Linux
In this step, we will proceed with creating a dedicated partition for the installation of Debian 12 Linux. To begin, access the “Disk Management” utility from the Start menu. In my example, I have a single 1 TB disk where all available space is allocated to the Windows C Drive.
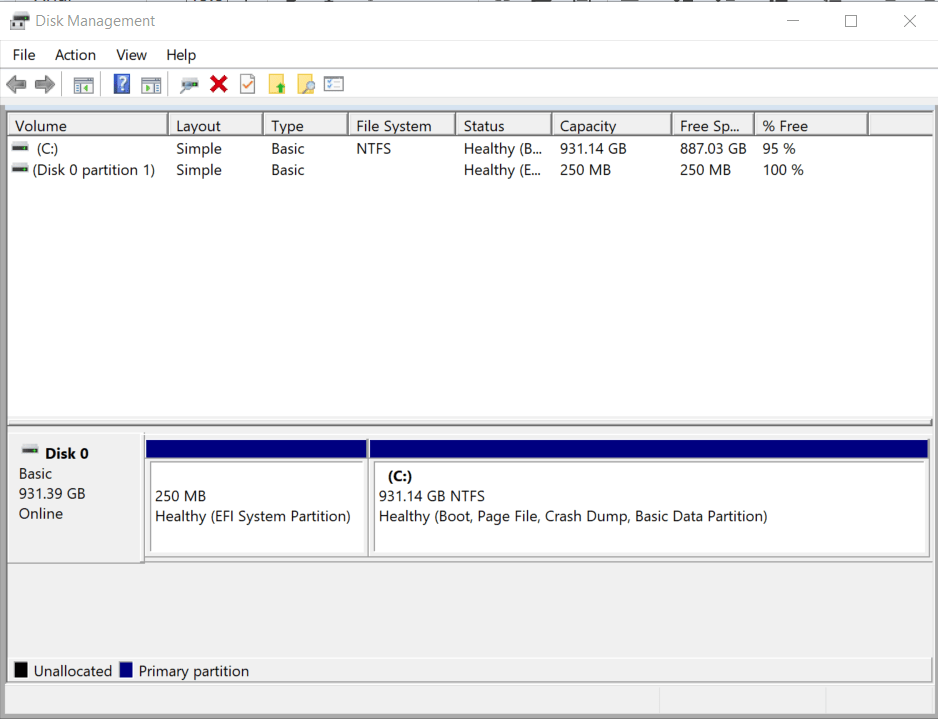
In order to create a separate partition for Debian Linux, it is necessary to free up some space from the existing C drive, as there is currently no available free space. This can be accomplished by shrinking the C drive.
To resize the partition, follow these steps:
- In the Disk Management window, locate the C drive which represents your primary Windows partition.
- Right-click on the C drive and select the “Shrink Volume” option from the context menu.
- Enter the desired size for the new partition in megabytes (MB). Make sure to allocate enough space for the Linux installation.
- Click on the “Shrink” button to initiate the shrinking process. It may take a few moments to complete.
- Once the process finishes, you will see a new section labeled “Unallocated space” in the Disk Management utility. This space has been successfully reclaimed from the C drive and is now available for creating the new partition.
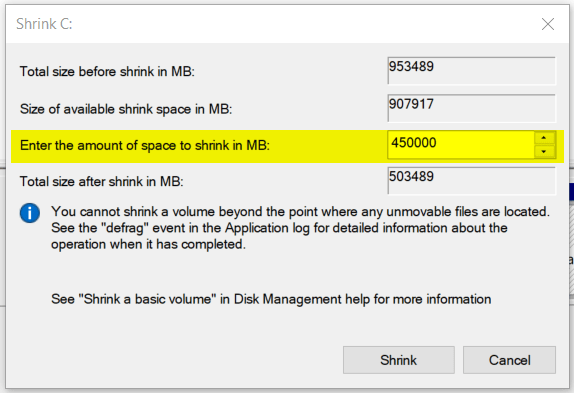
I have reclaimed around 440GB of space from the C drive which will further be used to install the Debian operating system.
Debian and Windows Dual Boot: Step-by-Step Installation
STEP 1 – Connect the USB device containing the Debian ISO image to your computer and restart your machine to initiate the boot process.
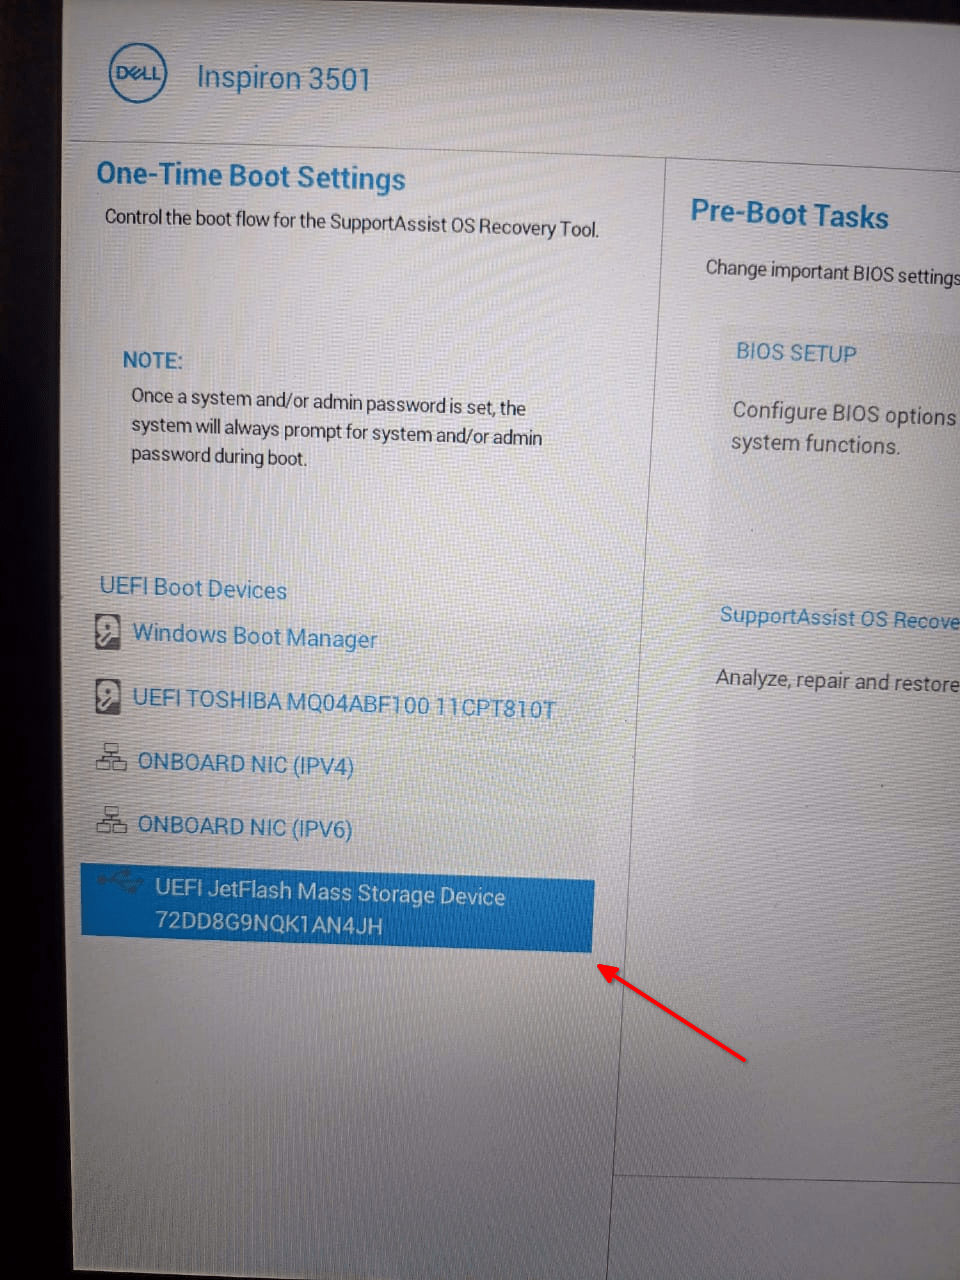
During the boot sequence, press the bootloader shortcut key. The specific key varies depending on the manufacturer of your computer. Commonly used keys include F12, F9, Esc, or Del. Refer to your computer’s documentation or look for on-screen prompts to determine the correct key for accessing the boot menu.
Once the boot menu appears, navigate through the options using the arrow keys on your keyboard. Select the USB device that contains the Debian ISO image.
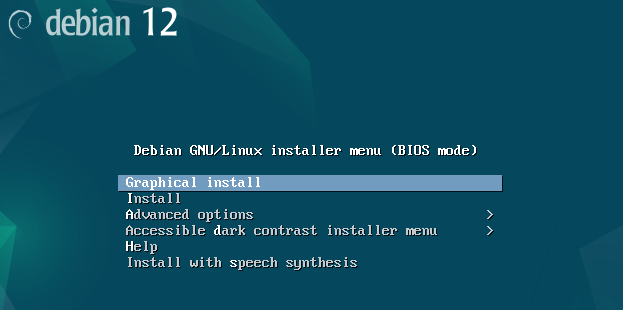
STEP 2 – The Debian installer menu will be displayed. You have different installation options like graphical install or text-based install. I go with the first option “”Graphical Install”.
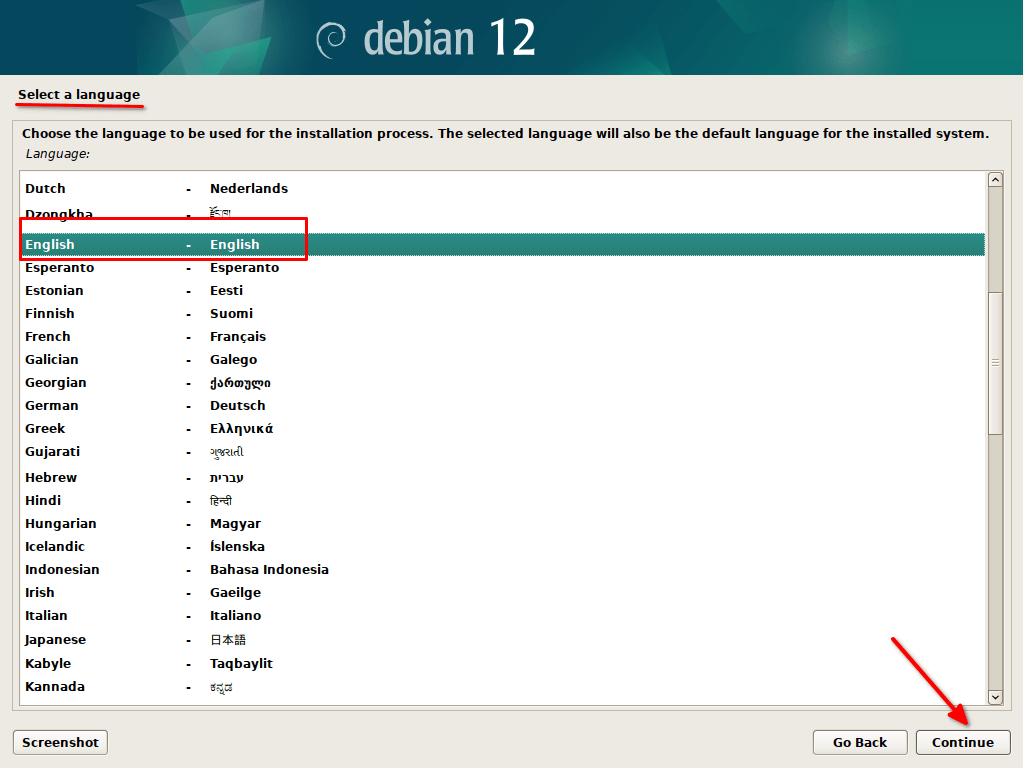
STEP 3 – In this step, select the language which will be used throughout the installation process and click continue.
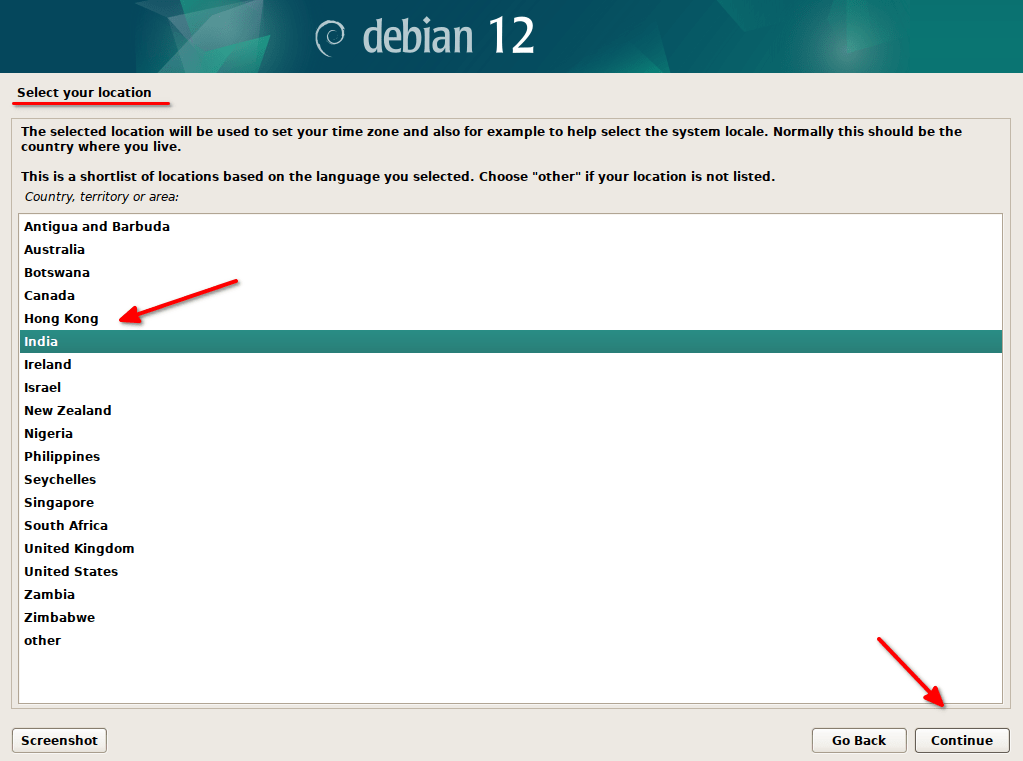
STEP 4 – Select the location which will automatically set the timezone for the installation.
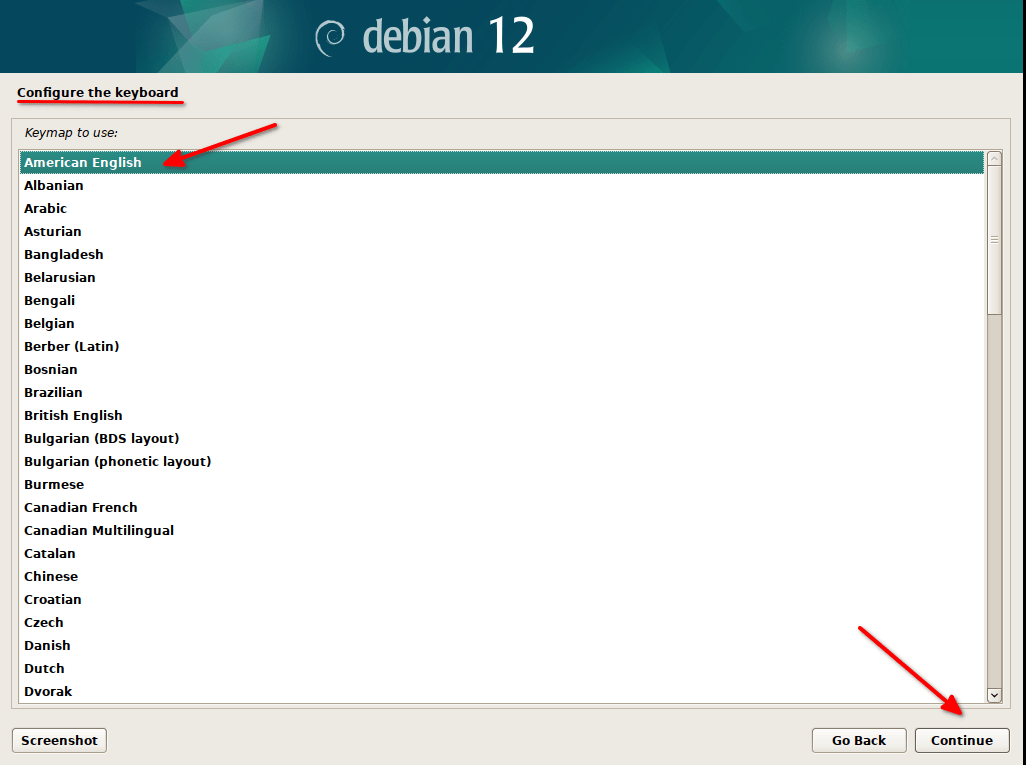
STEP 5 – Select the keyboard layout that matches your physical keyboard. Click continue to go to the next step.
Once you click continue you should see some components related to the installation will be loaded from the installation media.
STEP 6 – In this step, you will configure the network settings for Debian. You can change these configurations later from within the operating system too.
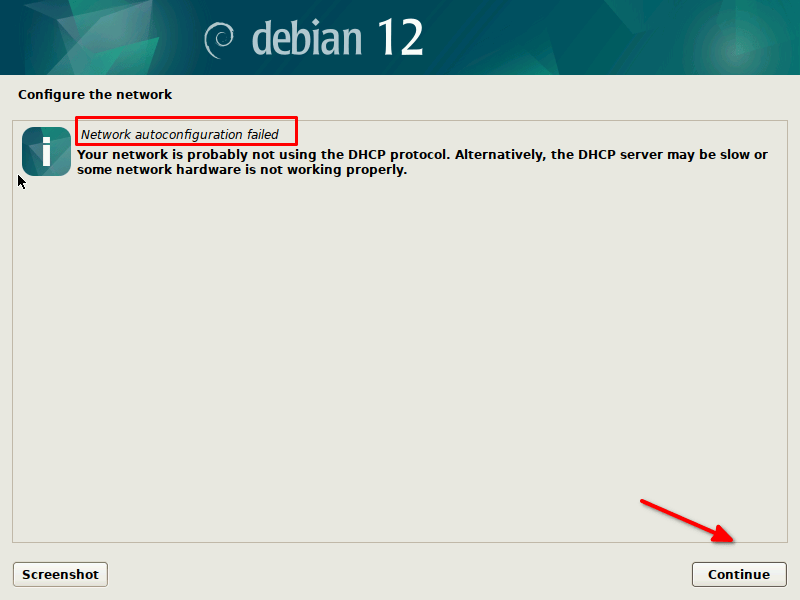
The installer will try to automatically assign an IP address from the DHCP server available in the network. In most cases, the installer will automatically connect to the ISP DHCP server and allocate the IP address.
If the installer was not able to set the IP address, then it will show you options to manually configure the IP address.
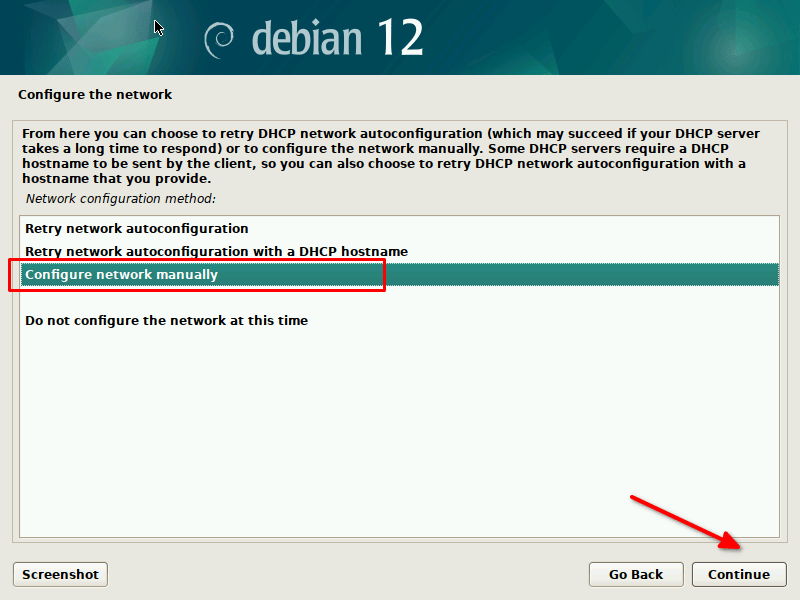
On the next screen, you will encounter four options for network configuration. Each option serves a specific purpose. Here are the details of each option:
- Retry network configuration: This option allows you to attempt the network configuration process again. It will try to connect to the available DHCP server and automatically configure the IP address.
- Retry network auto-configuration with DHCP hostname: Similar to the previous option, this choice will retry the network auto-configuration process but also includes the DHCP hostname.
- Configure the network manually: Selecting this option gives you the ability to manually set the IP address and subnet mask. This option is useful if you need to customize the network configuration according to specific requirements.
- Do not configure the network at this time: If you choose this option, the network configuration step will be skipped, and you can proceed to the next step without configuring the network settings.
I am going to configure IP address manually, so I choose option 3.
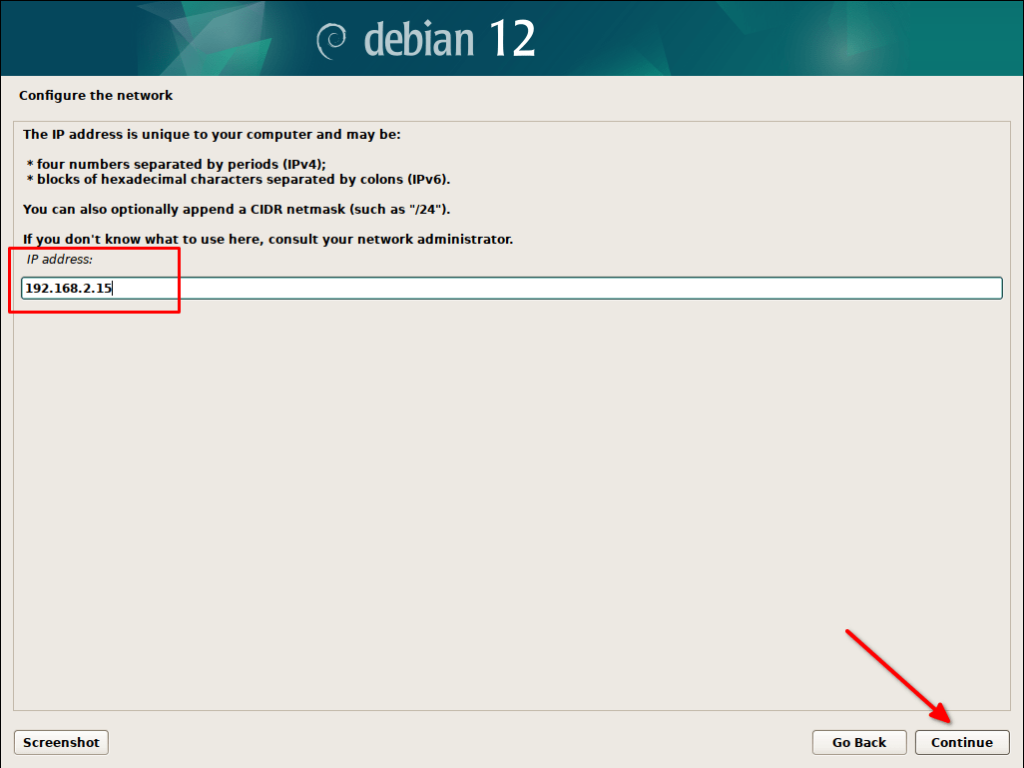
Enter the IP address and click continue.
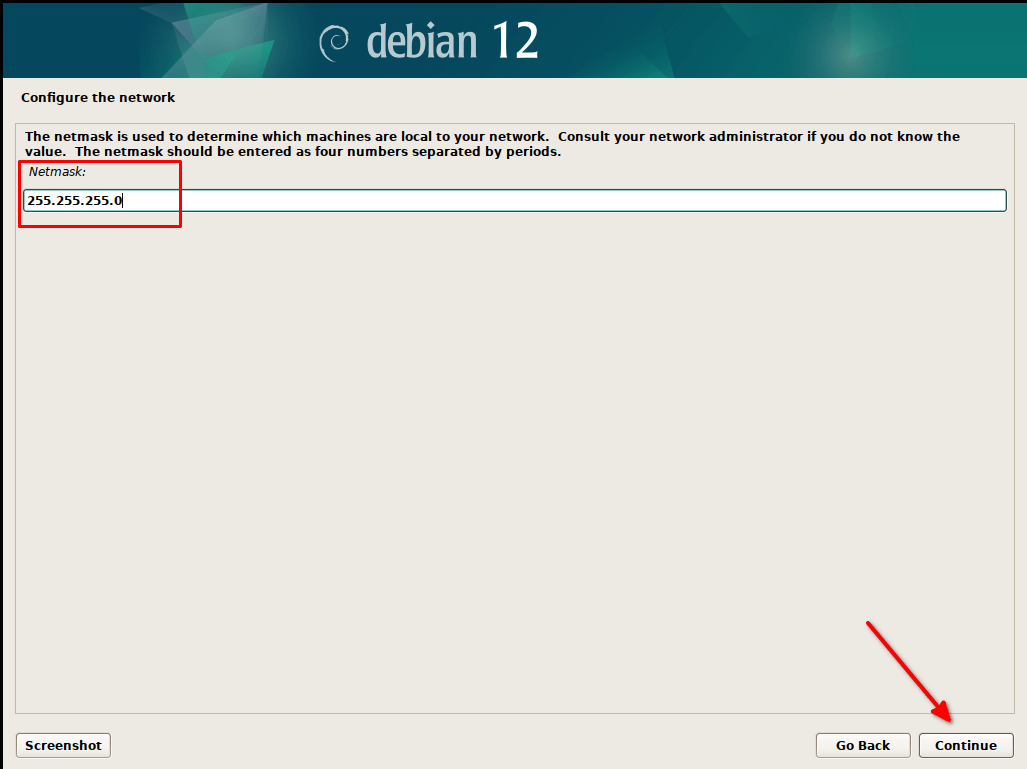
Enter the netmask value and click continue.
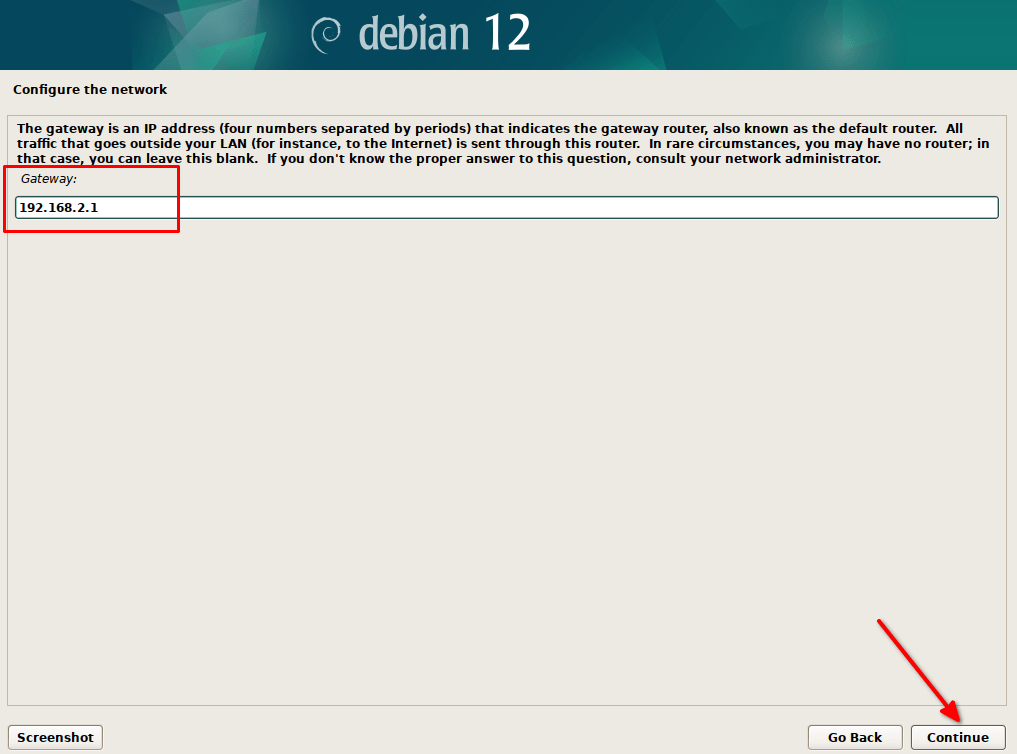
Enter the network gateway IP value and click continue.
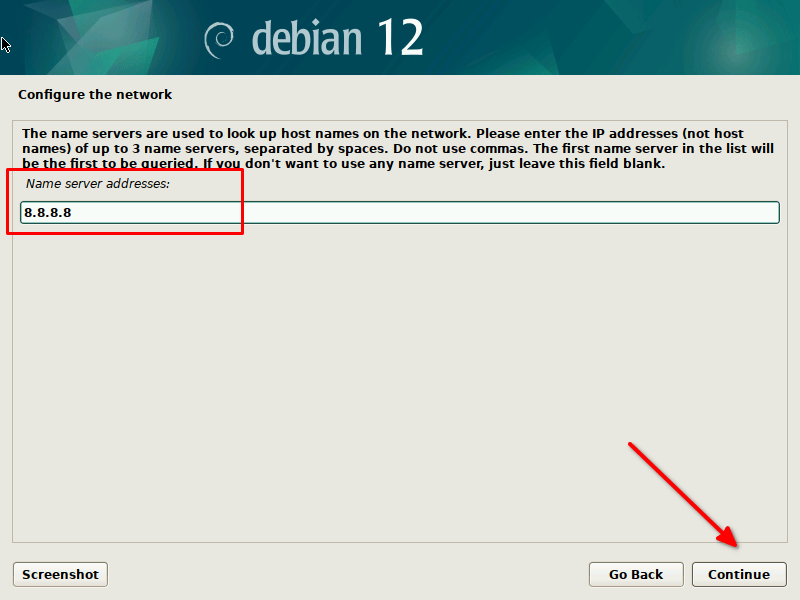
Enter the DNS IP address. Here, I use the Google’s DNS IP address 8.8.8.8.
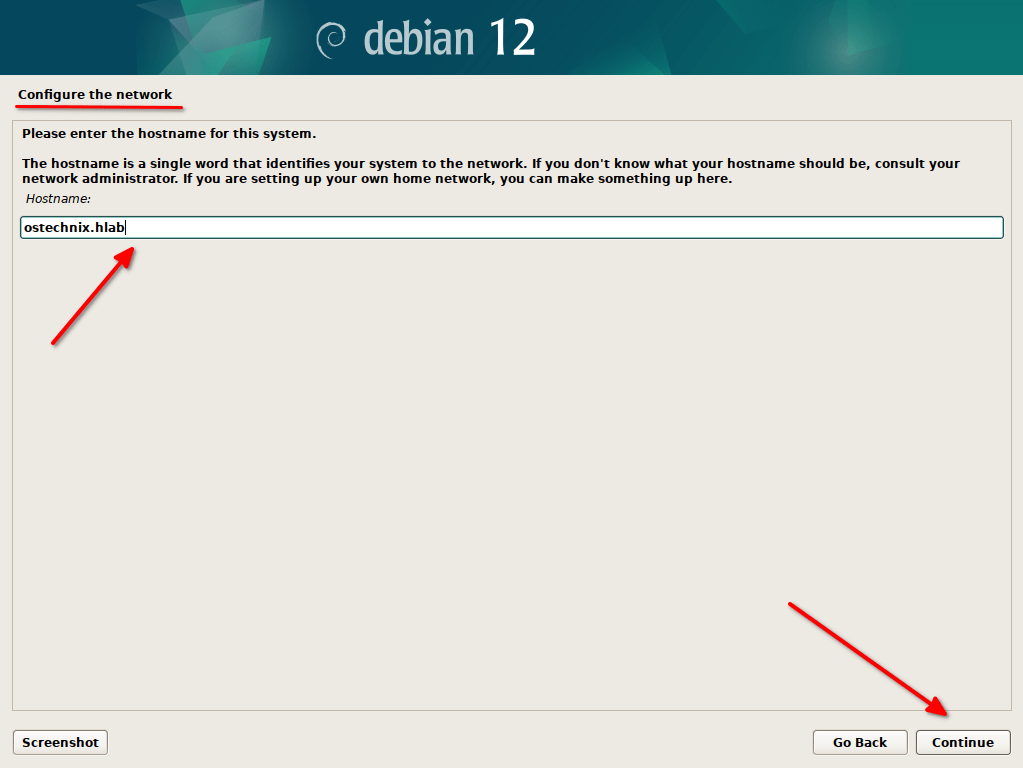
In the next step, enter the hostname with or without the domain name. If you are not using the domain name in this window, then it will prompt you to enter the domain name in a separate window.
I have used the domain name hlab in this window itself.
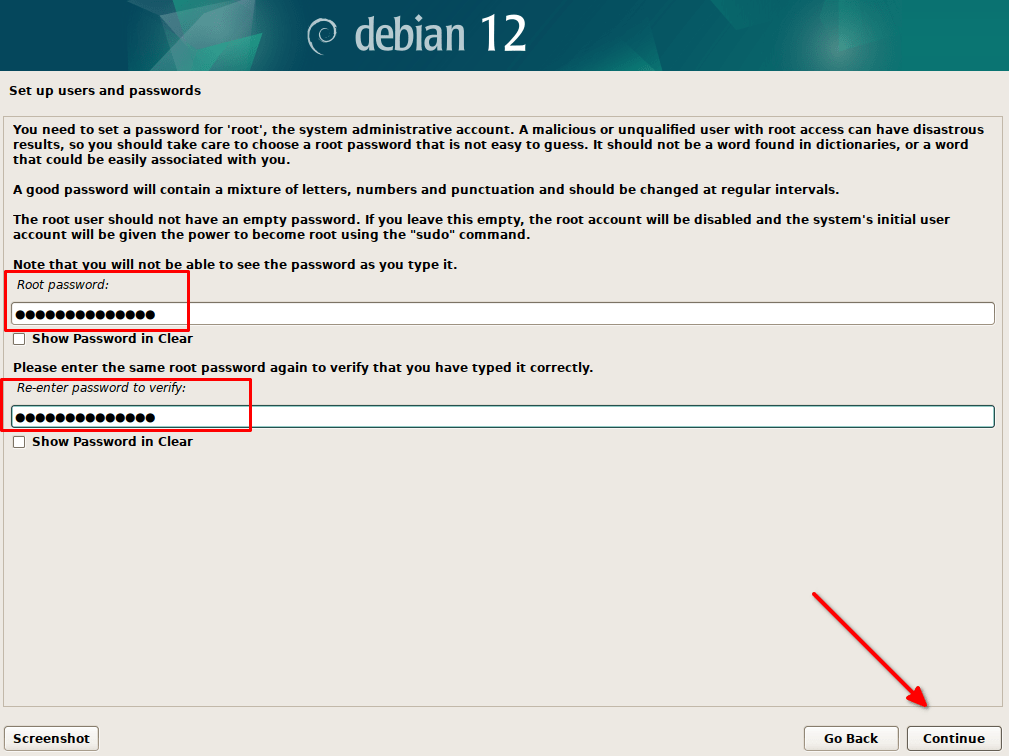
STEP 7 – In this step, you need to set up the root user password. Make sure a strong password is chosen.
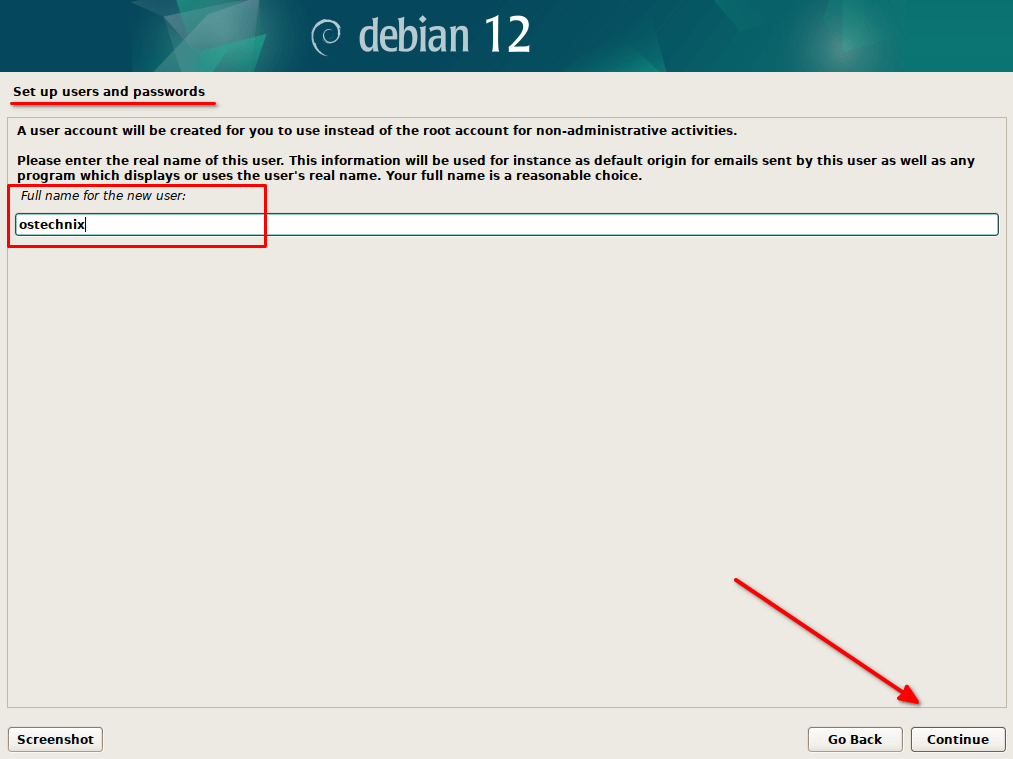
STEP 8 – In this step, you need to enter the user’s full name.
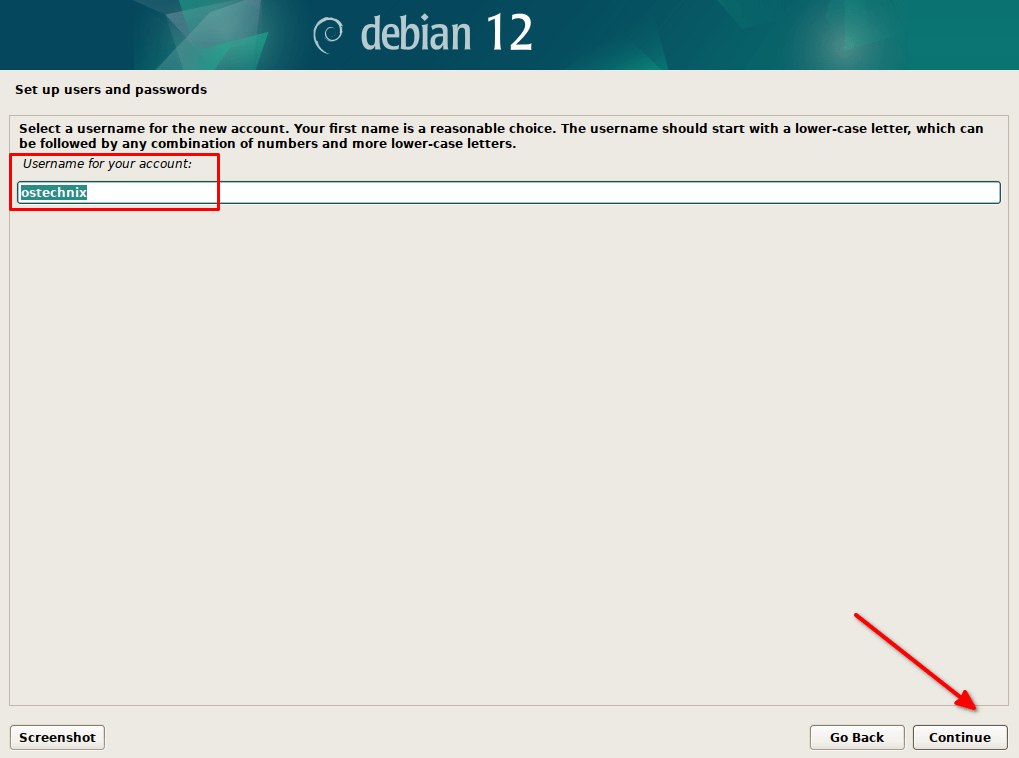
STEP 9 – In this step, give the username and a user account will be created with this name. This user can be used for all non-administrative activities.
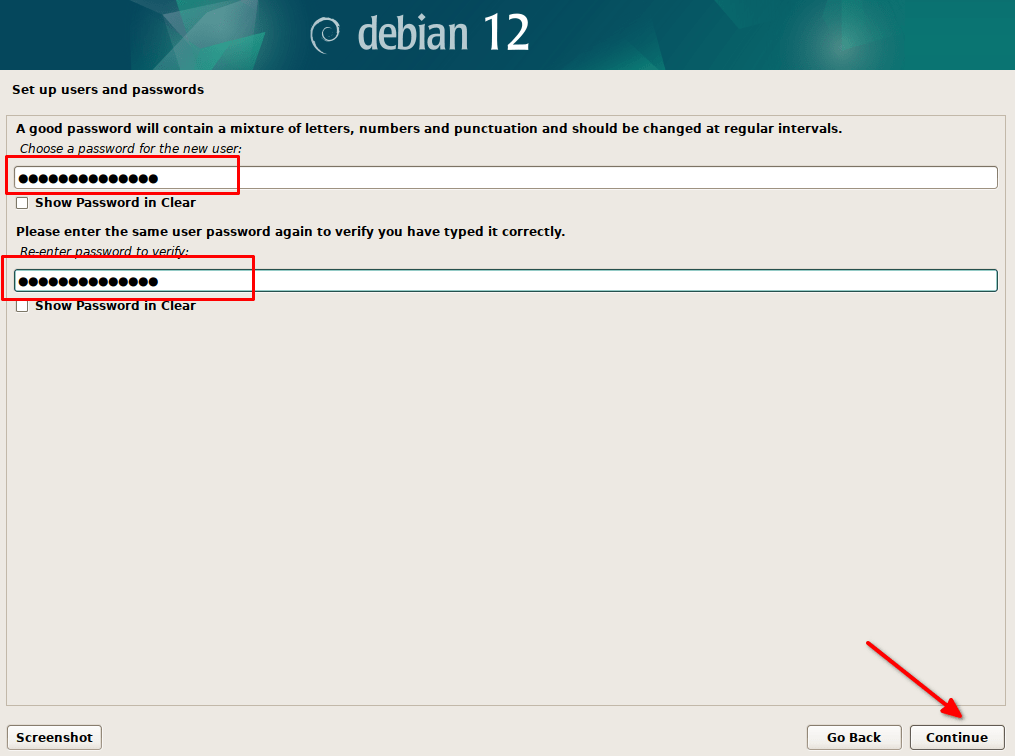
STEP 10 – In this step, give the password for the user account created in the previous step. Make sure the root password and user password are not identical. This is to make sure the root user password remains safe if even the user password is compromised.
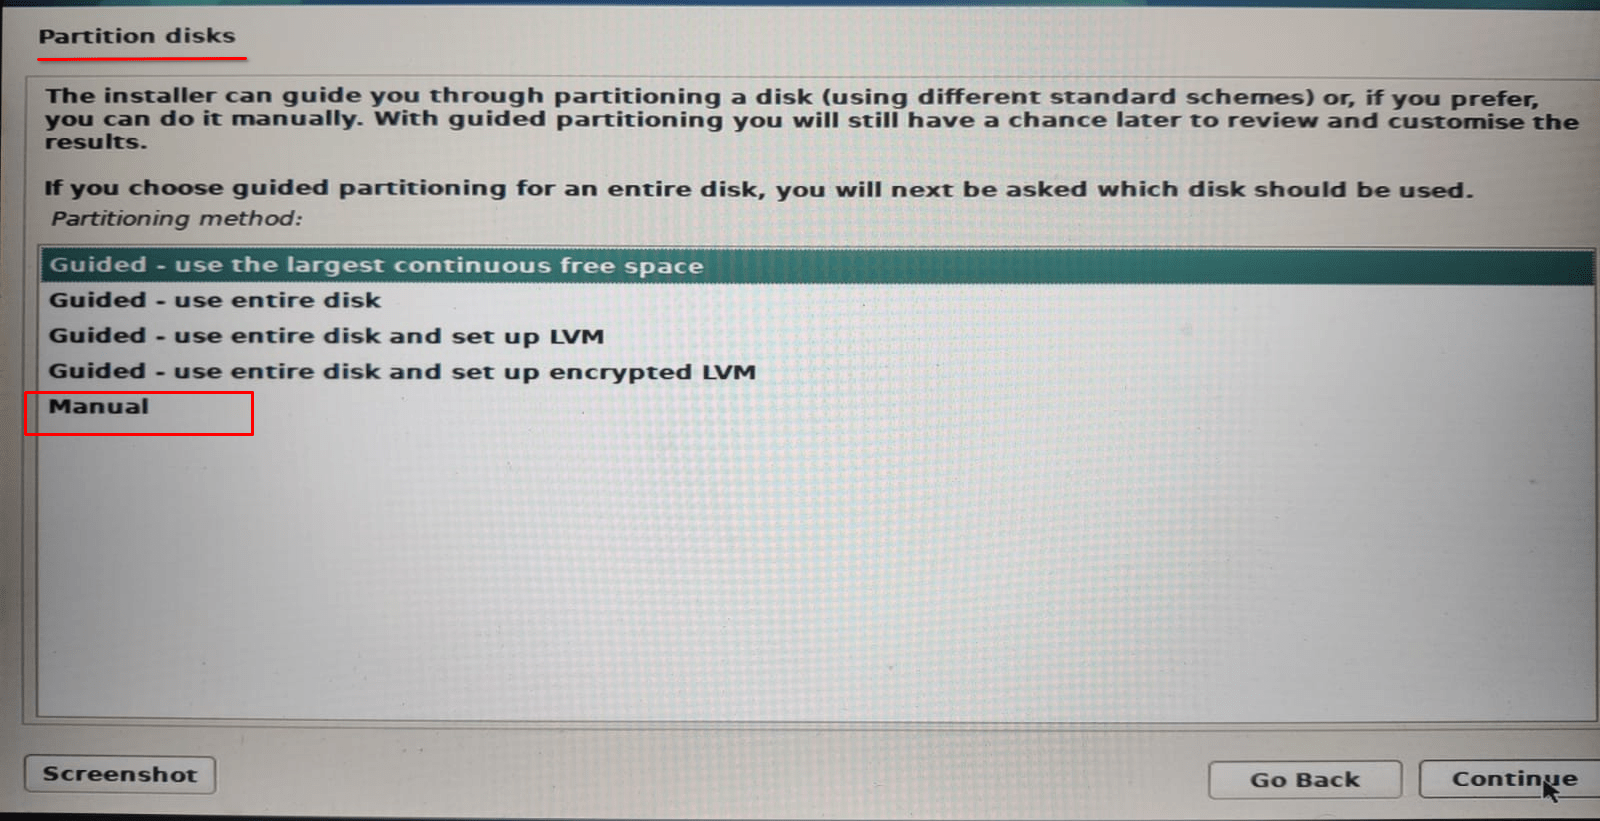
STEP 11 – In this step, you need to partition the disk post which the Debian base will be installed. You have 5 options to choose from as shown in the below image. The highlighted options are suited for dual booting and the remaining options will completely wipe out existing Windows partitions and install Debian 12. So you should be little bit careful while selecting the suitable option for dual boot Debian.
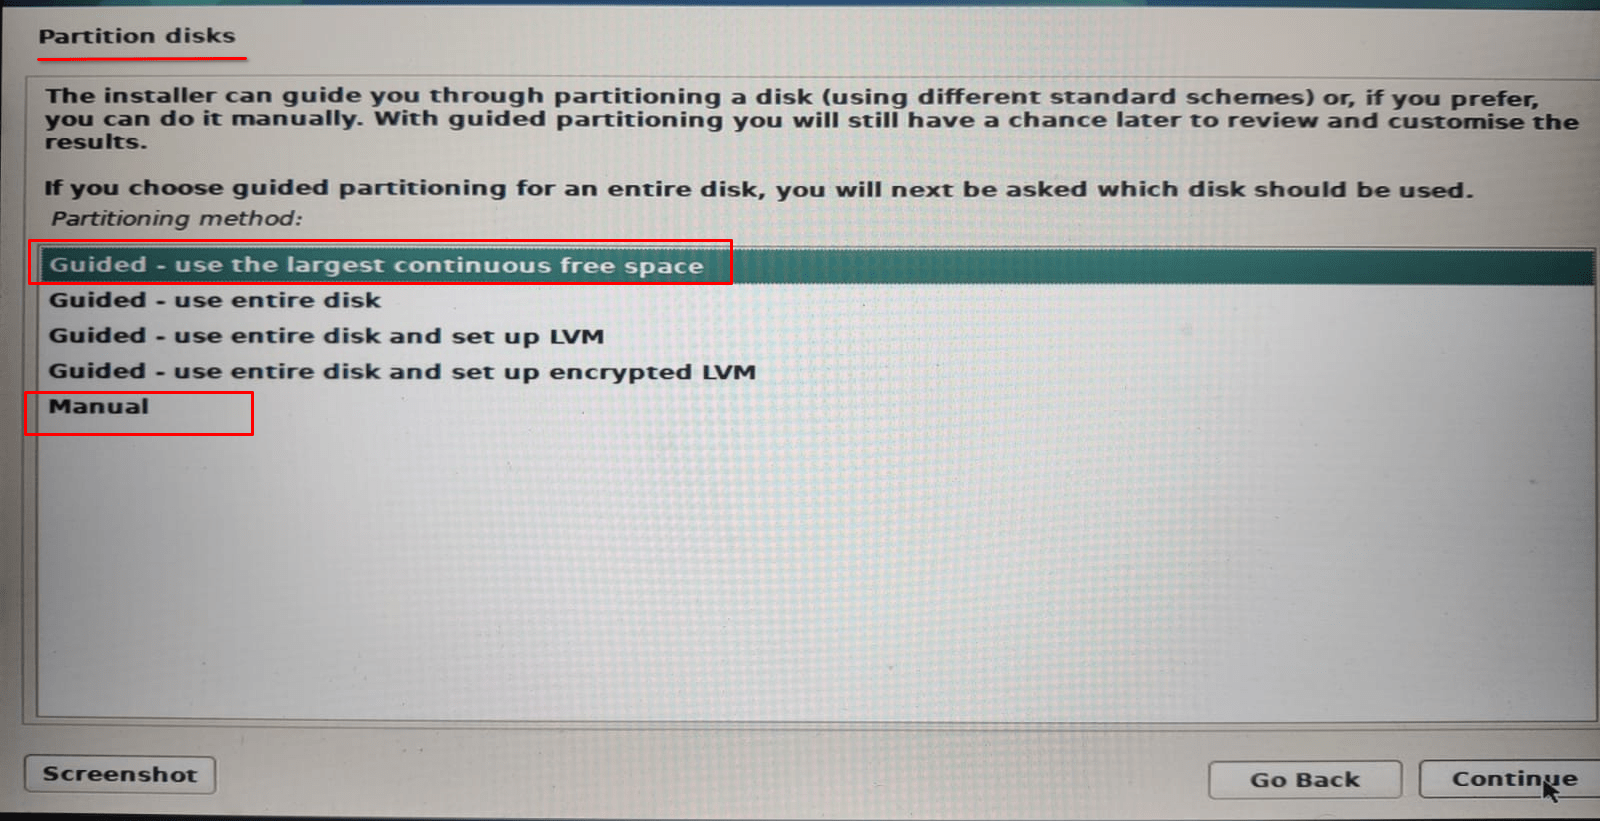
I will explain both of the highlighted methods.
1. GUIDED PARTITION
This is the simplest of all the methods and it picks the free space available in the disk and automatically creates partitions. This is the best option for newbies. Choose the first option “Guided – use the largest continuous free space” and click continue.
In the next window, you will be prompted with three options.
- All partitions (root, home, boot, etc.) will be created under one partition.
- Create a separate /home partition.
- Create separate /home, /var, /tmp partitions.
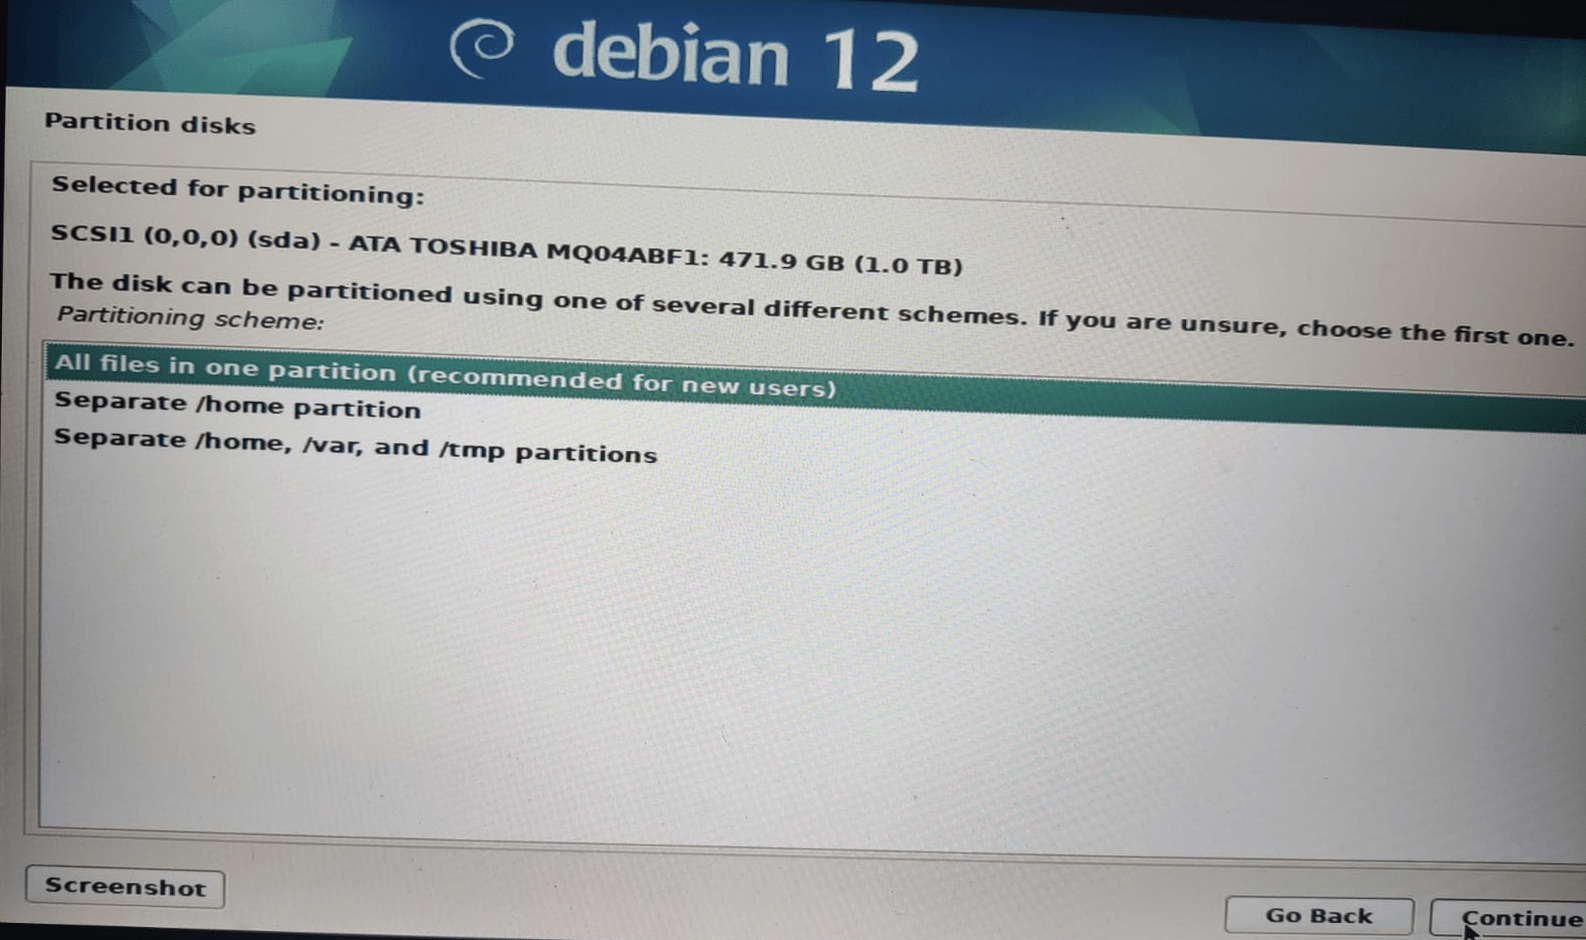
I choose to go with the second option which will just create a separate /home partition. In the next window, you will get the newly created partition information. As you can see from the below image, the installer automatically created a home partition along with the root and swap partition. If you look at the space allocation, the majority of the space is allocated to /home partition.
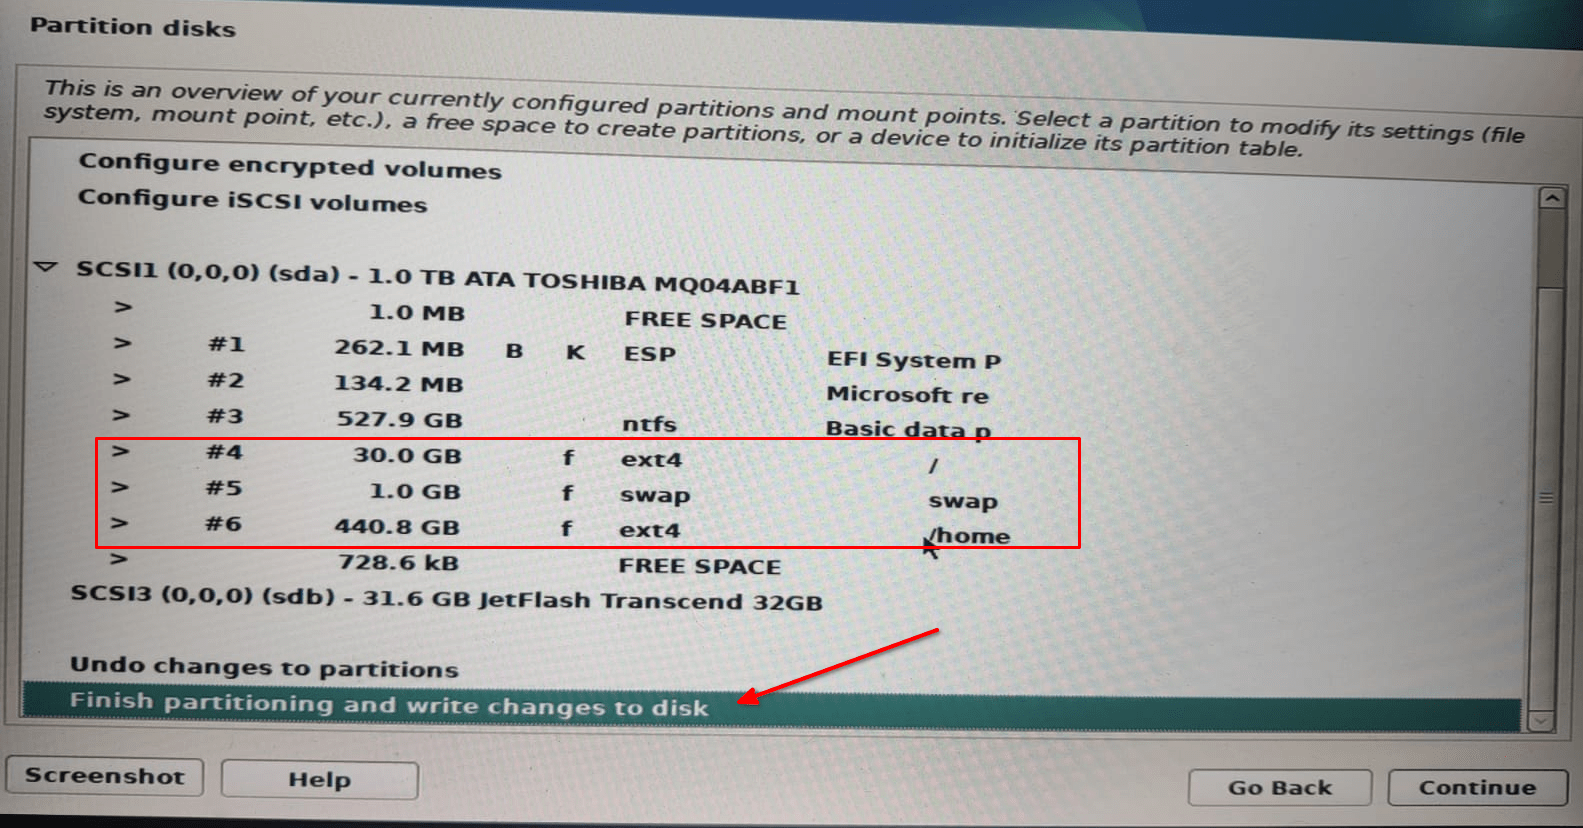
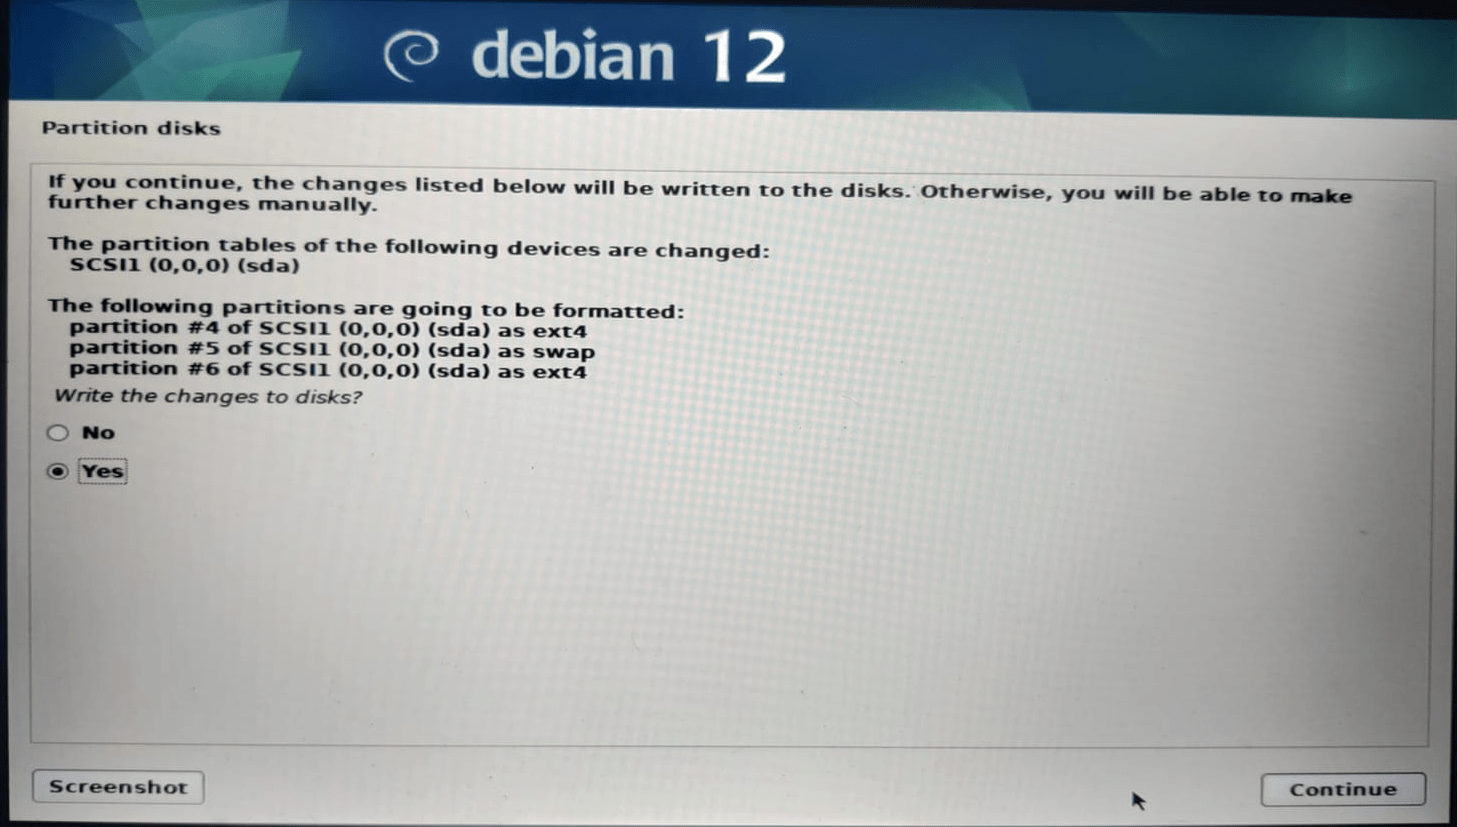
To write the changes to the disk choose “Finish partitioning and write changes to disk”. It will prompt you with confirmation to write the changes to the disk. Choose “Yes” and click continue.
2. MANUAL PARTITION
You can also create manual partitions and allocate sizes as per your wish. Choose “Manual” from the first partition window and click continue.
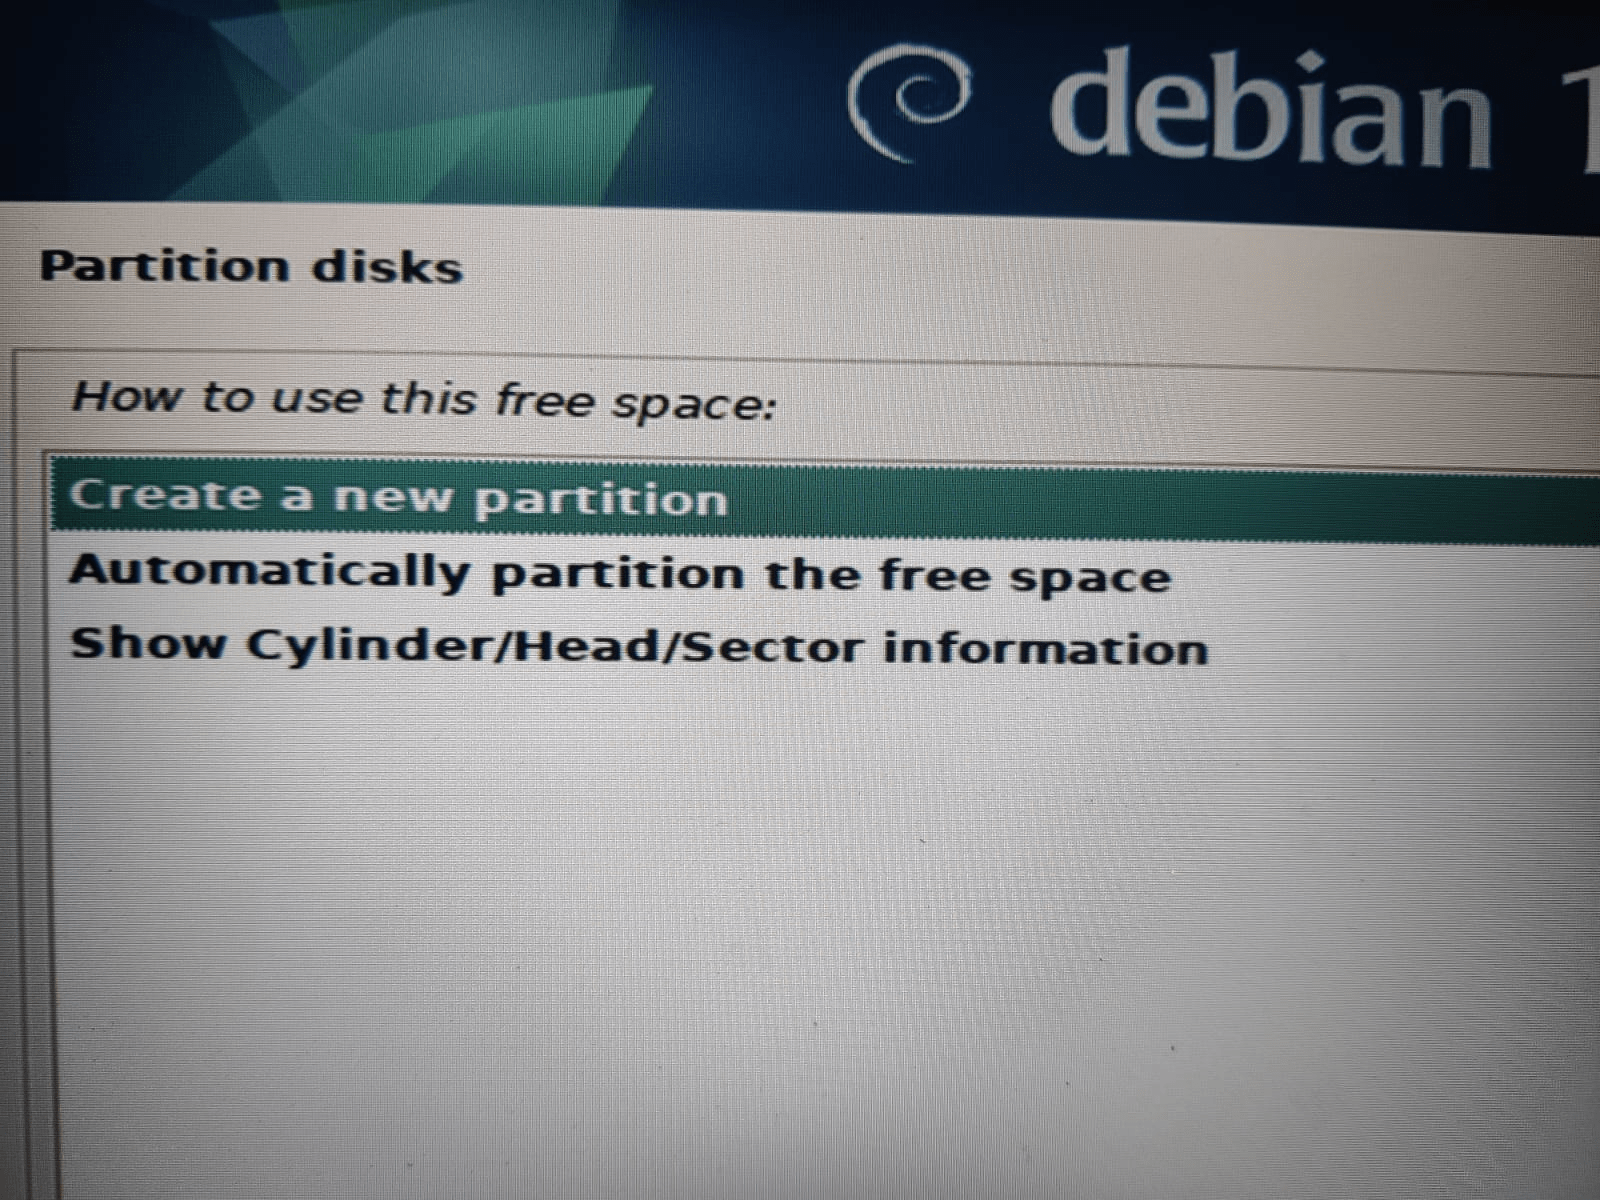
Choose the “Create a new partition” option in the next window and click continue.
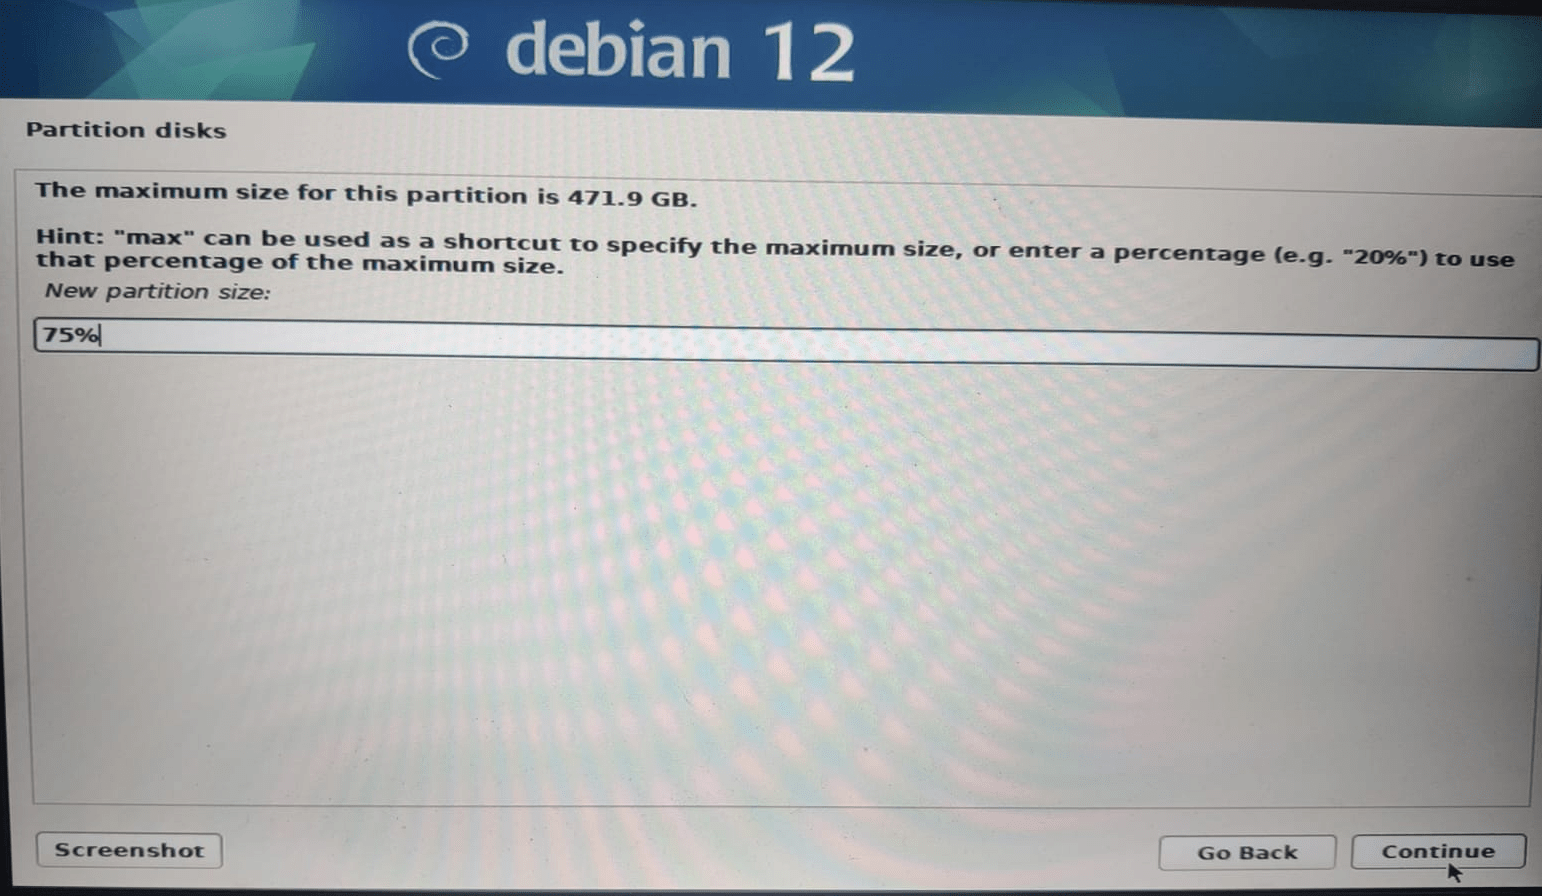
In the next window enter the size for the partition. You can enter the size in the percentage of free space. I have given 75% and this partition will be used as my /home partition.
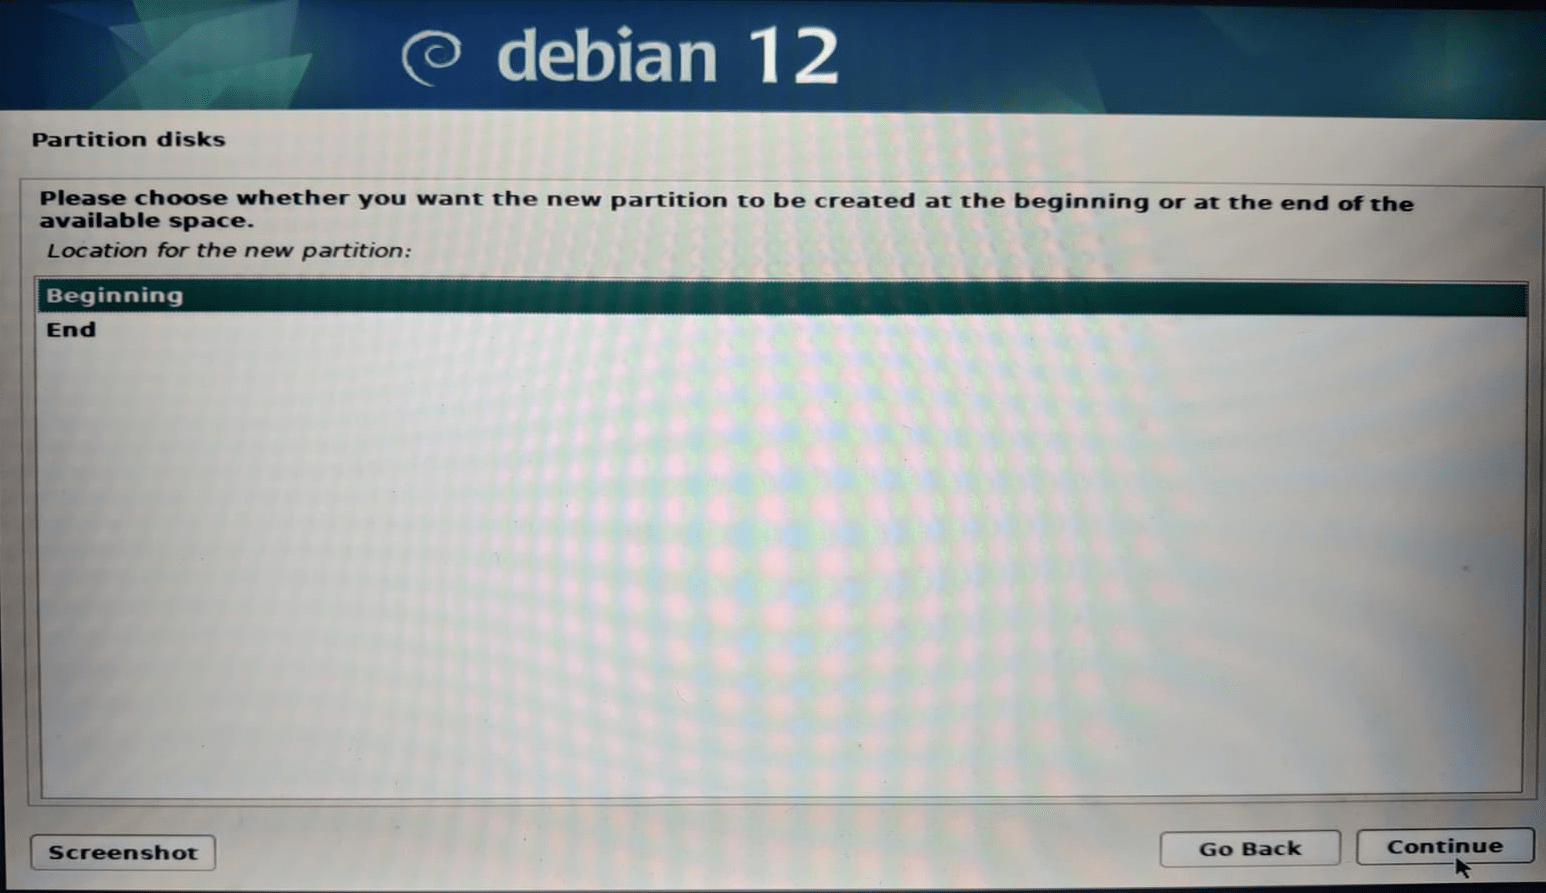
In the next window it will prompt you to choose the location for the new partition. Choose the beginning or end depending upon your disk layout. I choose “beginning” and click continue.
In the next window it will show you different configuration options for the partition.
- Use as – It will show you the list of supported linux file systems. I have chosen Ext4 as the file system.
- Mount point – It will show you the list of predefined mount points like
/home,/root,/tmp,/var,/etc. Choose the preferred mount point from the list. I am choosing/home. - Mount Options – You can choose mount options like async, atime, sync, permissions, etc from these options.
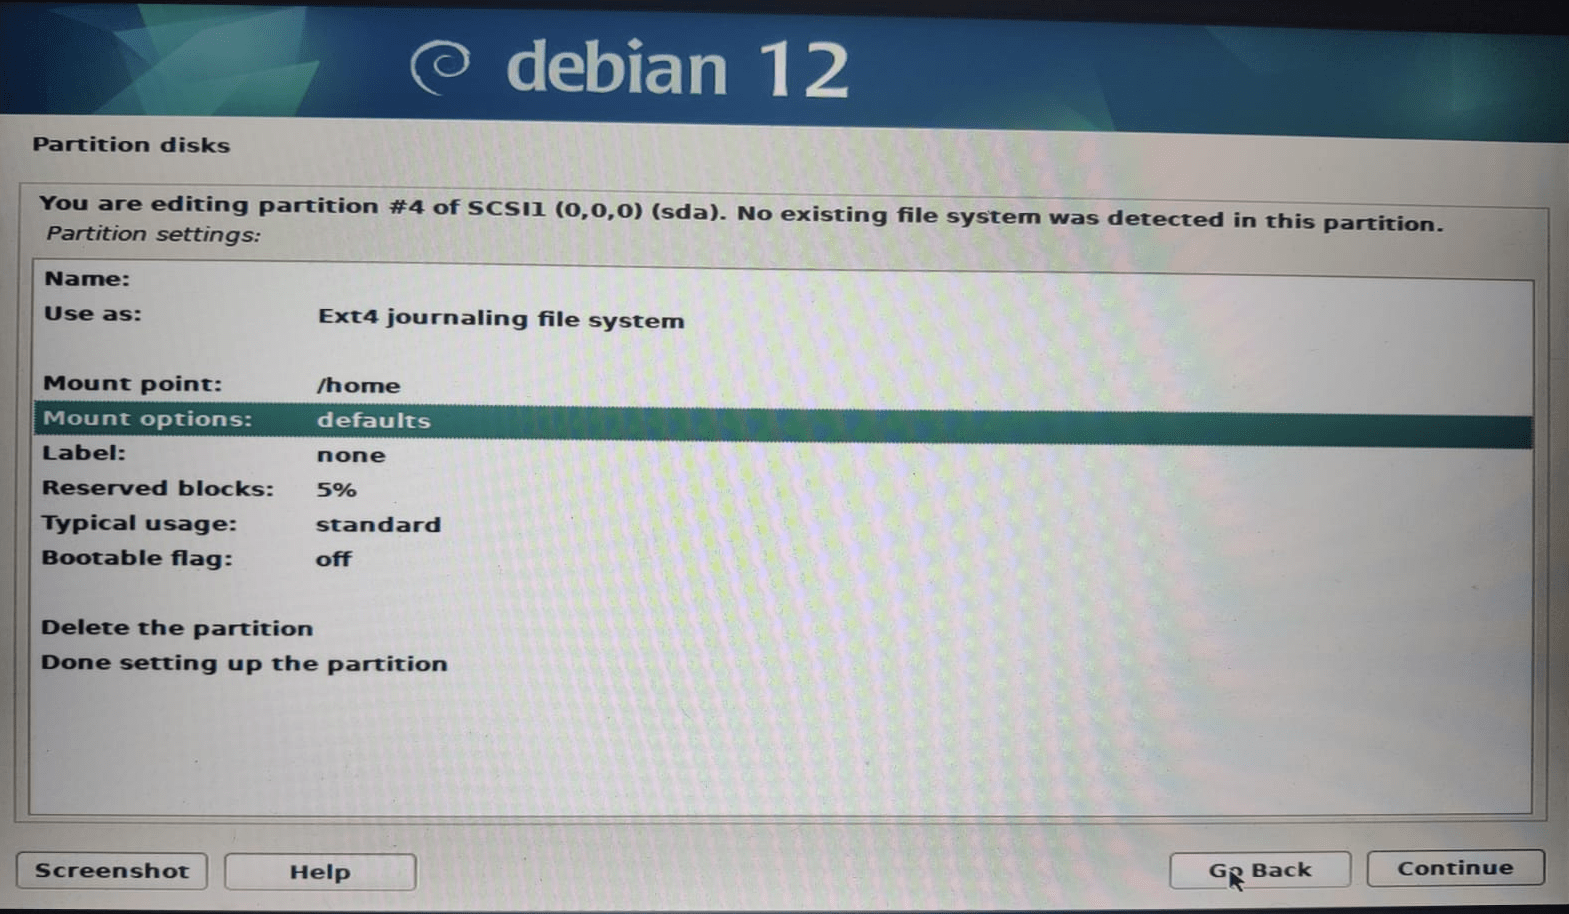
Choose “Done setting up the partition” to save the changes. Repeat the same procedure to create different partitions and finally write the changes to the disk.
STEP 12 – The base system installation will be started now.

STEP 13 – The installer will ask you to scan any additional media. This is to make sure other media are used by the apt package manager during the installation other than the default iso media. In most cases, you will only have the Debian iso image only. Choose “No” and click continue to move to the next step.
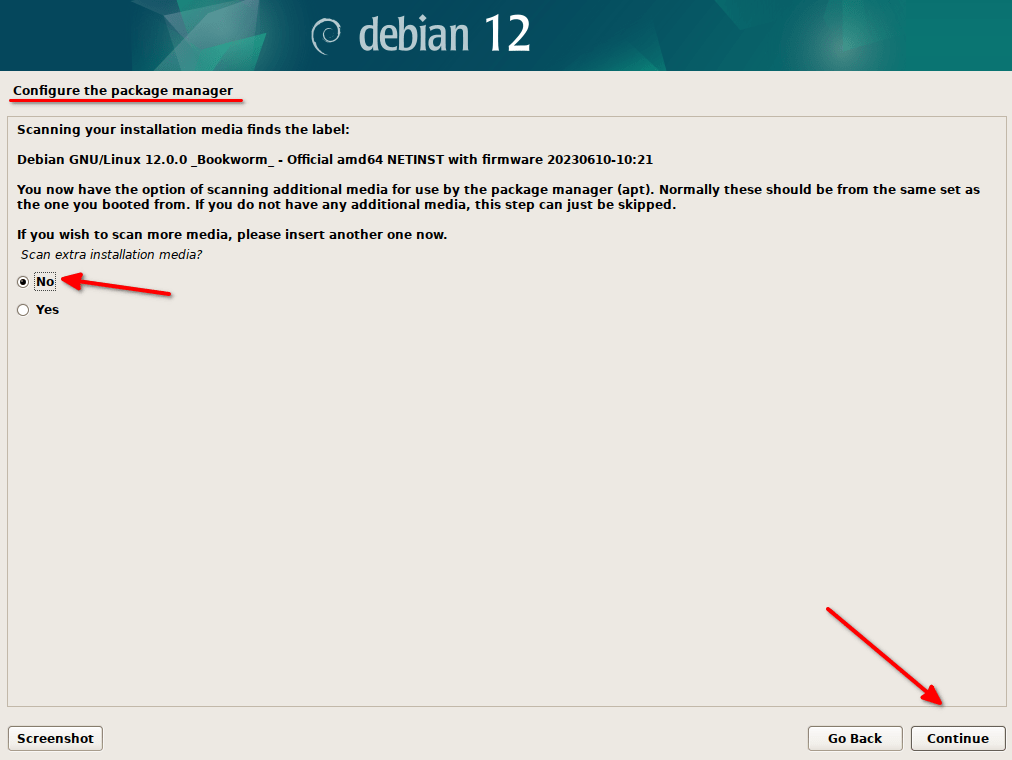
STEP 14 – In the next step, configure the network mirror. Your package manager will connect to the network mirror and download recent packages other than the packages available in the Debian iso image. You should have your machine connected to the internet for this to work. I choose “Yes”. However, you can choose “No” if you have no internet connection.
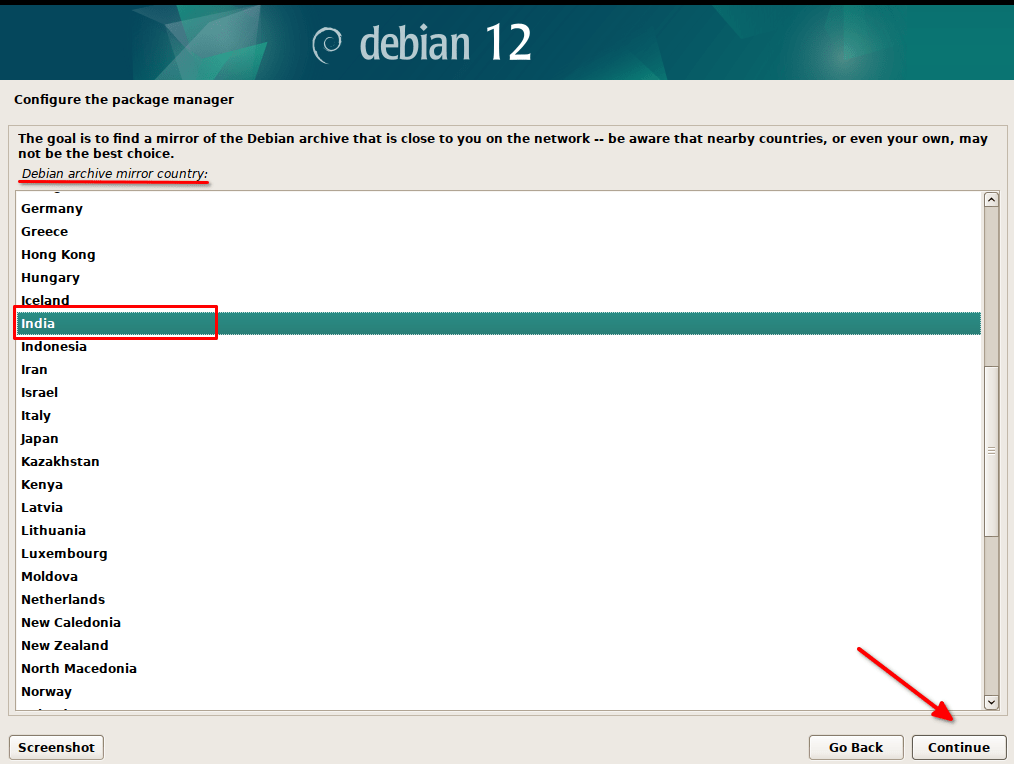
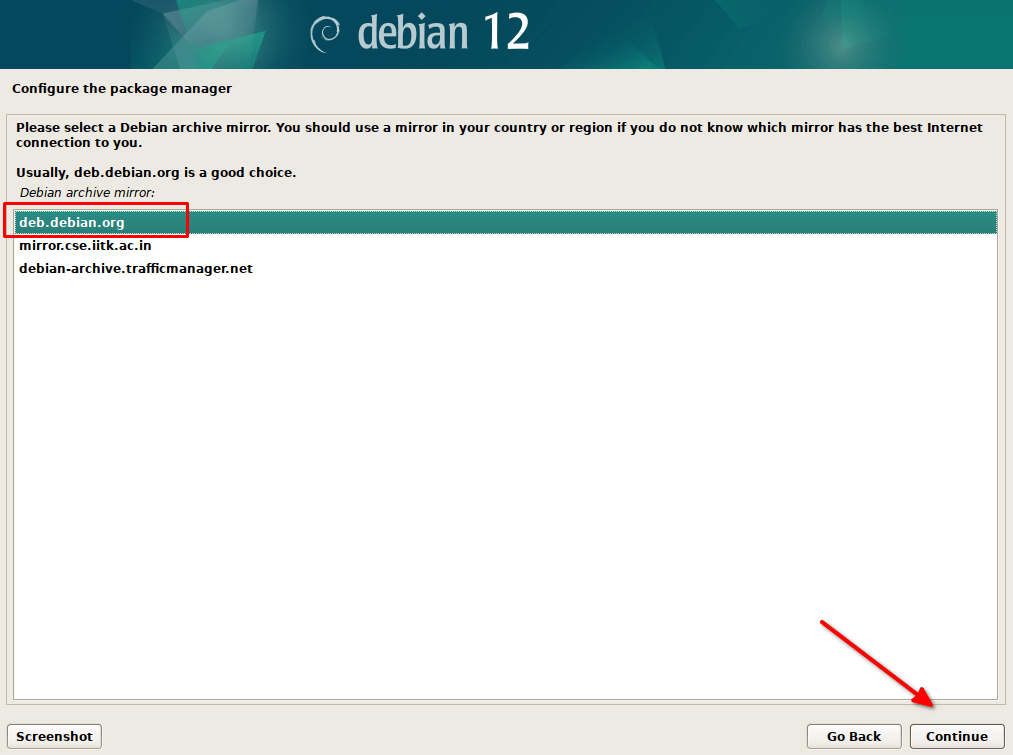
Choose any of the Debian archive mirrors. Mostly go with the “deb.debian.org” mirror and the installer recommends it too.
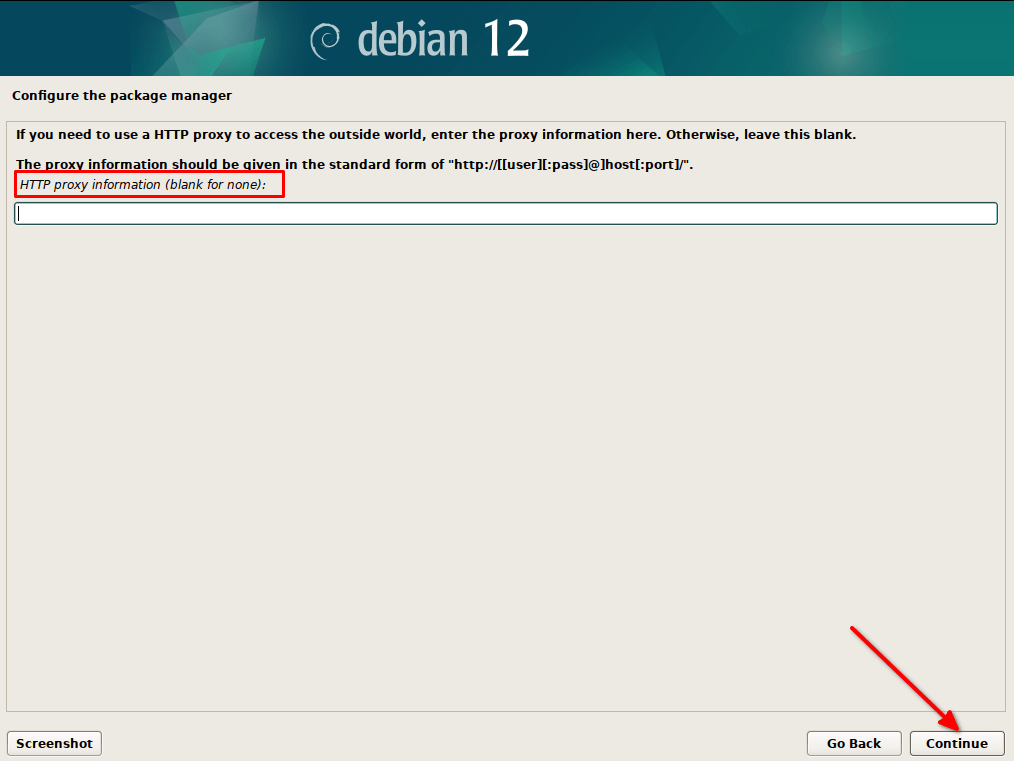
If you are using a proxy to connect to the internet then enter the proxy information in the next window. Click continue if no proxy is required.
STEP 15 – In this step, you will get an option to participate in the package survey. If you choose “Yes” the operating system will anonymously send statistics about the list of packages used to the developers. I choose “No” and click continue to move to the next step.
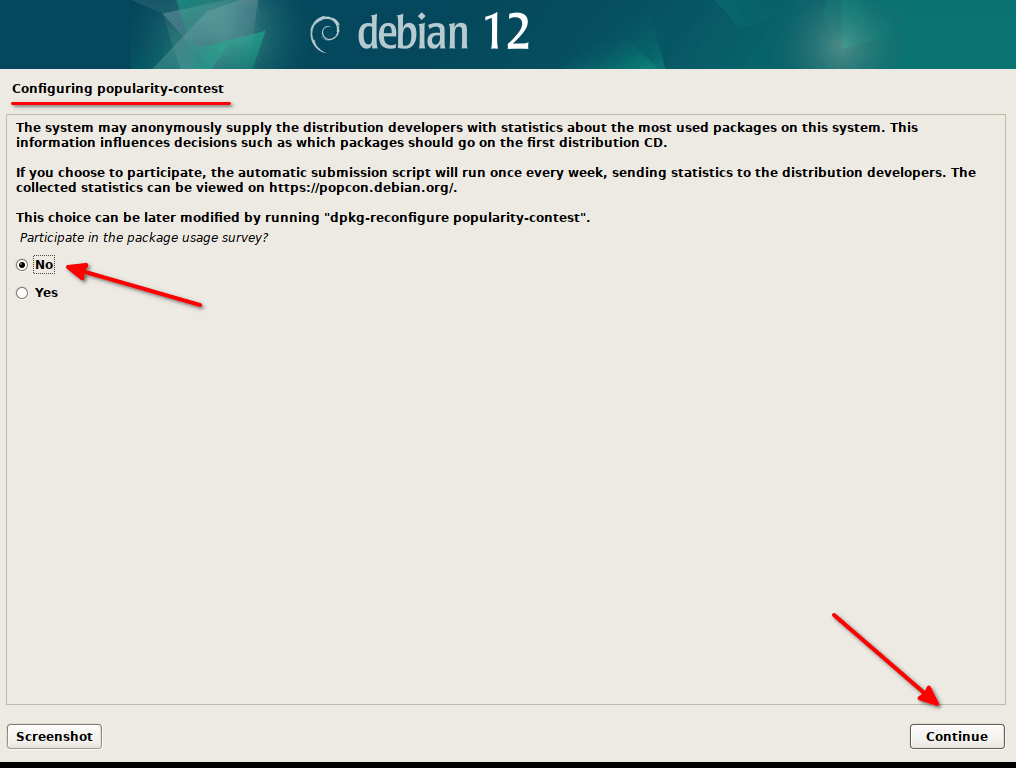
You can also change the configuration from “Yes” to “No” from within the operating system by running the following command.
$ dpkg-reconfigure popularity-contest
STEP 16 – In this section, you will choose the preferred desktop environment and other utilities that are required. I am choosing “Xfce” and “Standard System Utilities”. The installer will install all the selected packages.
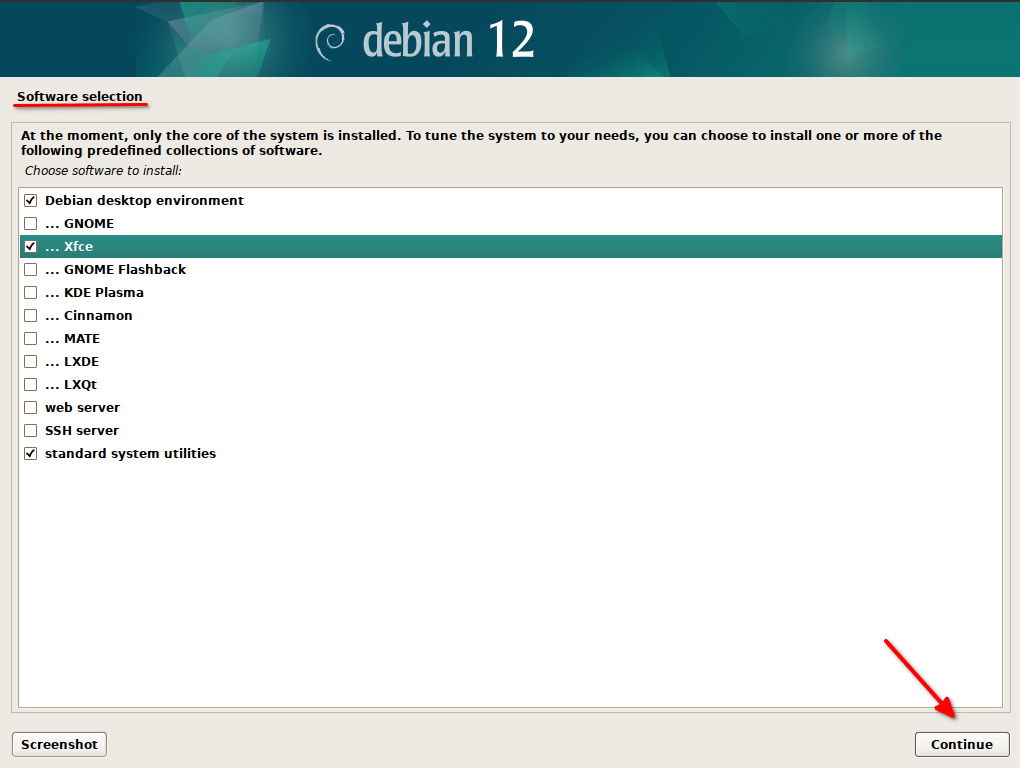
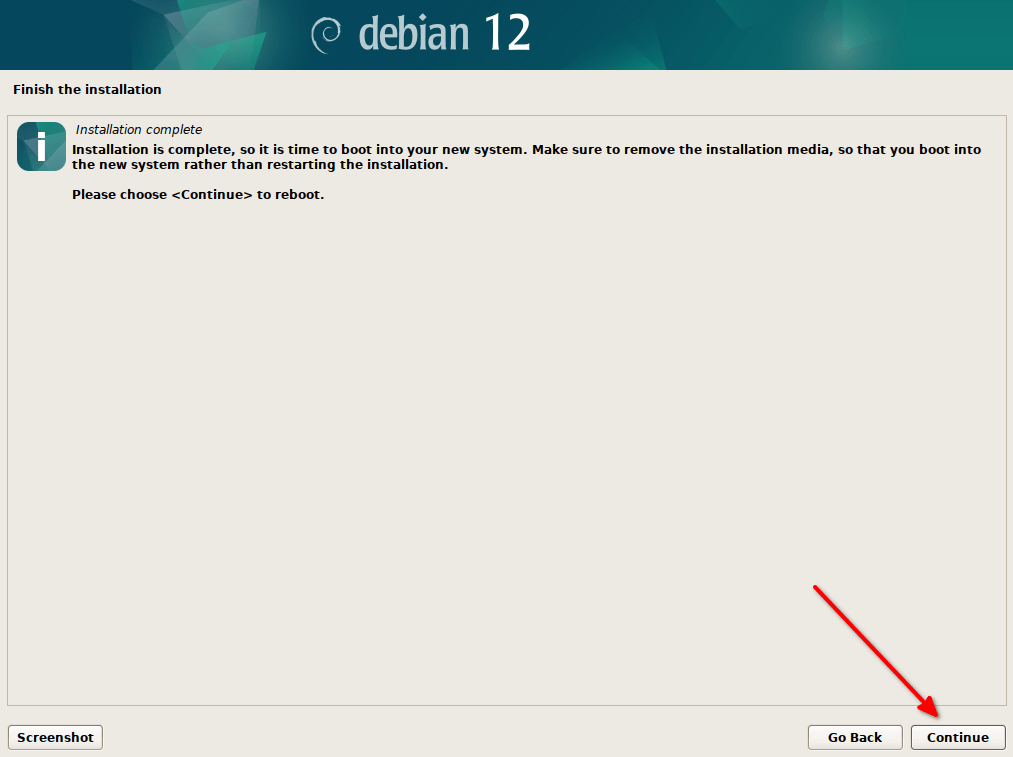
Now wait for the installer to do its job. During the installation, the installer will automatically install the GRUB boot loader and scan for other operating systems. An entry will be automatically made in the GRUB boot loader for any detected operating system. In this case, it will be Windows.

Once the installation is completed, click “Continue” which will automatically restart the machine.
STEP 17 – Post reboot you will be taken to the GRUB screen where you can choose between Windows and Debian operating system.
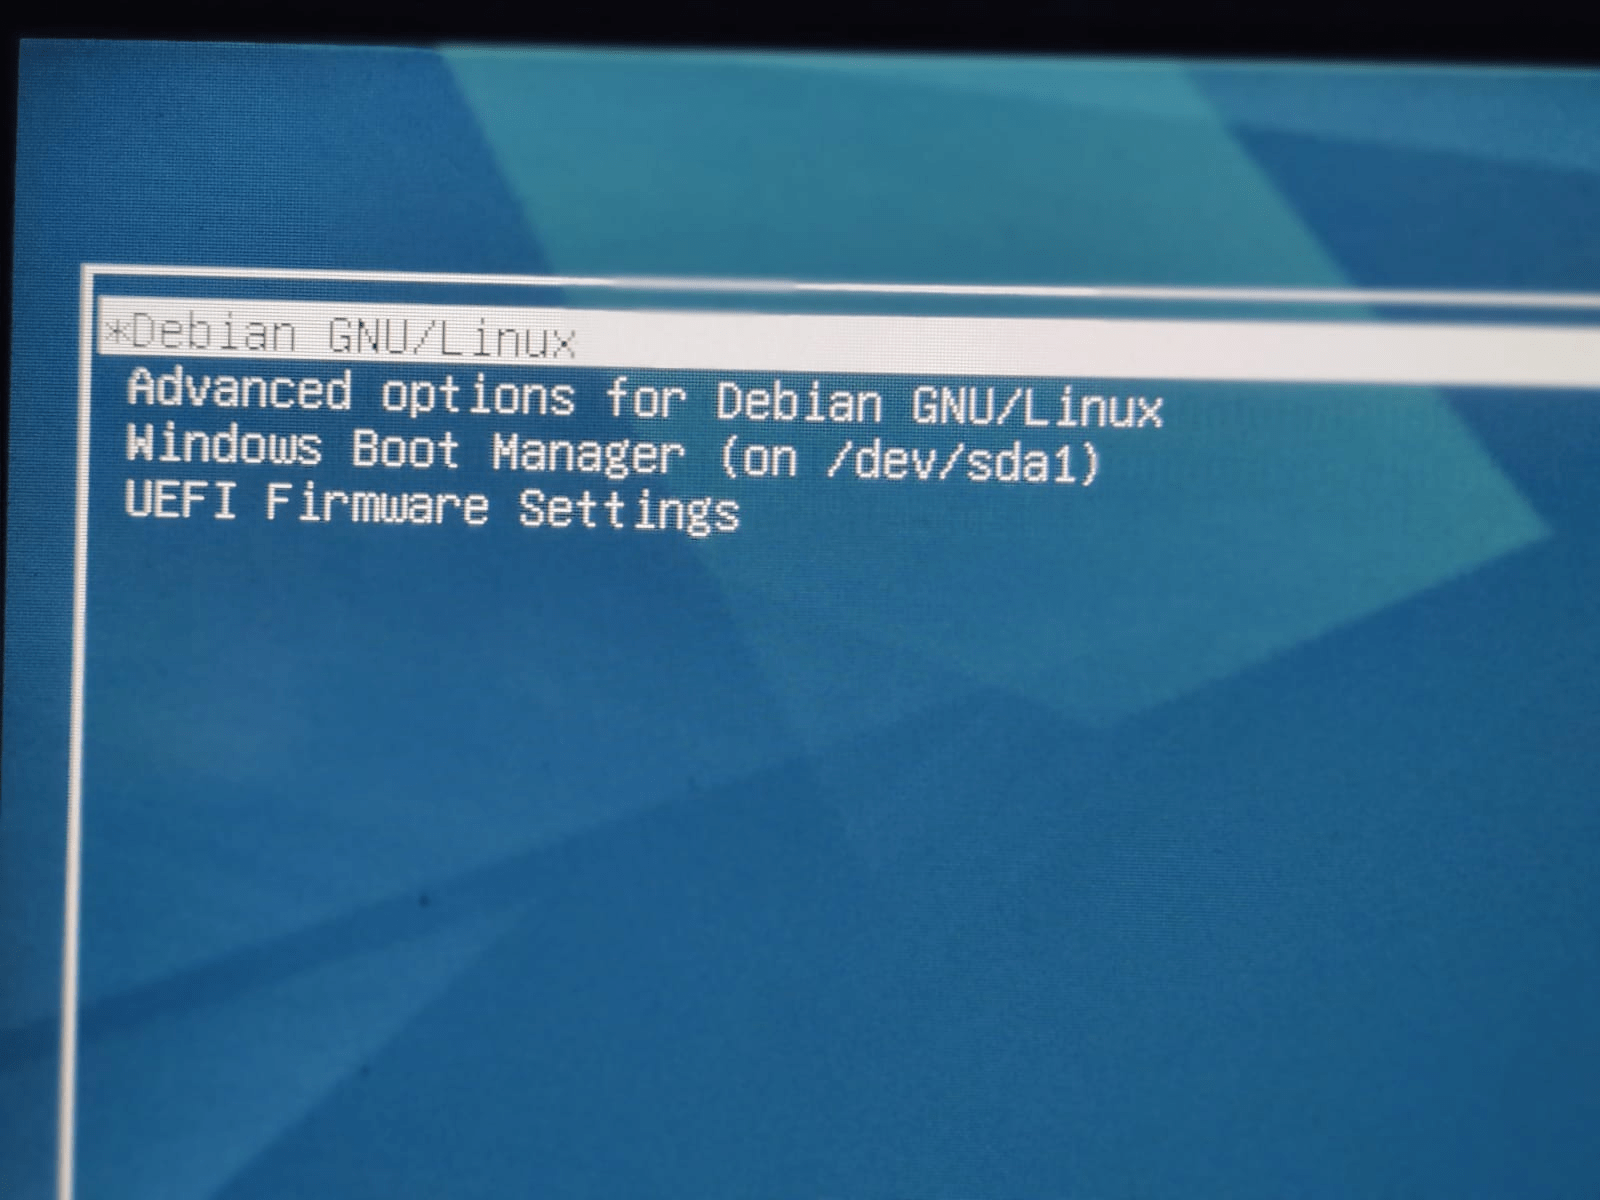
Choose “Debian GNU/Linux” which will load the Debian operating system and take you to the login screen. Log in with the non-administrative account you created during the installation.
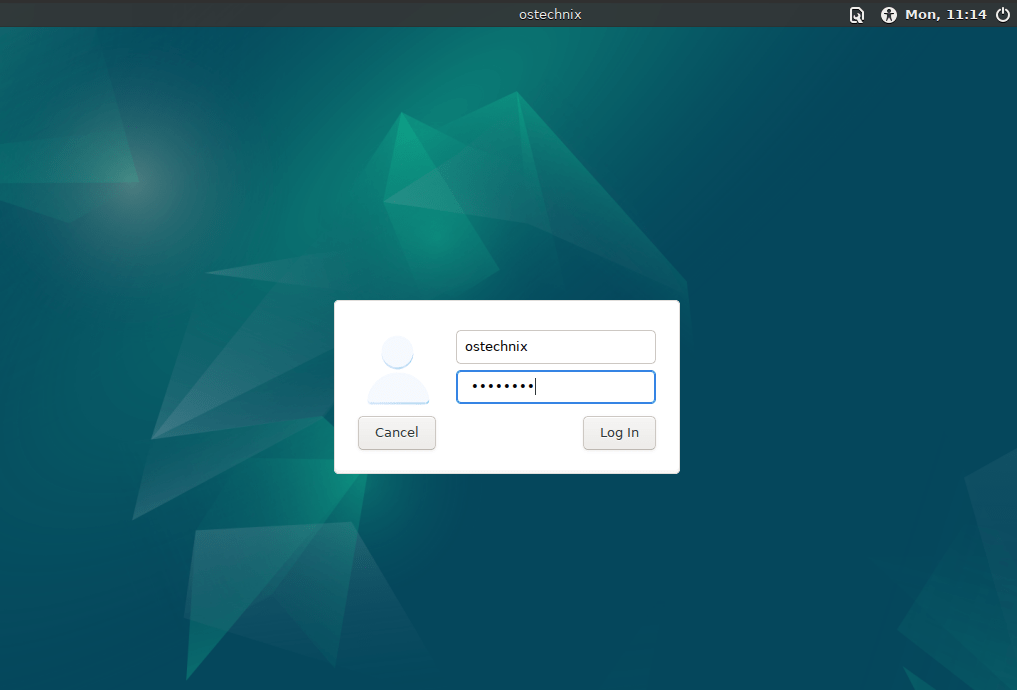
Welcome to Debian 12 with XFCE Desktop environment!
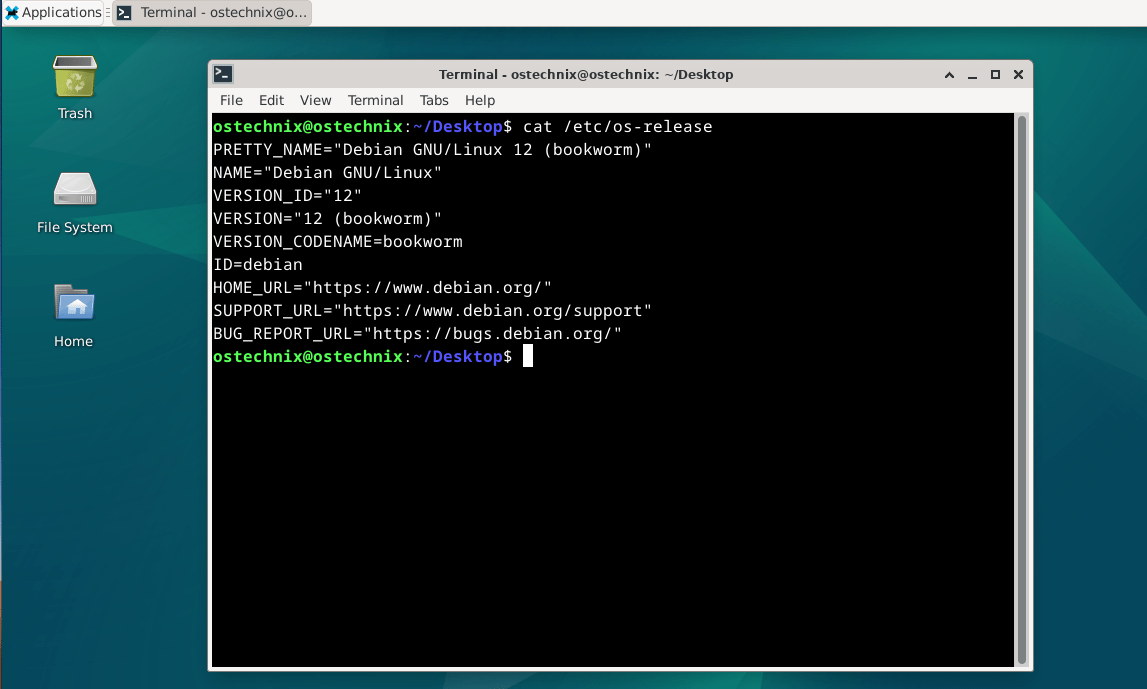
You can log in to Windows once to see if everything works fine on the Windows side.
Frequently Asked Questions
Here’s FAQ for Dual boot Debian and Windows setup.
A: Yes, it is possible to dual boot Debian and Windows on the same computer. By partitioning your hard drive and installing each operating system on a separate partition, you can enjoy the benefits of both.
A: There is no strict order for installing Debian and Windows. However, it is generally recommended to install Windows first and then Debian. This ensures that the Windows bootloader is properly configured to handle the dual boot setup.
A: The system requirements for dual booting Debian and Windows are typically the same as those required by each individual operating system. Ensure that your computer meets the minimum hardware specifications for both Debian and Windows.
A: Yes, with a dual boot setup, you can access files from one operating system while using the other. Both Debian and Windows can read files stored on the shared partitions, allowing seamless file exchange between the two operating systems. We already have a posted guide to share files between Windows and Linux by accessing Linux partitions from Windows using a third-party application.
A: As far as I know, YES. It is possible to resize the partitions after the dual boot setup. However, it is recommended to back up your data before resizing any partitions to avoid potential data loss.
A: During the boot process, a bootloader menu will appear, allowing you to choose the operating system you want to boot into. The specific bootloader and its appearance may vary depending on the setup, but popular options include GRUB or the Windows Boot Manager.
A: Yes, you can uninstall one of the operating systems if needed. However, removing an operating system from a dual boot setup requires careful consideration and should be done with caution to avoid any unintended consequences. It is recommended to back up your data and consult detailed guides or seek assistance before uninstalling an operating system. We have written a Step-by-Step guide to safely remove Linux from dual boot configuration.
A: Dual booting itself does not significantly impact the performance of either operating system. However, it is important to allocate sufficient resources (such as disk space, memory, and processing power) to each operating system to ensure optimal performance.
A: Yes, you can upgrade Debian or Windows without directly affecting the other operating system. However, it is always advisable to back up your important data before performing any major updates or upgrades to minimize the risk of data loss or compatibility issues.
A. Yes, the general procedure for dual booting can be applied to other Linux distributions as well. However, each distribution may have its own installation process and requirements. I recommend you to check on the respective operating system’s official documentation. We already have published “dual boot Pop!_OS and Windows”, “dual boot Fedora and Windows” and “Dual boot Ubuntu and Windows” guides.
Conclusion
We have successfully completed the installation of Debian 12 along with Windows 10 in dual boot mode. Setting up a dual boot system with Windows and Debian offers the flexibility to enjoy the benefits of both operating systems on a single machine.
Related Read:

