ADVERTISEMENT
The first task of an administrator who installs an operating system is bringing the server into the network after the OS installation. The server has to be configured with IP address so that it can be accessed over the network.
READ: How To Install CentOS 8 (With Screenshot)
READ: How To Install Red Hat Enterprise Linux 8 (With Screenshot)
Small organizations or home network sometimes uses DHCP enabled routers / DHCP server to assign an IP address to servers. But, bigger organizations use the static IP address for their servers.
Here, in this post, we will see how to configure static IP address in CentOS 8 / RHEL 8.
Configure Static IP Address
Contents
Let us configure the system for the following information.
IP Address: 192.168.1.10
Netmask: 255.255.255.0
Gateway (Router): 192.168.1.1
DNS Server 1: 192.168.1.1
DNS Server 2: 8.8.8.8
Domain Name: itzgeek.local
Check available network interfaces
Use any one of the below commands to list the available network interfaces on the system.
ifconfig -a
OR
ip a
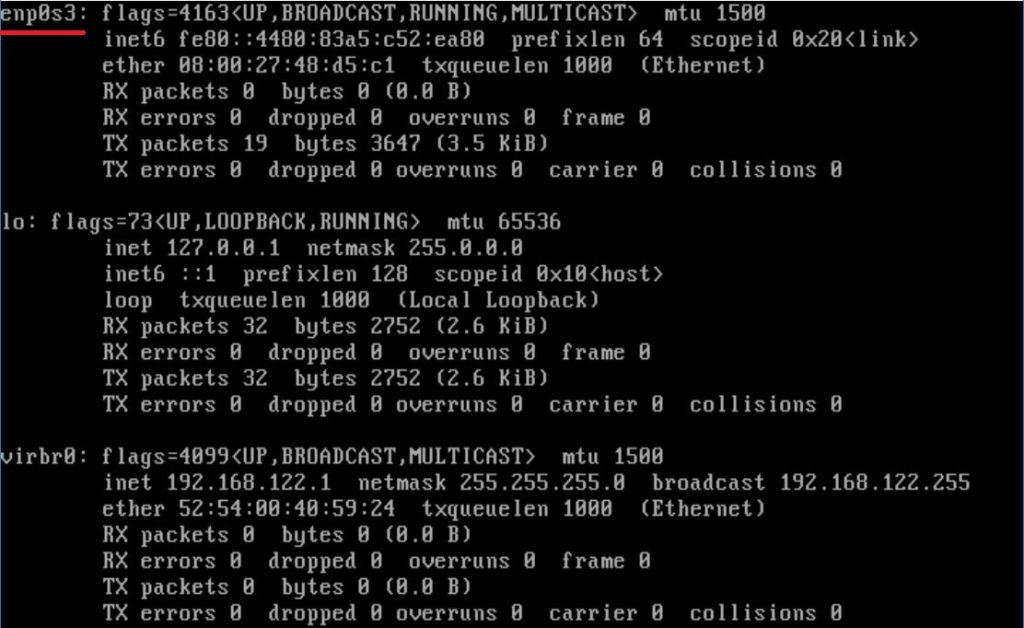
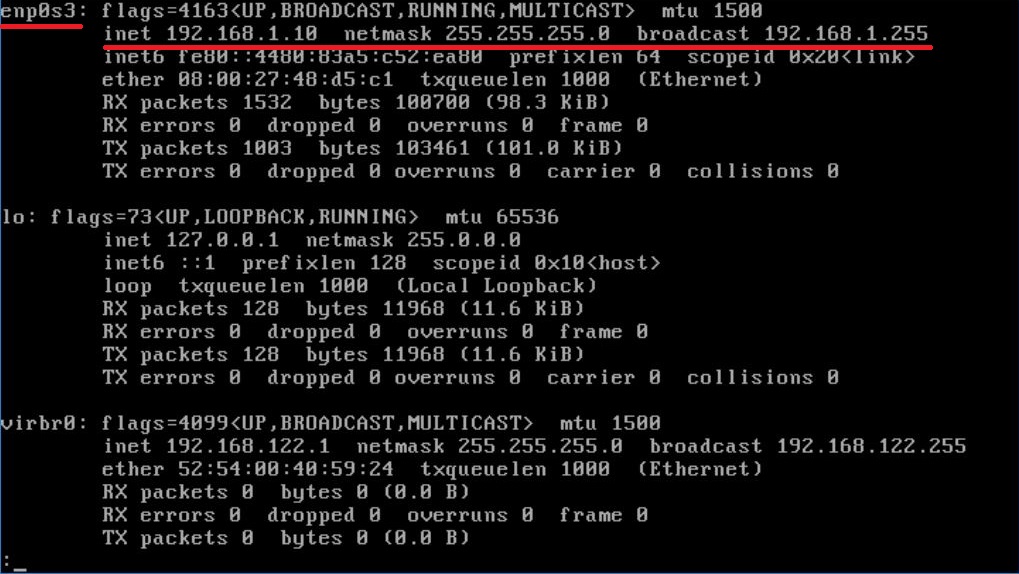
The output of ifconfig -a may look like below. Here, we will configure the static IP address for enp0s3.
Configure Static IP Address
We can set a static IP address to the network interface by using below methods.
1. Editing ifcfg file
2. Using nmtui tool
1. Editing ifcfg file
In this method, we will edit the network interface file ifcfg-ifname under /etc/sysconfig/network-scripts/ directory. For interface enp0s3, the file name would be ifcfg-enp0s3.
vi /etc/sysconfig/network-scripts/ifcfg-enp0s3
Set the IP address and other information as per your requirement.
ADVERTISEMENT
HWADDR=08:00:27:98:06:76
TYPE=Ethernet
PROXY_METHOD=none
BROWSER_ONLY=no
BOOTPROTO=none # Static IP Address
DEFROUTE=yes
IPV4_FAILURE_FATAL=no
IPV6INIT=yes
IPV6_AUTOCONF=yes
IPV6_DEFROUTE=yes
IPV6_FAILURE_FATAL=no
IPV6_ADDR_GEN_MODE=stable-privacy
NAME=enp0s3 # Connection Name
DEVICE=enp0s3  # Device Name
ONBOOT=yes # Activate on Boot
IPV6_PRIVACY=no
PEERDNS=no
UUID=3c36b8c2-334b-57c7-91b6-4401f3489c69
IPADDR=192.168.1.10 # IP Address
NETMASK=255.255.255.0 # NetMask
GATEWAY=192.168.1.1 # Gateway / Router
DNS1=192.168.1.1 # DNS Server 1
DNS2=8.8.8.8  # DNS Server 2
DOMAIN=itzgeek.local  # Default Domain Search
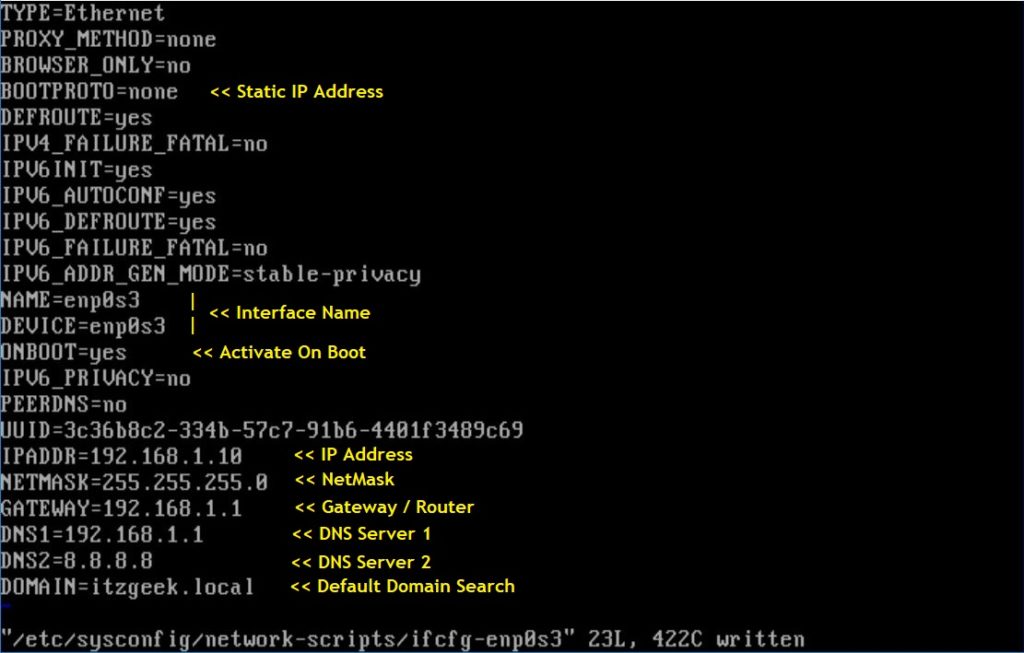
In RHEL 8, if you make changes in the ifcfg file, NetworkManager needs to be informed. To do that, reload the connection profile using the following command.
To reload all profiles:
nmcli connection reload
OR
To reload only changed file:
nmcli con load /etc/sysconfig/network-scripts/ifcfg-enp0s3
Then, bring up the network connection with the below command.
nmcli con up enp0s3
2. Using nmtui Tool
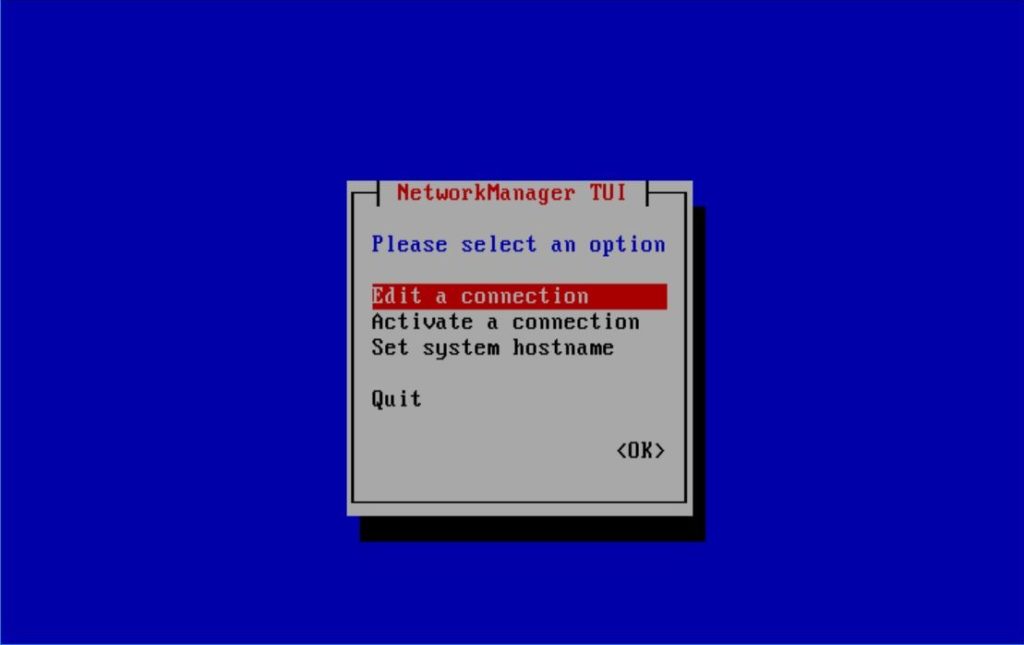
You can also use nmtui – the text-based user interface for configuring network interfaces.
nmtui
Select Edit a connection and press enter.
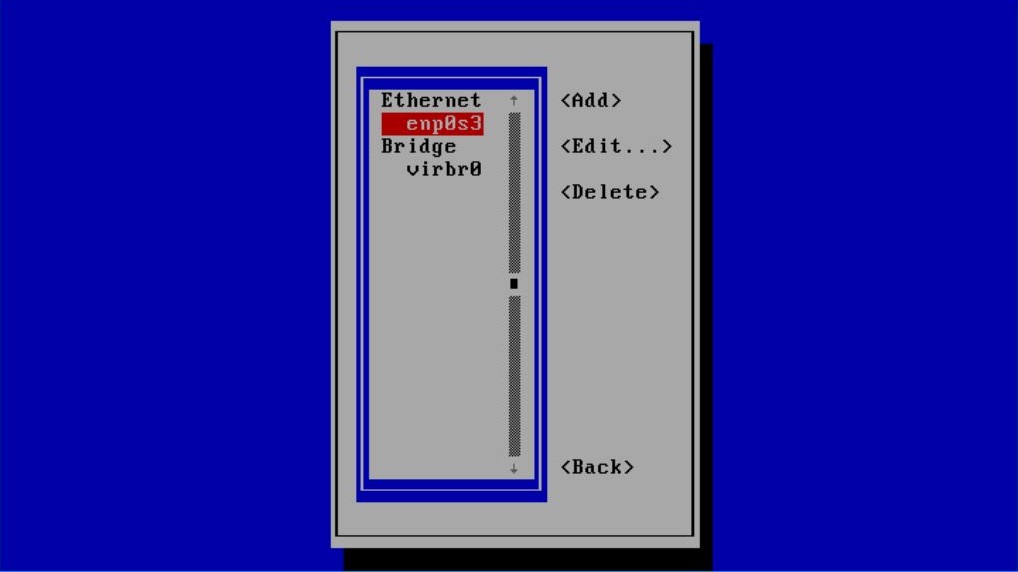
Choose the network interface and then press enter.
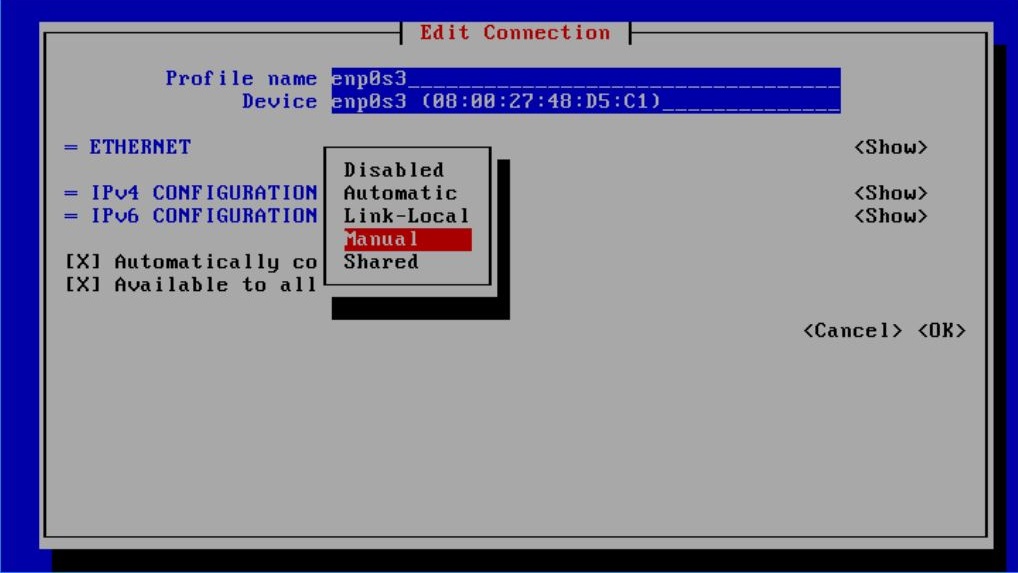
Tab to IPv4 CONFIGURATION and change it from Automatic to Manual.
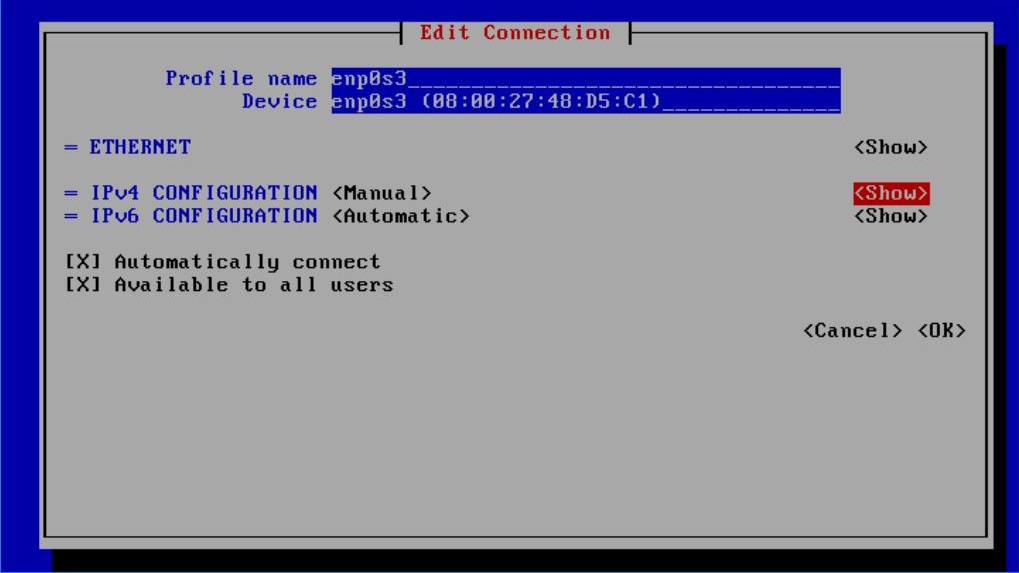
Tab to Show and press enter.
Set the IP address to the interface as per your requirement.
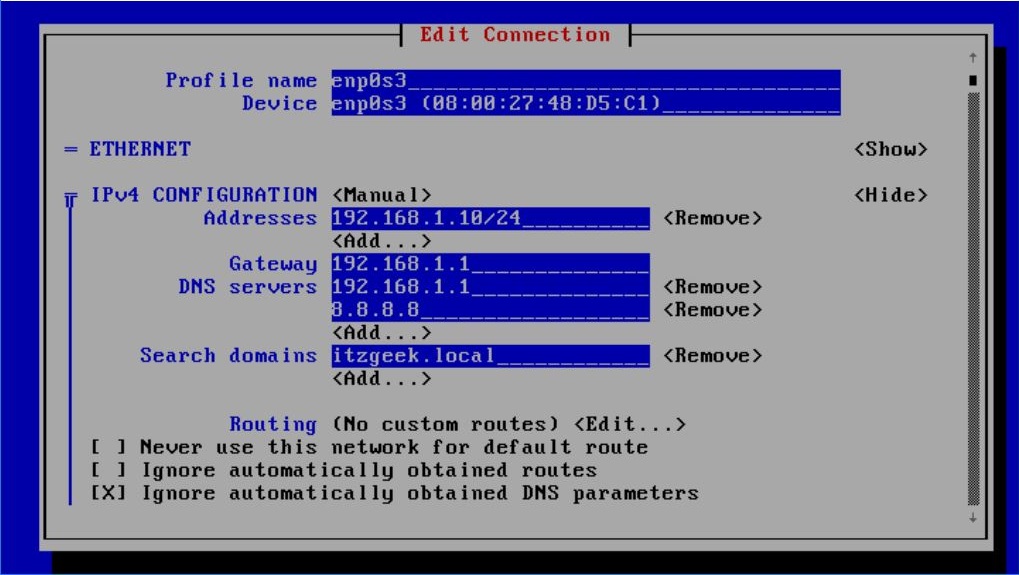
Use down arrow key to scroll down, and tab to OK and press enter to finish the IP configuration.
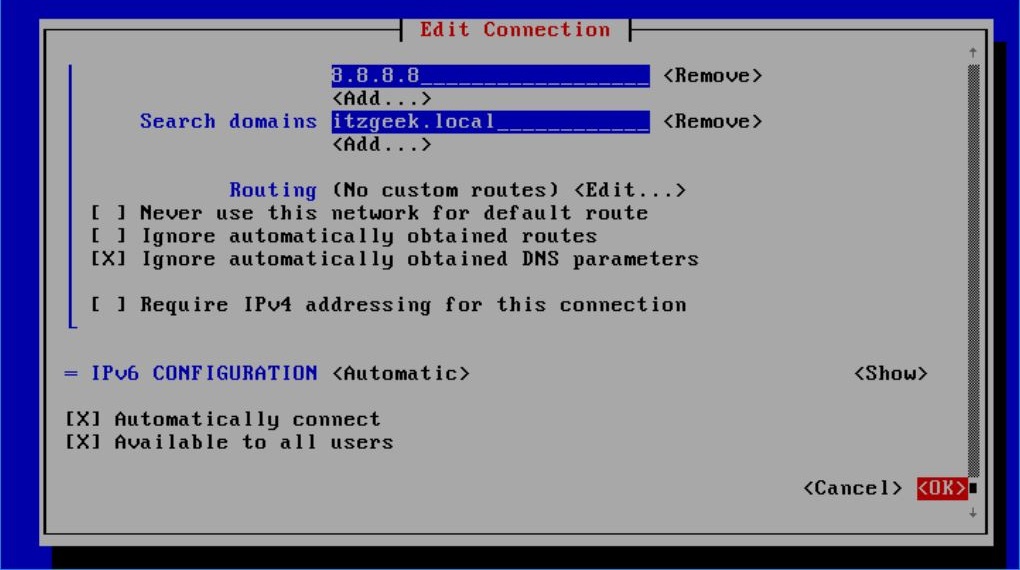
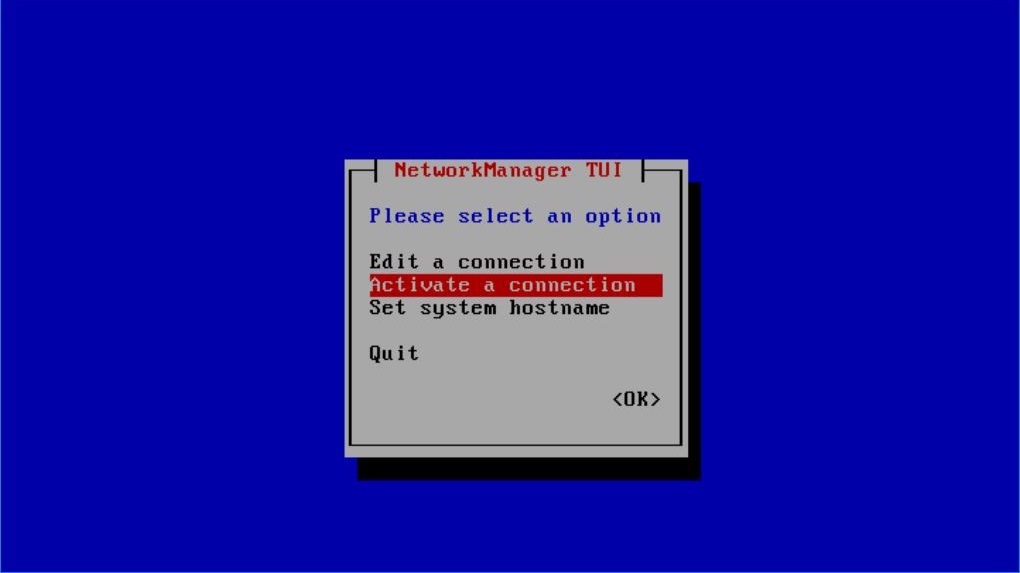
Press ESC key go to the connections.
Select Activate a connection and press enter.
ADVERTISEMENT
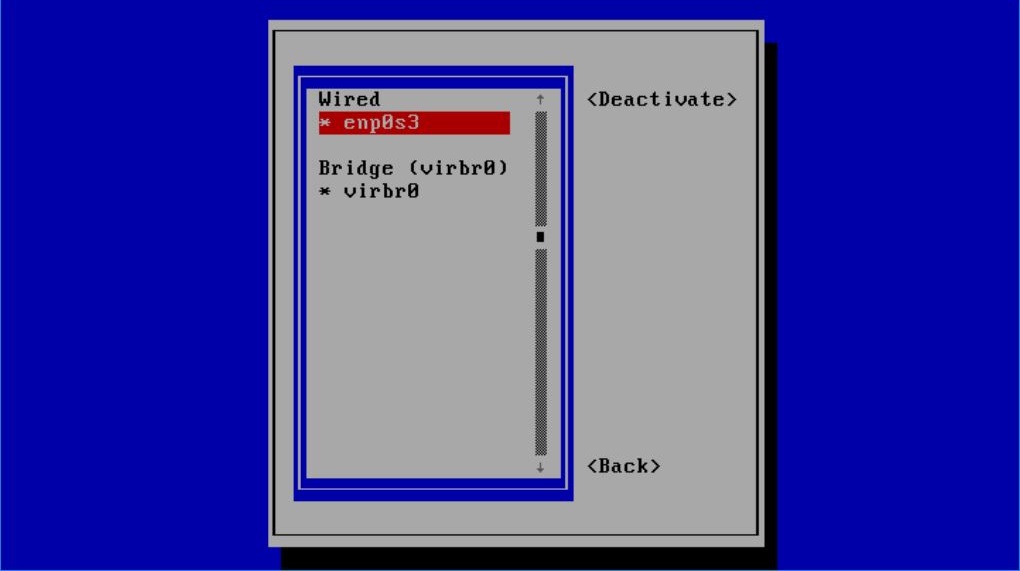
Select the network interface name and press enter to Deactivate the network interface.
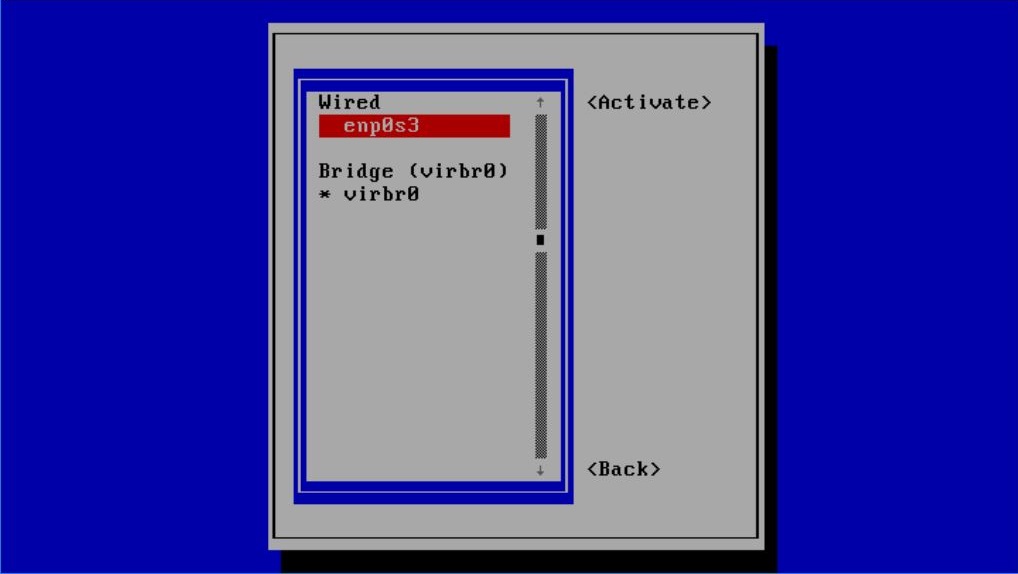
Press enter again to Activate the network interface.
Verify Static IP Address
Use ifconfig -a command to verify the IP address.
Also, verify the DNS server entries.
cat /etc/resolv.conf
Output:

Conclusion
That’s All. You have successfully configured a static IP address to a network interface in CentOS 8 / RHEL 8. Please share your feedback in the comments section.


