Nginx is an open-source, high-performance web server. It is known for its stability, very simple configuration, rich feature set, and low resource consumption.
Nginx lets you use it as a reverse proxy, load balancer, HTTP cache, and mail proxy.
This post shows you how to install Nginx on CentOS 8 / RHEL 8 with PHP support (through PHP-FPM) and MariaDB support.
THIS DOCUMENT IS ALSO AVAILABLE FOR
PHP-FPM is an alternative PHP FastCGI implementation. It has additional features that are useful for sites of any size, especially busier sites.
Install Linux
Contents
Follow the links to install a Linux operating system
READ: How To Install CentOS 8 (With Screenshot)
READ: How To Install Red Hat Enterprise Linux 8 (With Screenshot) or Upgrade from RHEL 7 to RHEL 8.
By now, you should have a Linux system ready with you. Now, we will install Nginx, MariaDB, and PHP-FPM on top of it.
Log in into the system as the root user or switch to the root user.
$ su -
Install Nginx
Install Nginx using Base Repository
In RHEL 8, Nginx is available in the rhel-8-for-x86_64-appstream-rpms repository. So, we do not need to set up the Nginx repository manually.
Install Nginx using the YUM command.
yum -y install nginx
Install Nginx using Nginx’s Official Repository
Add Nginx repository to your system.
### CentOS 8 ### cat << EOF > /etc/yum.repos.d/nginx.repo
[nginx-mainline]
name=nginx mainline repo
baseurl=http://nginx.org/packages/mainline/centos/8/x86_64/
gpgcheck=1
enabled=1
gpgkey=https://nginx.org/keys/nginx_signing.key
EOF ### RHEL 8 ### cat << EOF > /etc/yum.repos.d/nginx.repo
[nginx-mainline]
name=nginx mainline repo
baseurl=http://nginx.org/packages/mainline/rhel/8/x86_64/
gpgcheck=1
enabled=1
gpgkey=https://nginx.org/keys/nginx_signing.key
EOF
Install Nginx from Nginx’s official repository by temporarily disabling AppStream repository.
yum install -y nginx --disablerepo=* --enablerepo=nginx-mainline
Start the Nginx web server service after the installation.
systemctl start nginx
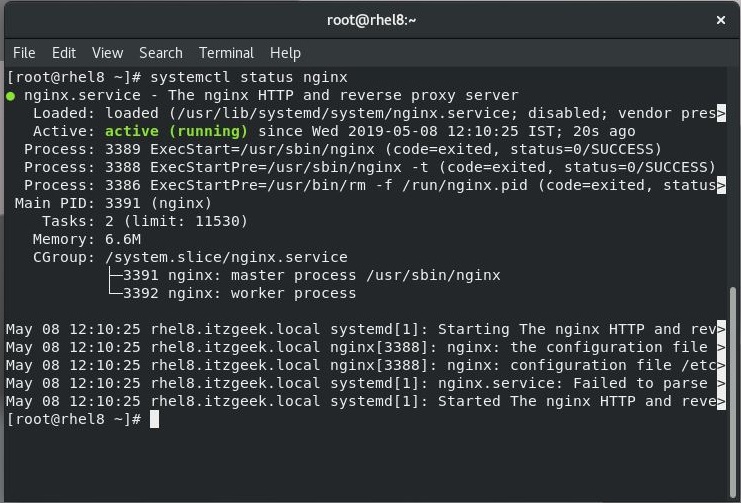
Check the status Nginx web server service using the below command.
ADVERTISEMENT
systemctl status nginx
Firewall
Allow web requests flow through the firewall by executing the below commands.
firewall-cmd --permanent --add-service=http firewall-cmd --reload
SELinux
If you get any error for SELinux on Nginx logs, here is the tutorial on setting SELinux policy for Nginx.
Else, you can temporarily disable the SELinux using the following command. But, we suggest you disable the SELinux permanently.
setenforce 0 sed -i 's/SELINUX=enforcing/SELINUX=disabled/g' /etc/selinux/config
Verify Nginx Installation
Open your web browser and visit the below URL.
http://your-ip-address
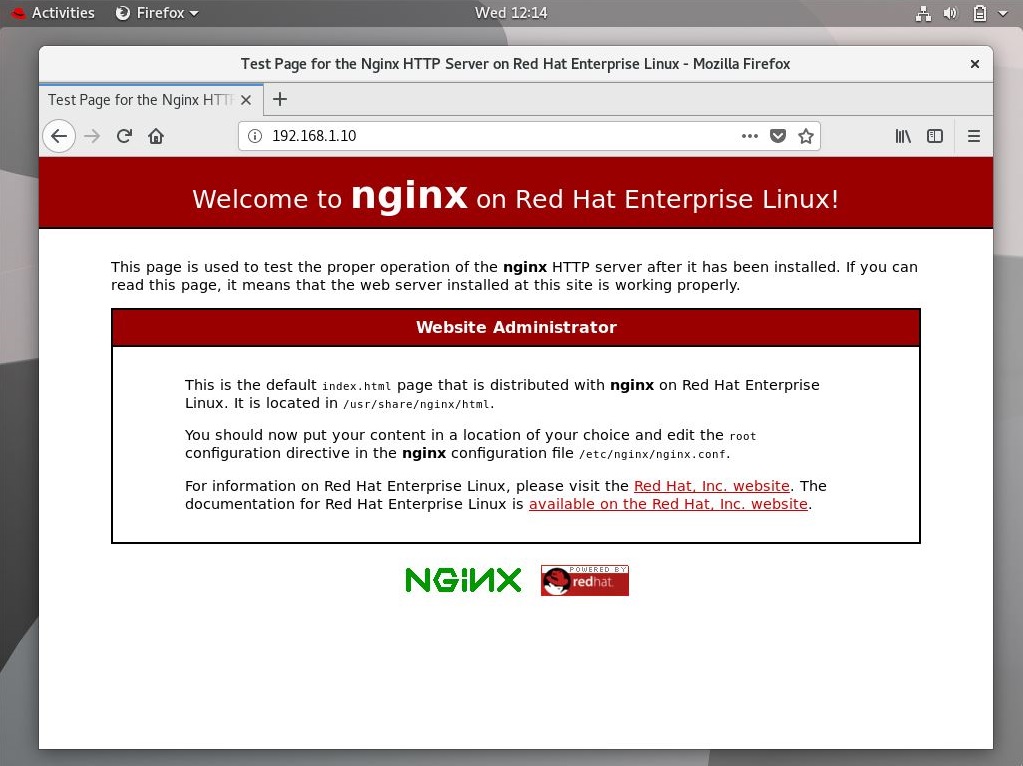
Installed Nginx from Red Hat repository:
You should see the following page Welcome to nginx on Red Hat Enterprise Linux. This page confirms you that the Ngnix web server is successfully installed on the server.
Installed Nginx using Nginx’s Official Repository:
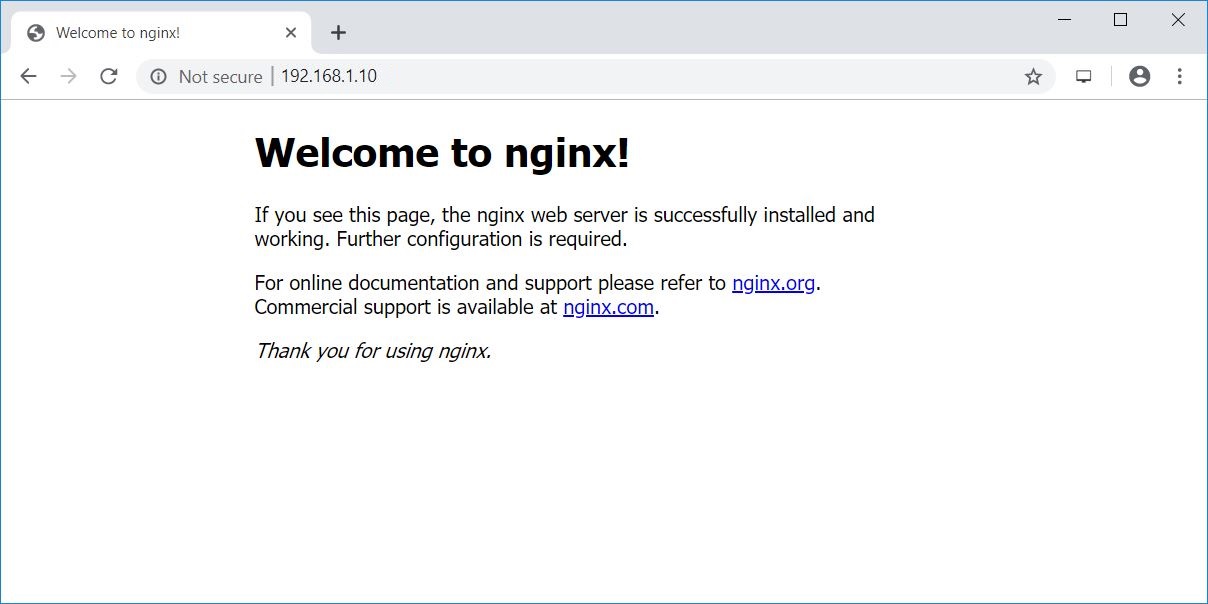
Enable the Nginx service at system startup.
systemctl enable nginx
Install MariaDB
CentOS 8 / RHEL 8 comes with MariaDB 10.3. Install the MariaDB server using the yum command.
You can also install MariaDB packages from the MariaDB community.
READ: How To Install MariaDB On CentOS 8 / RHEL 8
yum -y install mariadb mariadb-server
Start the MariaDB server using the following command.
systemctl start mariadb
Enable the MariaDB service to start automatically during system boot.
systemctl enable mariadb
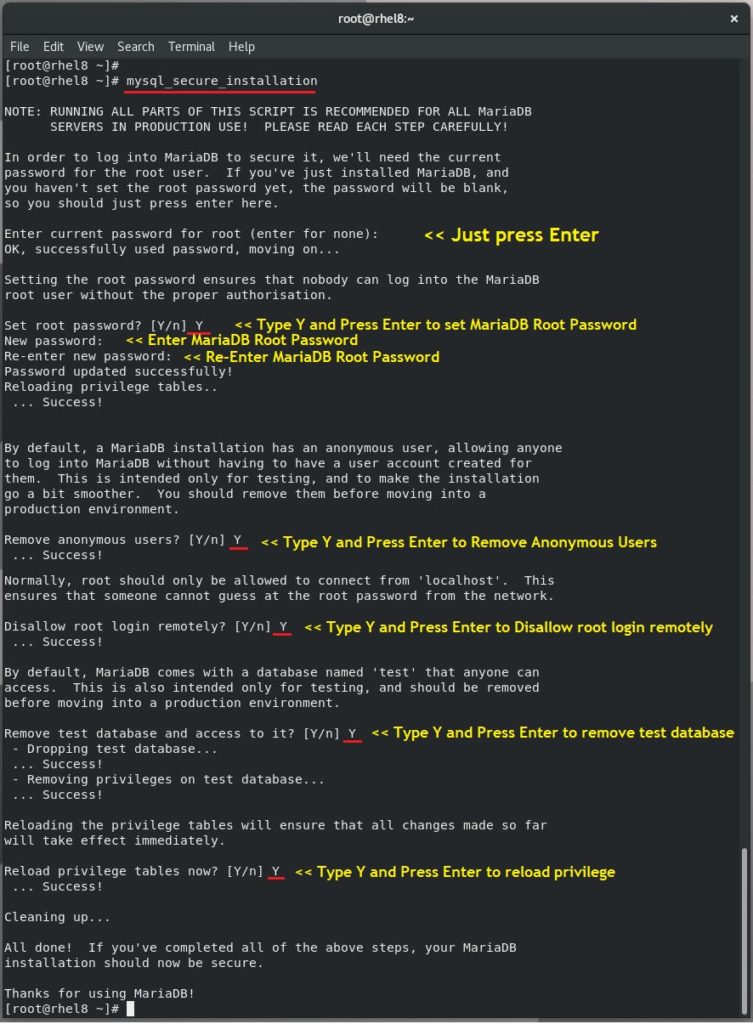
Once the MariaDB server installation is complete, run the mysql_secure_installation command to secure the MariaDB.
ADVERTISEMENT
Install PHP
CentOS 8 / RHEL 8 comes with PHP 7.2. Install the PHP through PHP-FPM (FastCGI Process Manager using YUM command.
If you can want, you can install PHP 7.3 using Remi repository.
READ: How To Install PHP 7.3 On CentOS 8 / RHEL 8
yum -y install php-fpm php-mysqlnd php-cli
Edit /etc/php.ini.
vi /etc/php.ini
set cgi.fix_pathinfo to 0.
cgi.fix_pathinfo=0
Edit /etc/php-fpm.d/www.conf file.
vi /etc/php-fpm.d/www.conf
Make sure the following values are UN-commented.
[.More.] pm.min_spare_servers = 5 [.More.] pm.max_spare_servers = 35 [.More.]
Change the Listen parameter.
FROM
listen = /run/php-fpm/www.sock
TO
listen = 127.0.0.1:9000
Then, start the PHP-FPM service.
systemctl start php-fpm
Enable PHP-FPM service to start automatically on system boot.
systemctl enable php-fpm
Enable PHP-FPM Support on Virtual Host
We will now create a virtual host on Nginx server for the following details to test the PHP.
Server Name: web.itzgeek.local
Document Root: /usr/share/nginx/html/web.itzgeek.local
Create a configuration file called web.itzgeek.local.conf under /etc/nginx/conf.d and edit it.
ADVERTISEMENT
vi /etc/nginx/conf.d/web.itzgeek.local.conf
Add the following content.
server { server_name web.itzgeek.local; root /usr/share/nginx/html/web.itzgeek.local; location / { index index.html index.htm index.php; } location ~ .php$ { include /etc/nginx/fastcgi_params; fastcgi_pass 127.0.0.1:9000; fastcgi_index index.php; fastcgi_param SCRIPT_FILENAME $document_root$fastcgi_script_name; }
}
Create a document root directory.
mkdir /usr/share/nginx/html/web.itzgeek.local
For testing the PHP, we will place a PHP file on to the document root of the created virtual host.
echo "<?php phpinfo(); ?>" > /usr/share/nginx/html/web.itzgeek.local/index.php
Restart the services.
systemctl restart nginx systemctl restart php-fpm
Test LEMP Stack
Create host entry for your web server domain (server.itzgeek.local) in the /etc/hosts (Linux) and hosts file (Windows).
192.168.1.10 web.itzgeek.local
Open a web browser and enter your domain in the address bar.
http://web.itzgeek.local
The page will look like below.
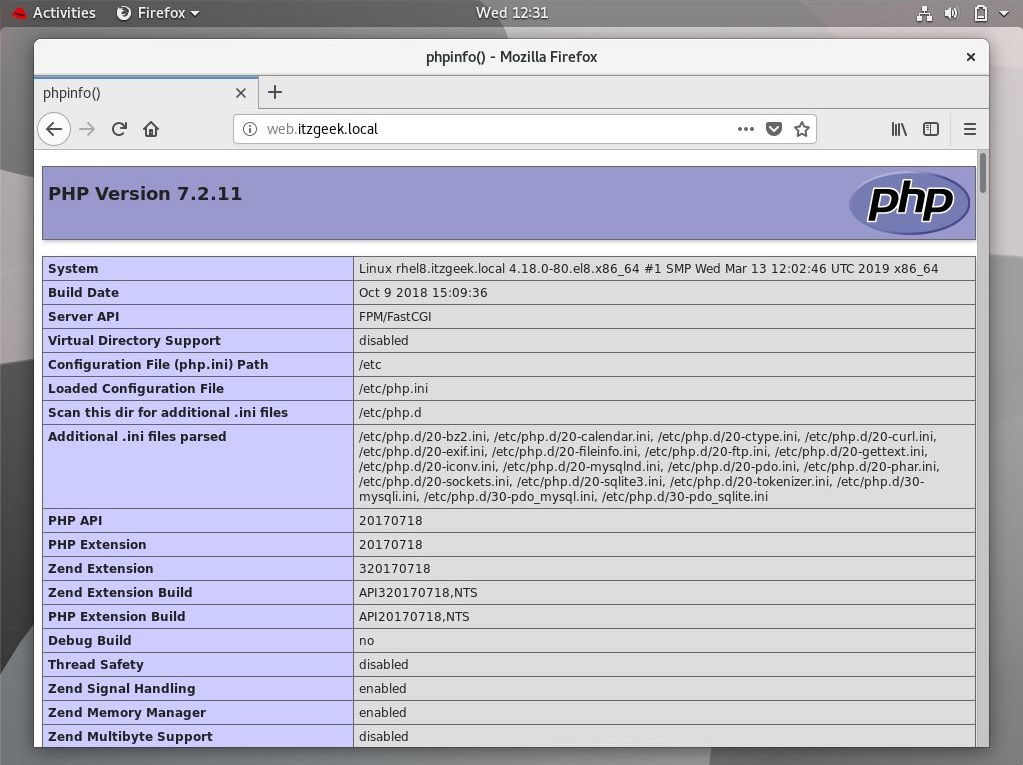
From the above screenshot, PHP is working as expected, and it’s working through FPM/FastCGI, as shown in the Server API line.
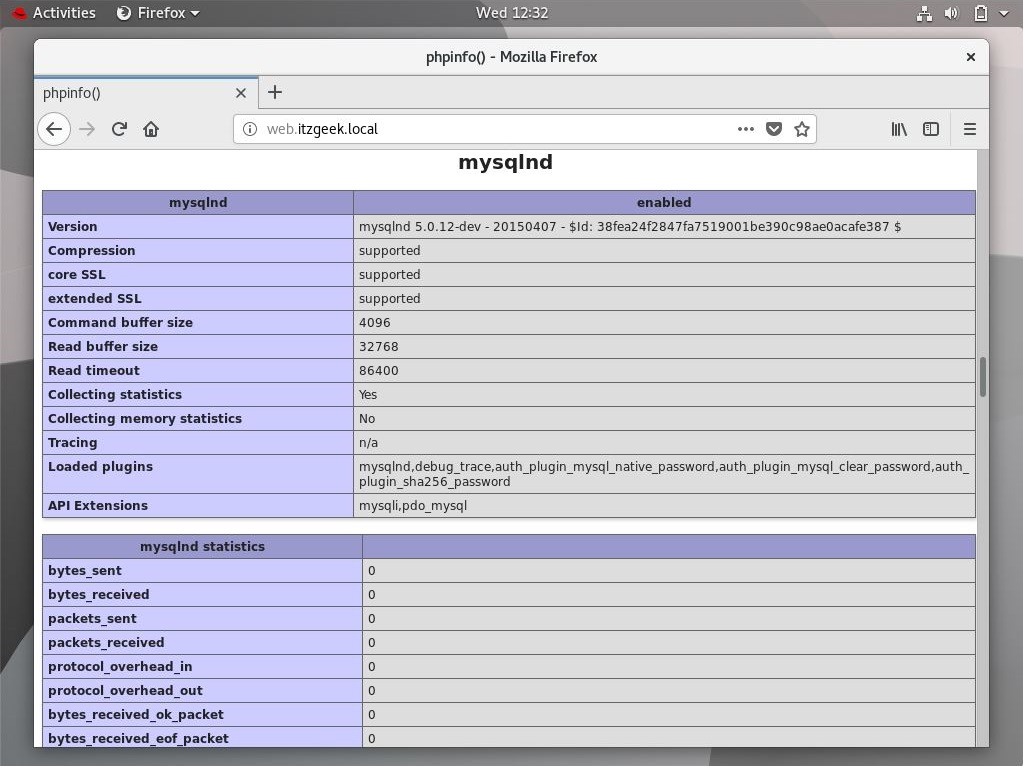
You can scroll the page further down to see the MariaDB support details.
Interested Topics
How To Setup Let’s Encrypt SSL with Nginx On CentOS 8 / RHEL 8
How To Install WordPress With Nginx On CentOS 8 / RHEL 8
How To Install phpMyAdmin With Nginx On CentOS 8 / RHEL 8
Conclusion
You have learned how to install LEMP stack on CentOS 8 / RHEL 8. Please share your feedback in the comments section.


