VMware Cloud Provider HubTM is the platform for VMware Cloud Provider partners (VCPP) to get access to VMware XaaS services. Currently the services we support are VMware Cloud on AWS allowing partners to go asset-light and VMware Log Intelligence , a simple and powerful log collection and analytics tool helping manage cloud operations. These services are made available using the VCPP Managed Service Provider (MSP) program commitment based constructs.
Here, we outline the steps cloud providers need to take to on-board and provision the services for their tenants.
The onboarding process consists of primarily two steps
- Master org creation
- Service activation for tenant , which is an easier automated way to onboard tenants and manage services and users
The steps to create the master org invitation are the same as in MSP 1.x and are as follows:
- Commit contract for the service (s) needs to have been created for the service provider email
- When the contract becomes active, an email is received for creating master org
- Providing a name for master organization, accepting ToS , confirming the payment method and providing master organization metadata creates a master organization for the provider
- *New* When another commit contract is created for the same service provider with the same email id, there will be no master org invitation sent. When the commit contract becomes active, it will be reflected in the payment method and that service tile will be enabled under ‘Services Available for provisioning’ when the provides logs in
Creating master org
Pre-requisites
- VCPP partner email is a registered email with MyVMware account. Partner email id used while creating commit contract MUST be a registered valid MyVMware account, with a complete profile and password. Make sure to verify by logging into MyVMware before providing this email for commit contract creation.
- The commit contract for the service created and has becomes active
Below are the steps for creating a master org
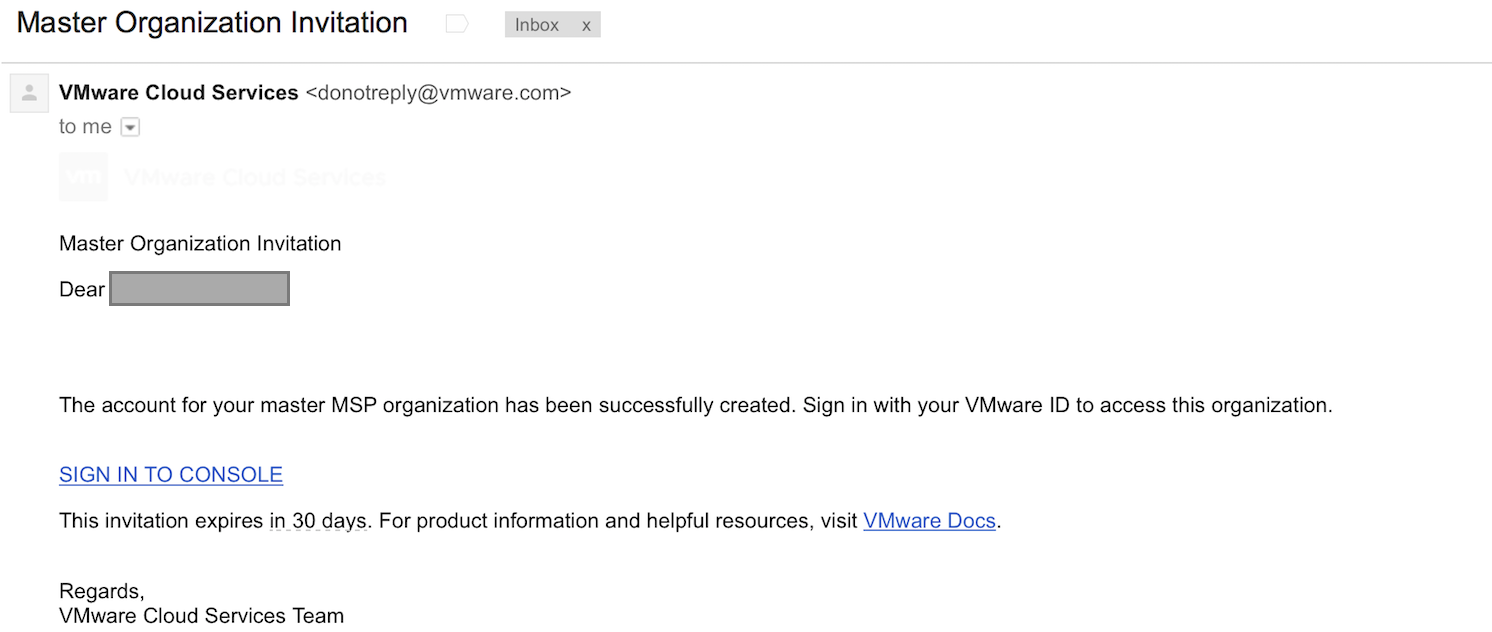
- When the commit contract becomes active, an email is automatically sent to the email id provided while signing the contract. Using this email, a master organization needs to be created first. It can take upto 30 minutes sometimes to be received after the commit contract becomes active.
-
- This link can be used only once and will expire in 30 days.
- It needs to be done once for a partner for the first commit contracts , when it becomes active.
- Once partner logs in VMware Cloud services using this link , he will able to create a new master Org which is the provider org . The activated commit contract is the default payment method for that org as well as any tenant org created under this provider org .
- Click on the onboarding email to login to VMware Cloud services console
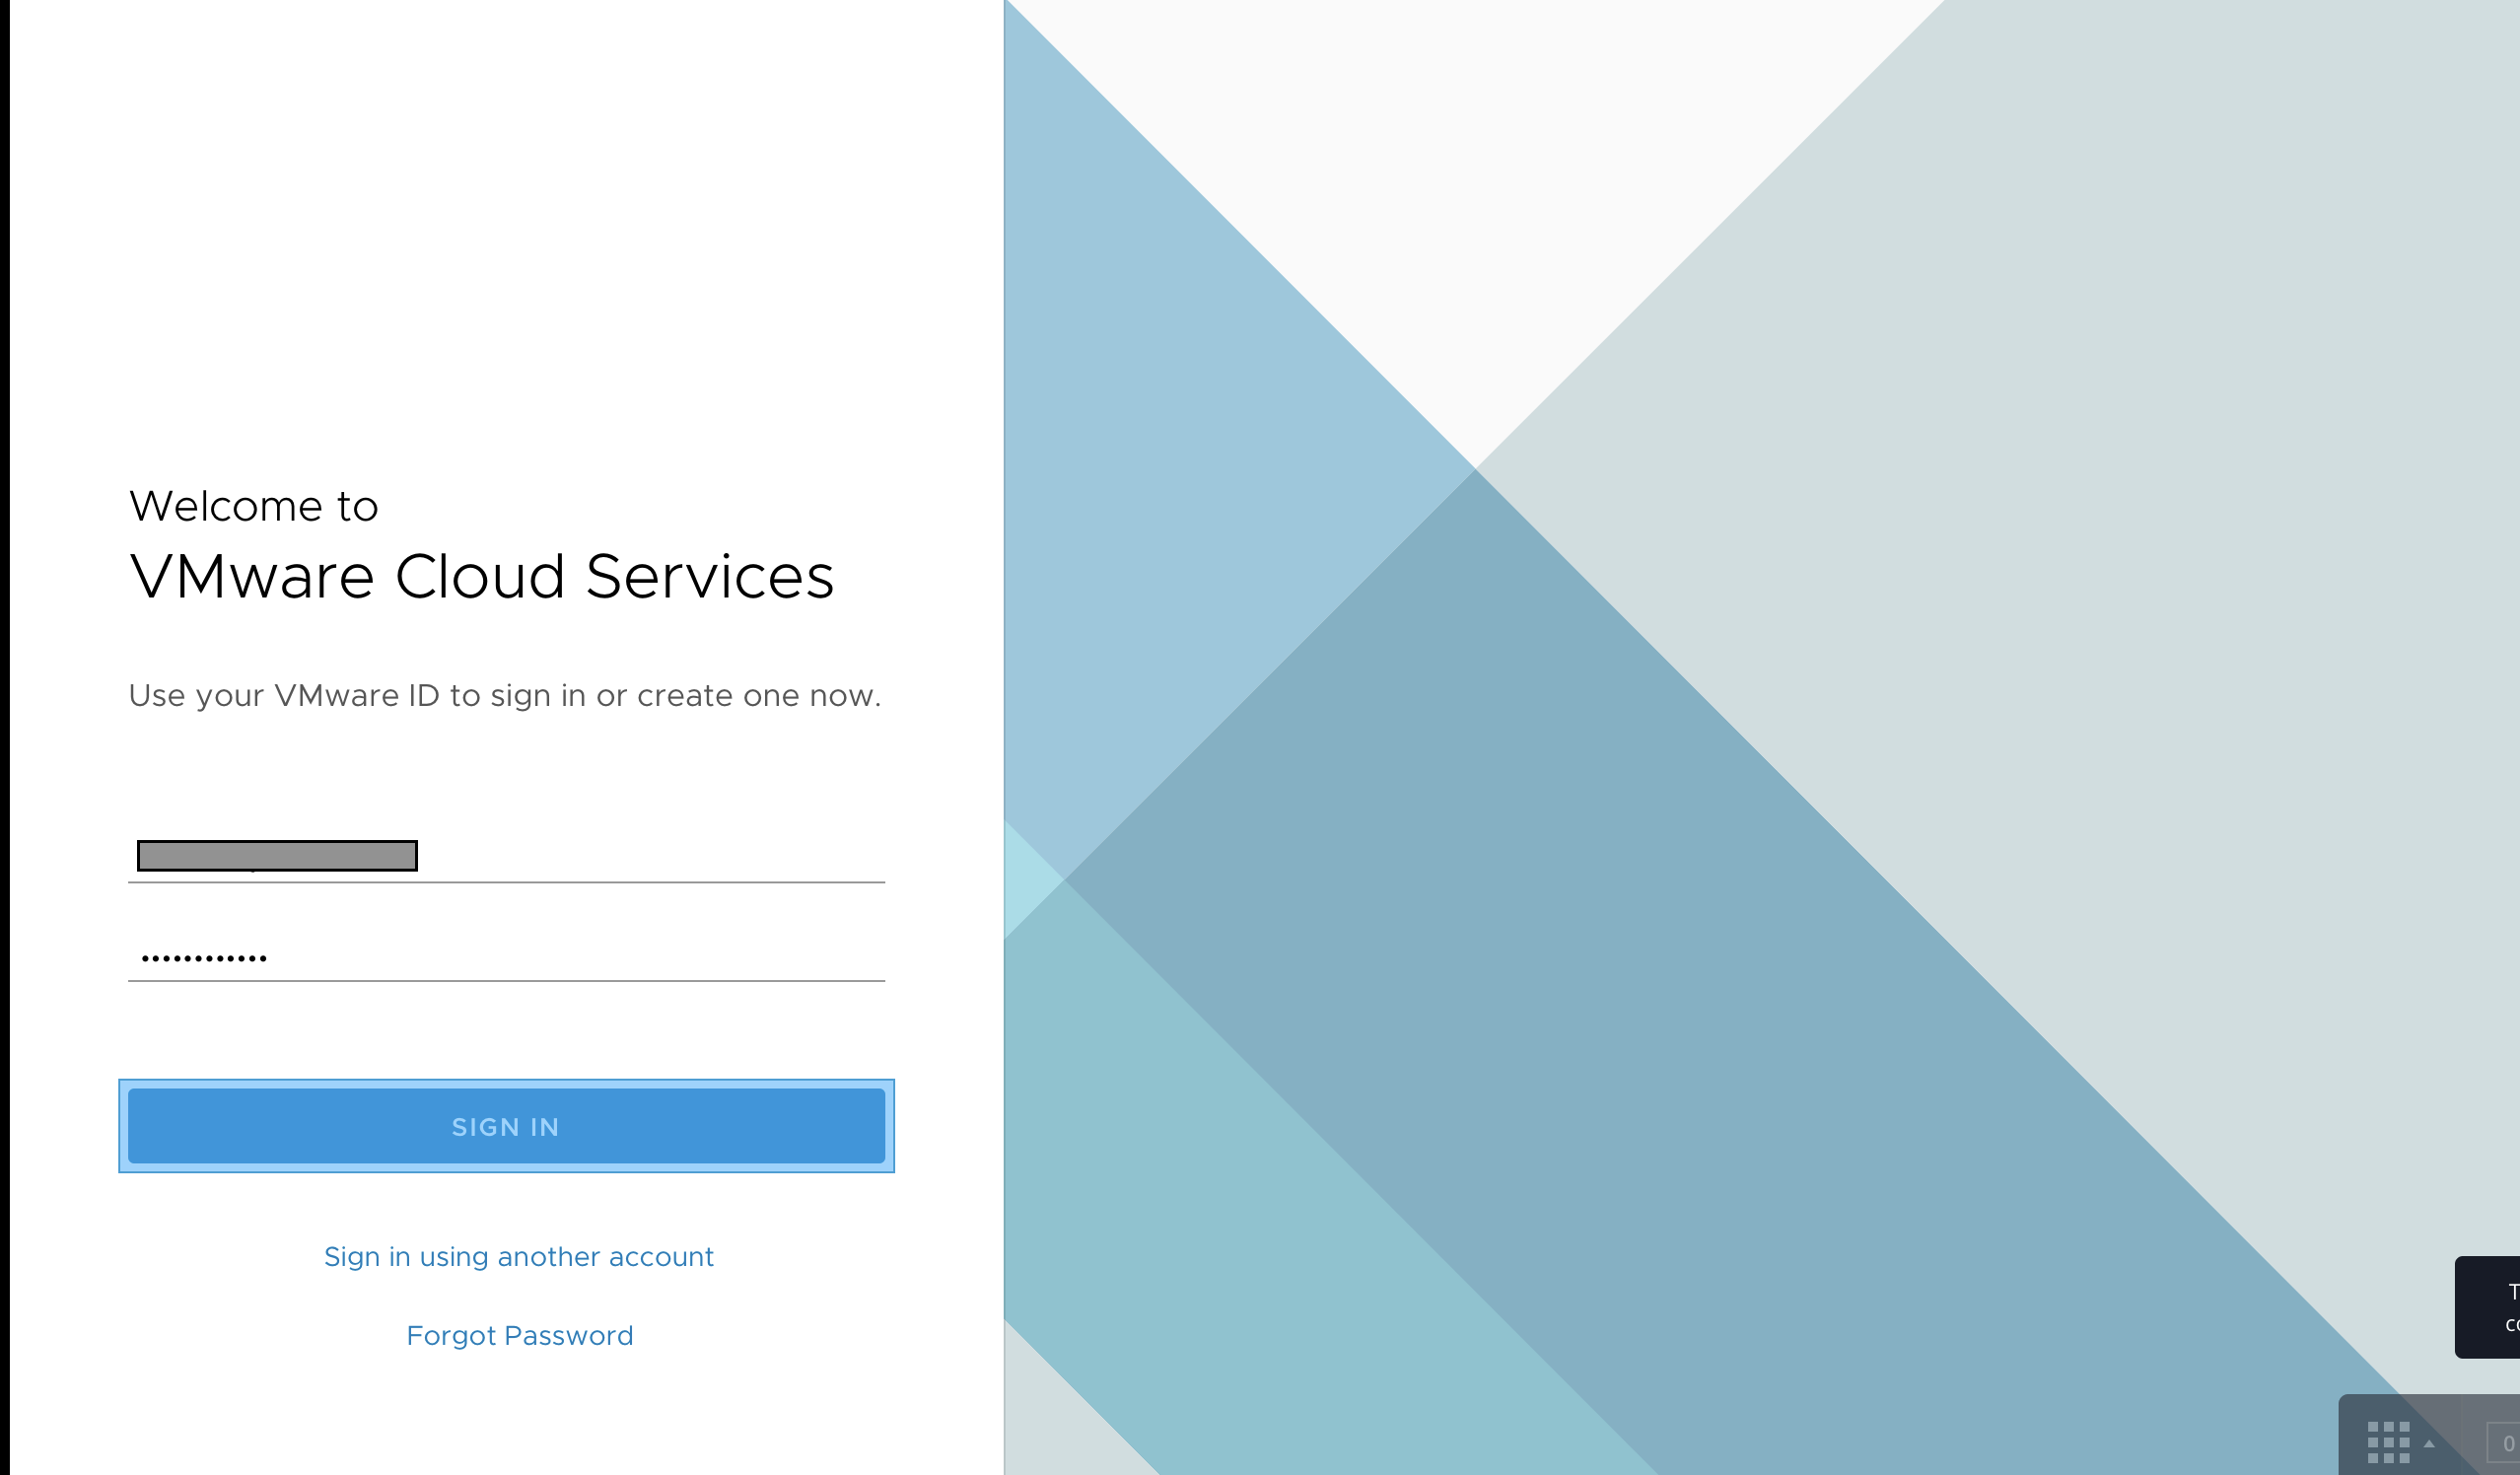
Note: VMware Cloud Provider Hub is available only in English at this time
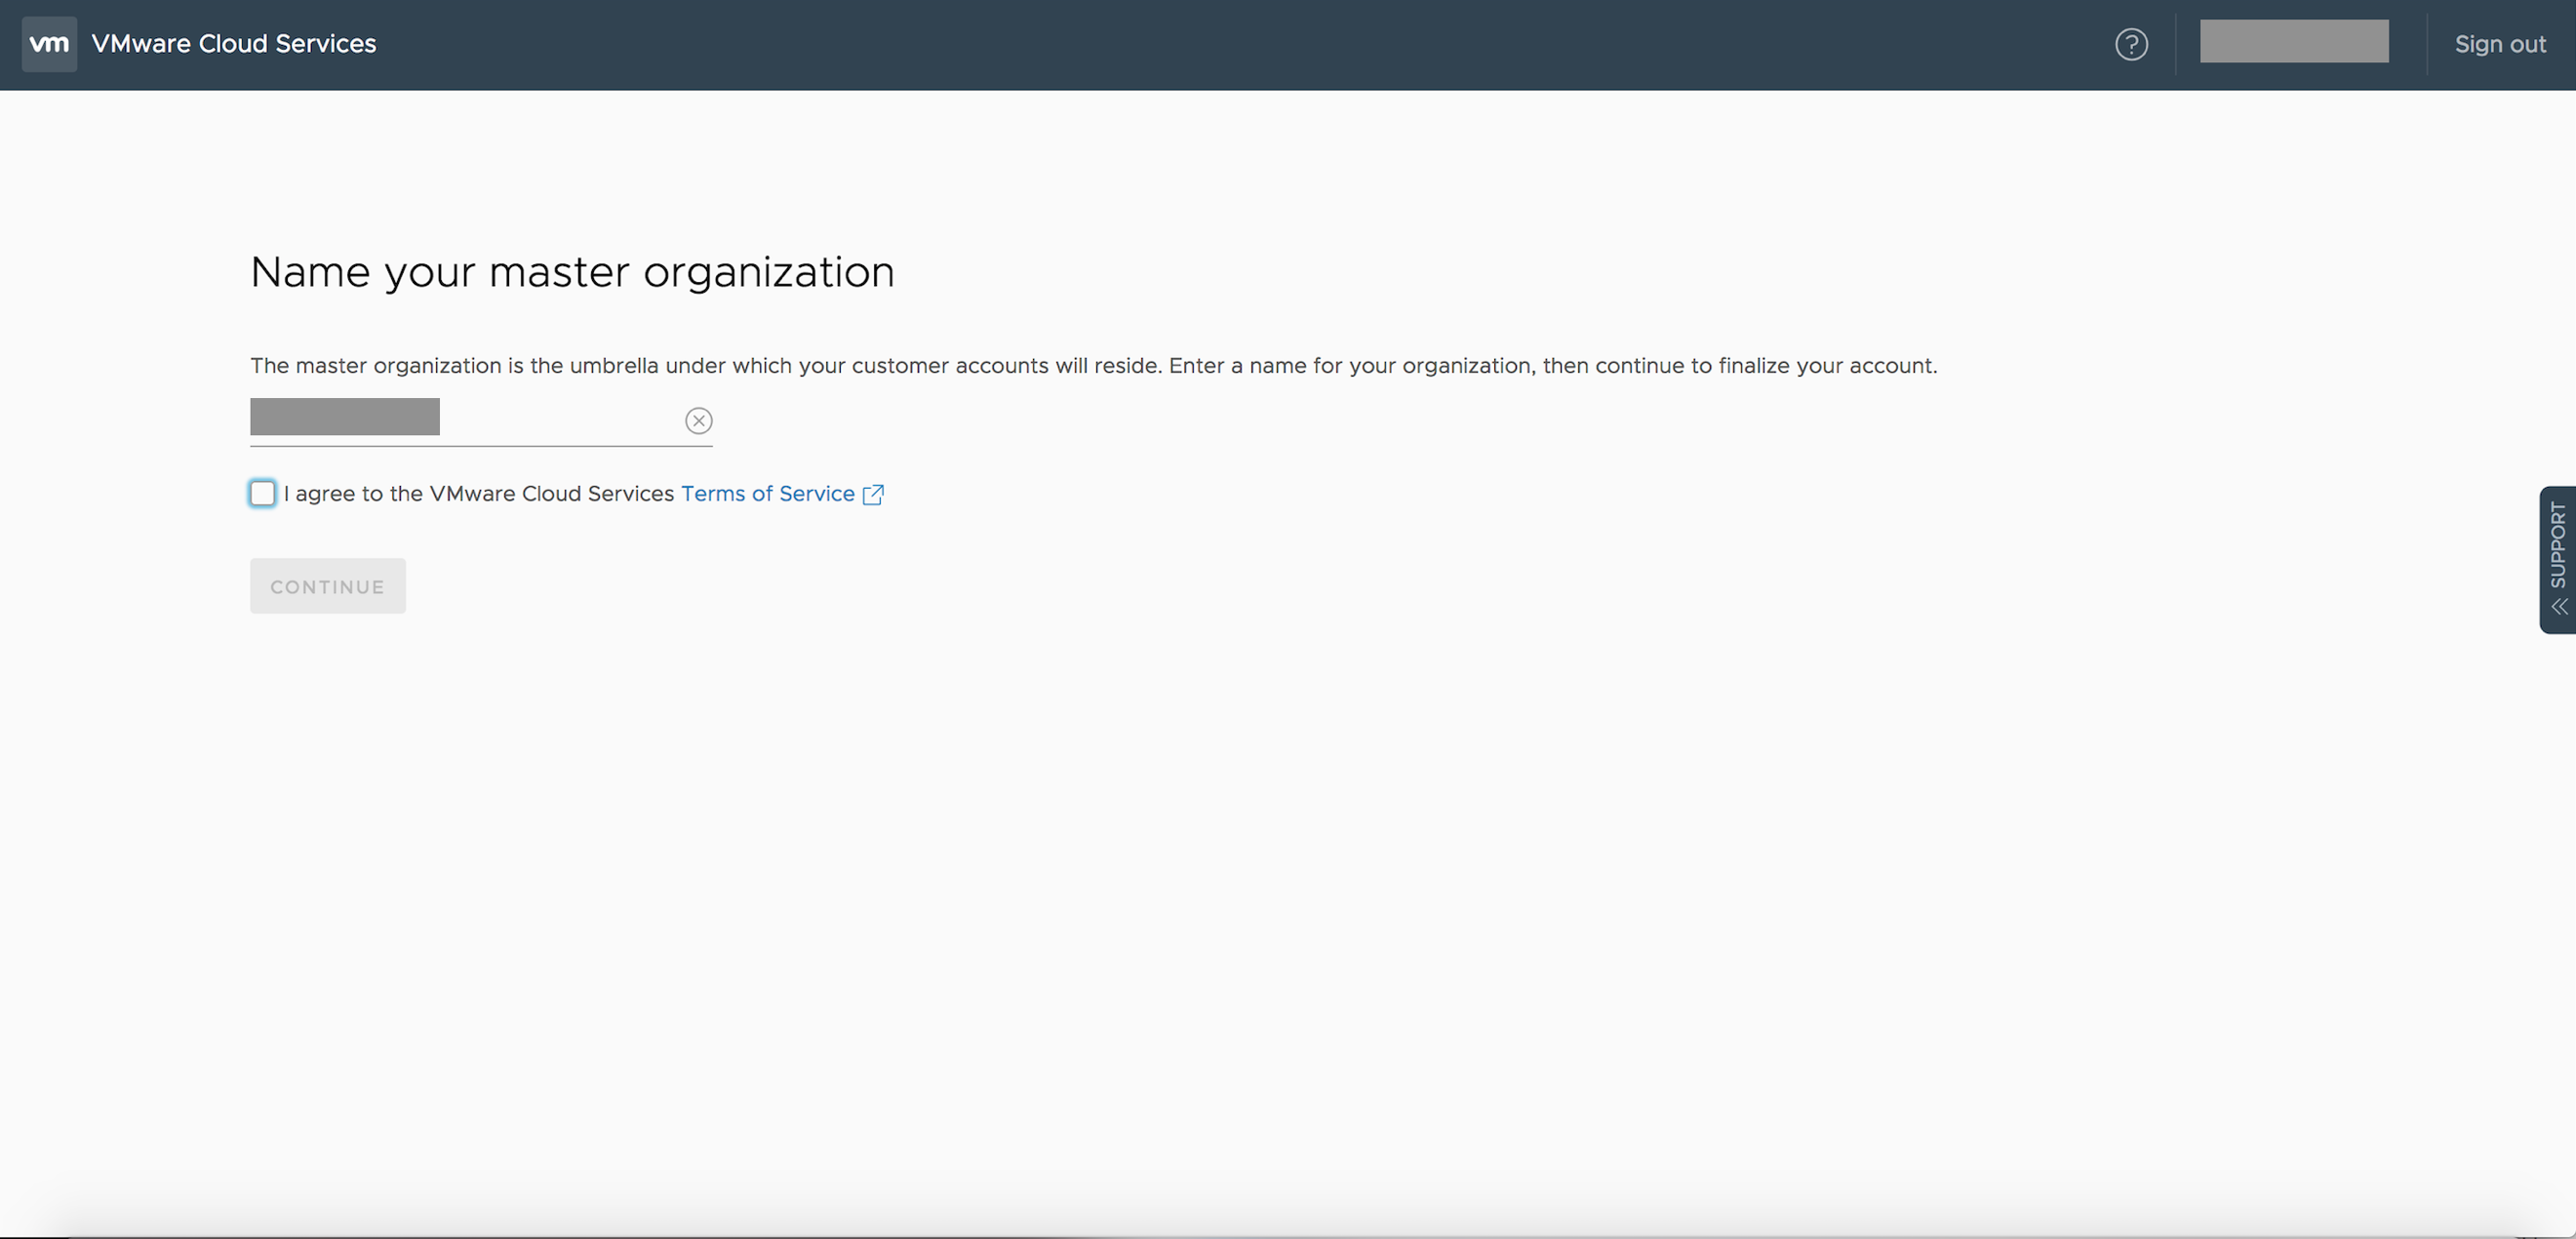
- Enter a name for the master Org – example ‘Acme’, accept T&Cs
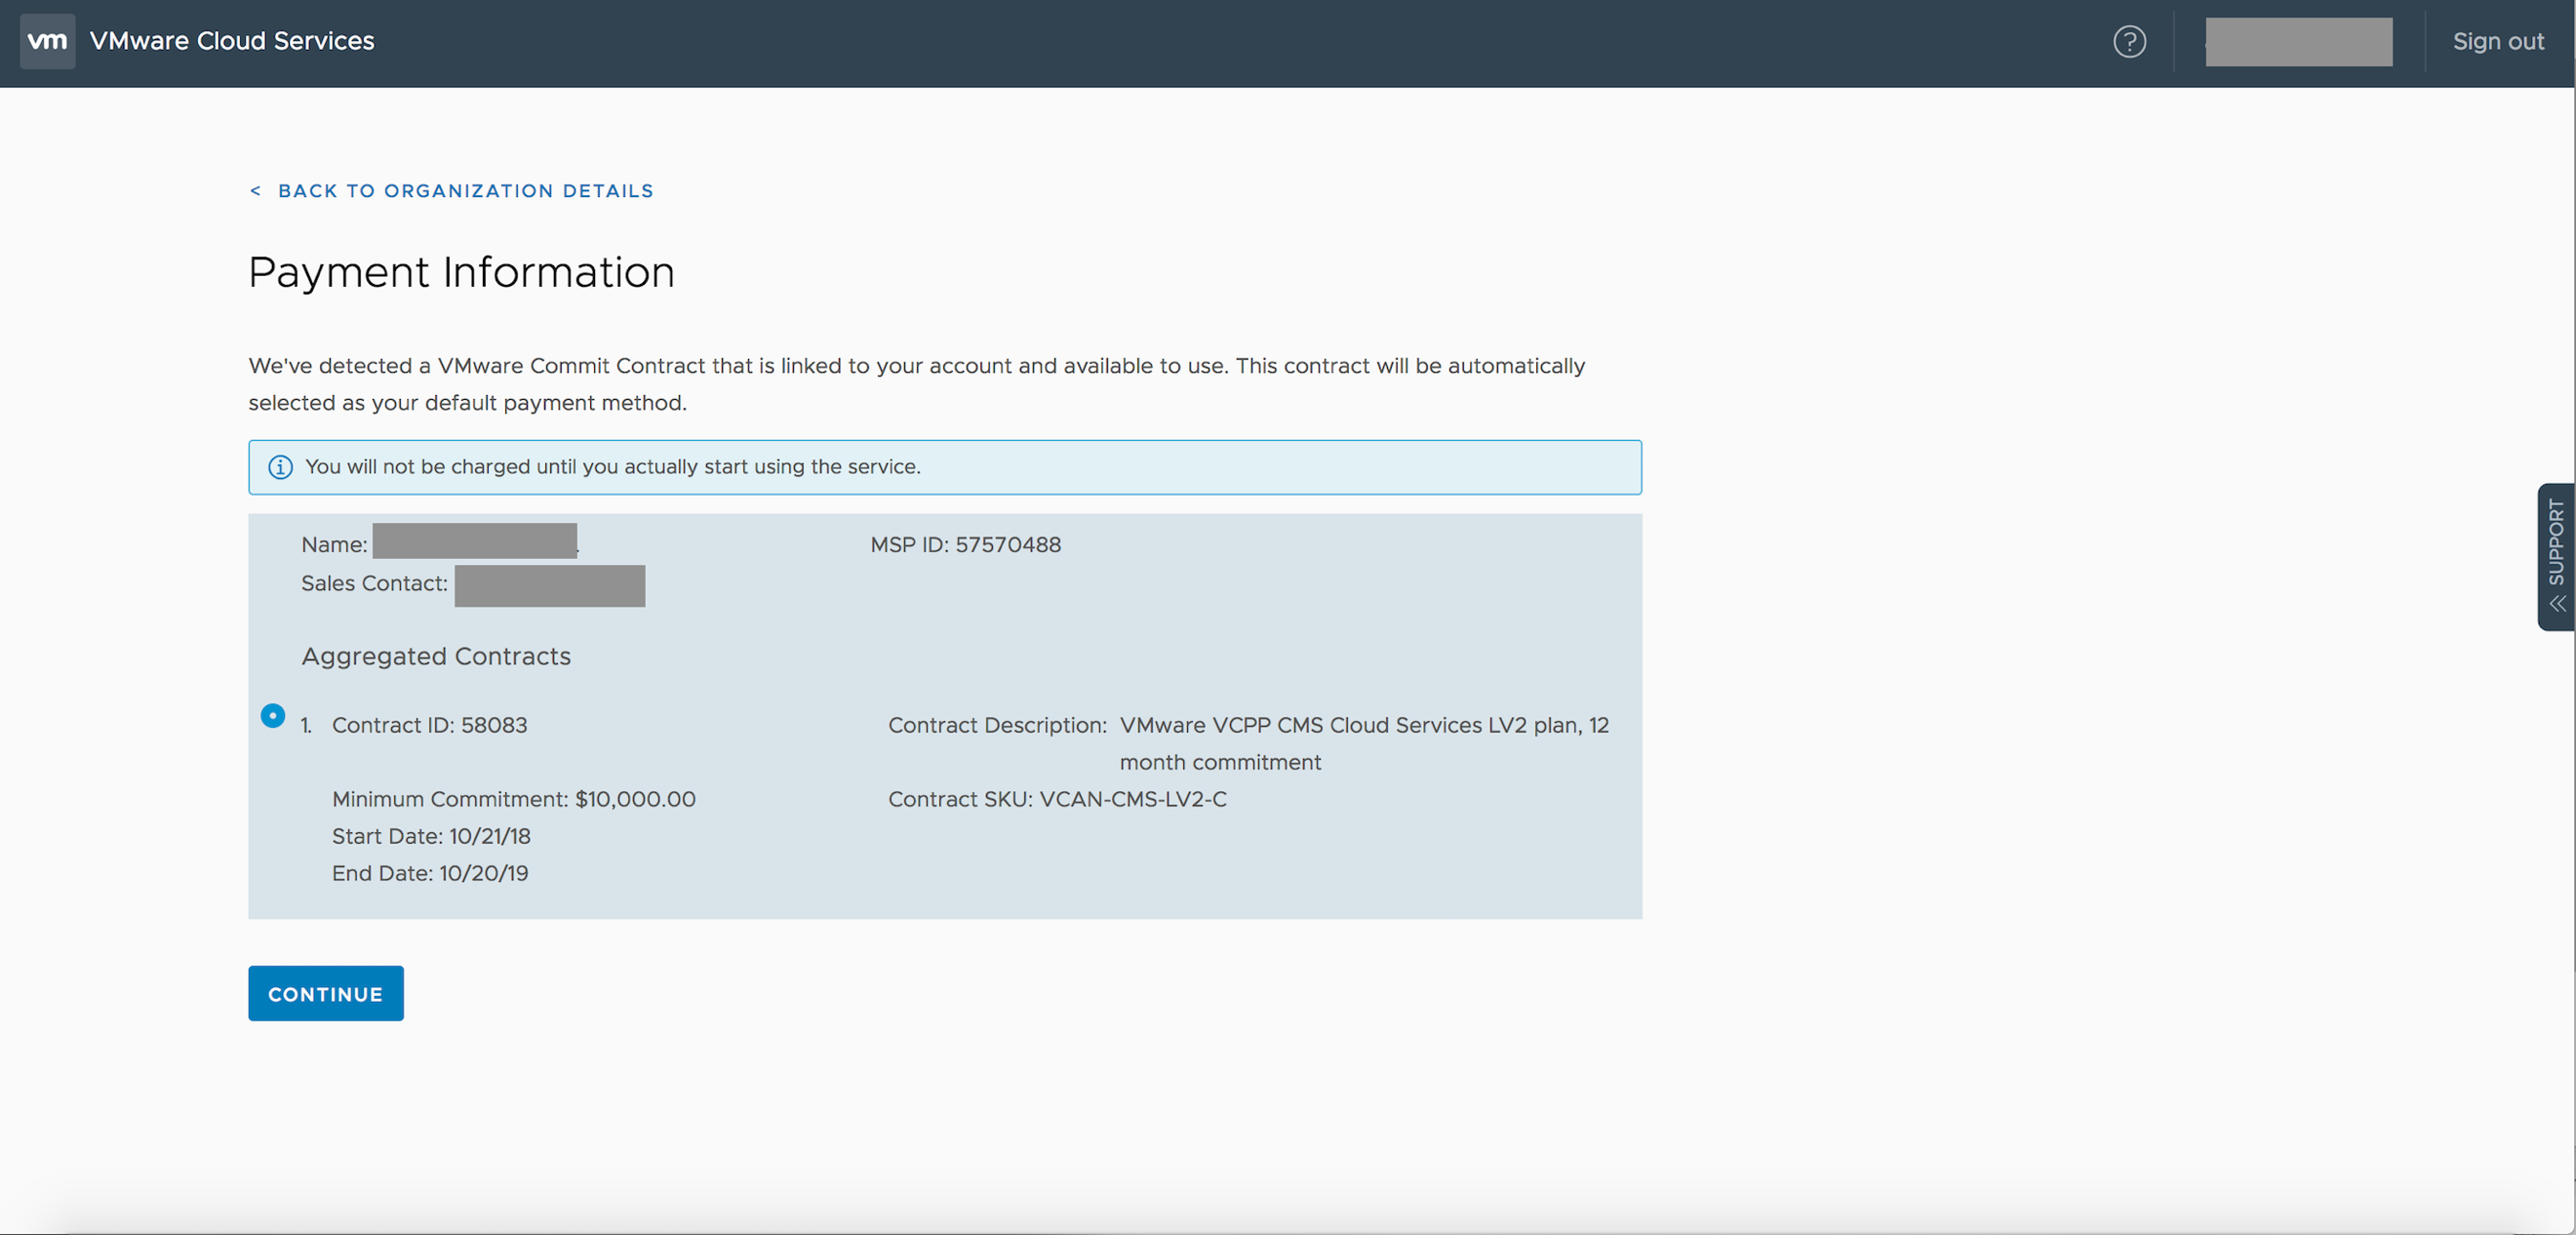
- Confirm the commit contract to be associated with this organization. The commit contract associated with the master organization cannot be changed at a later time. If there was a fund account associated with this user, it will be displayed for informational purposes only.
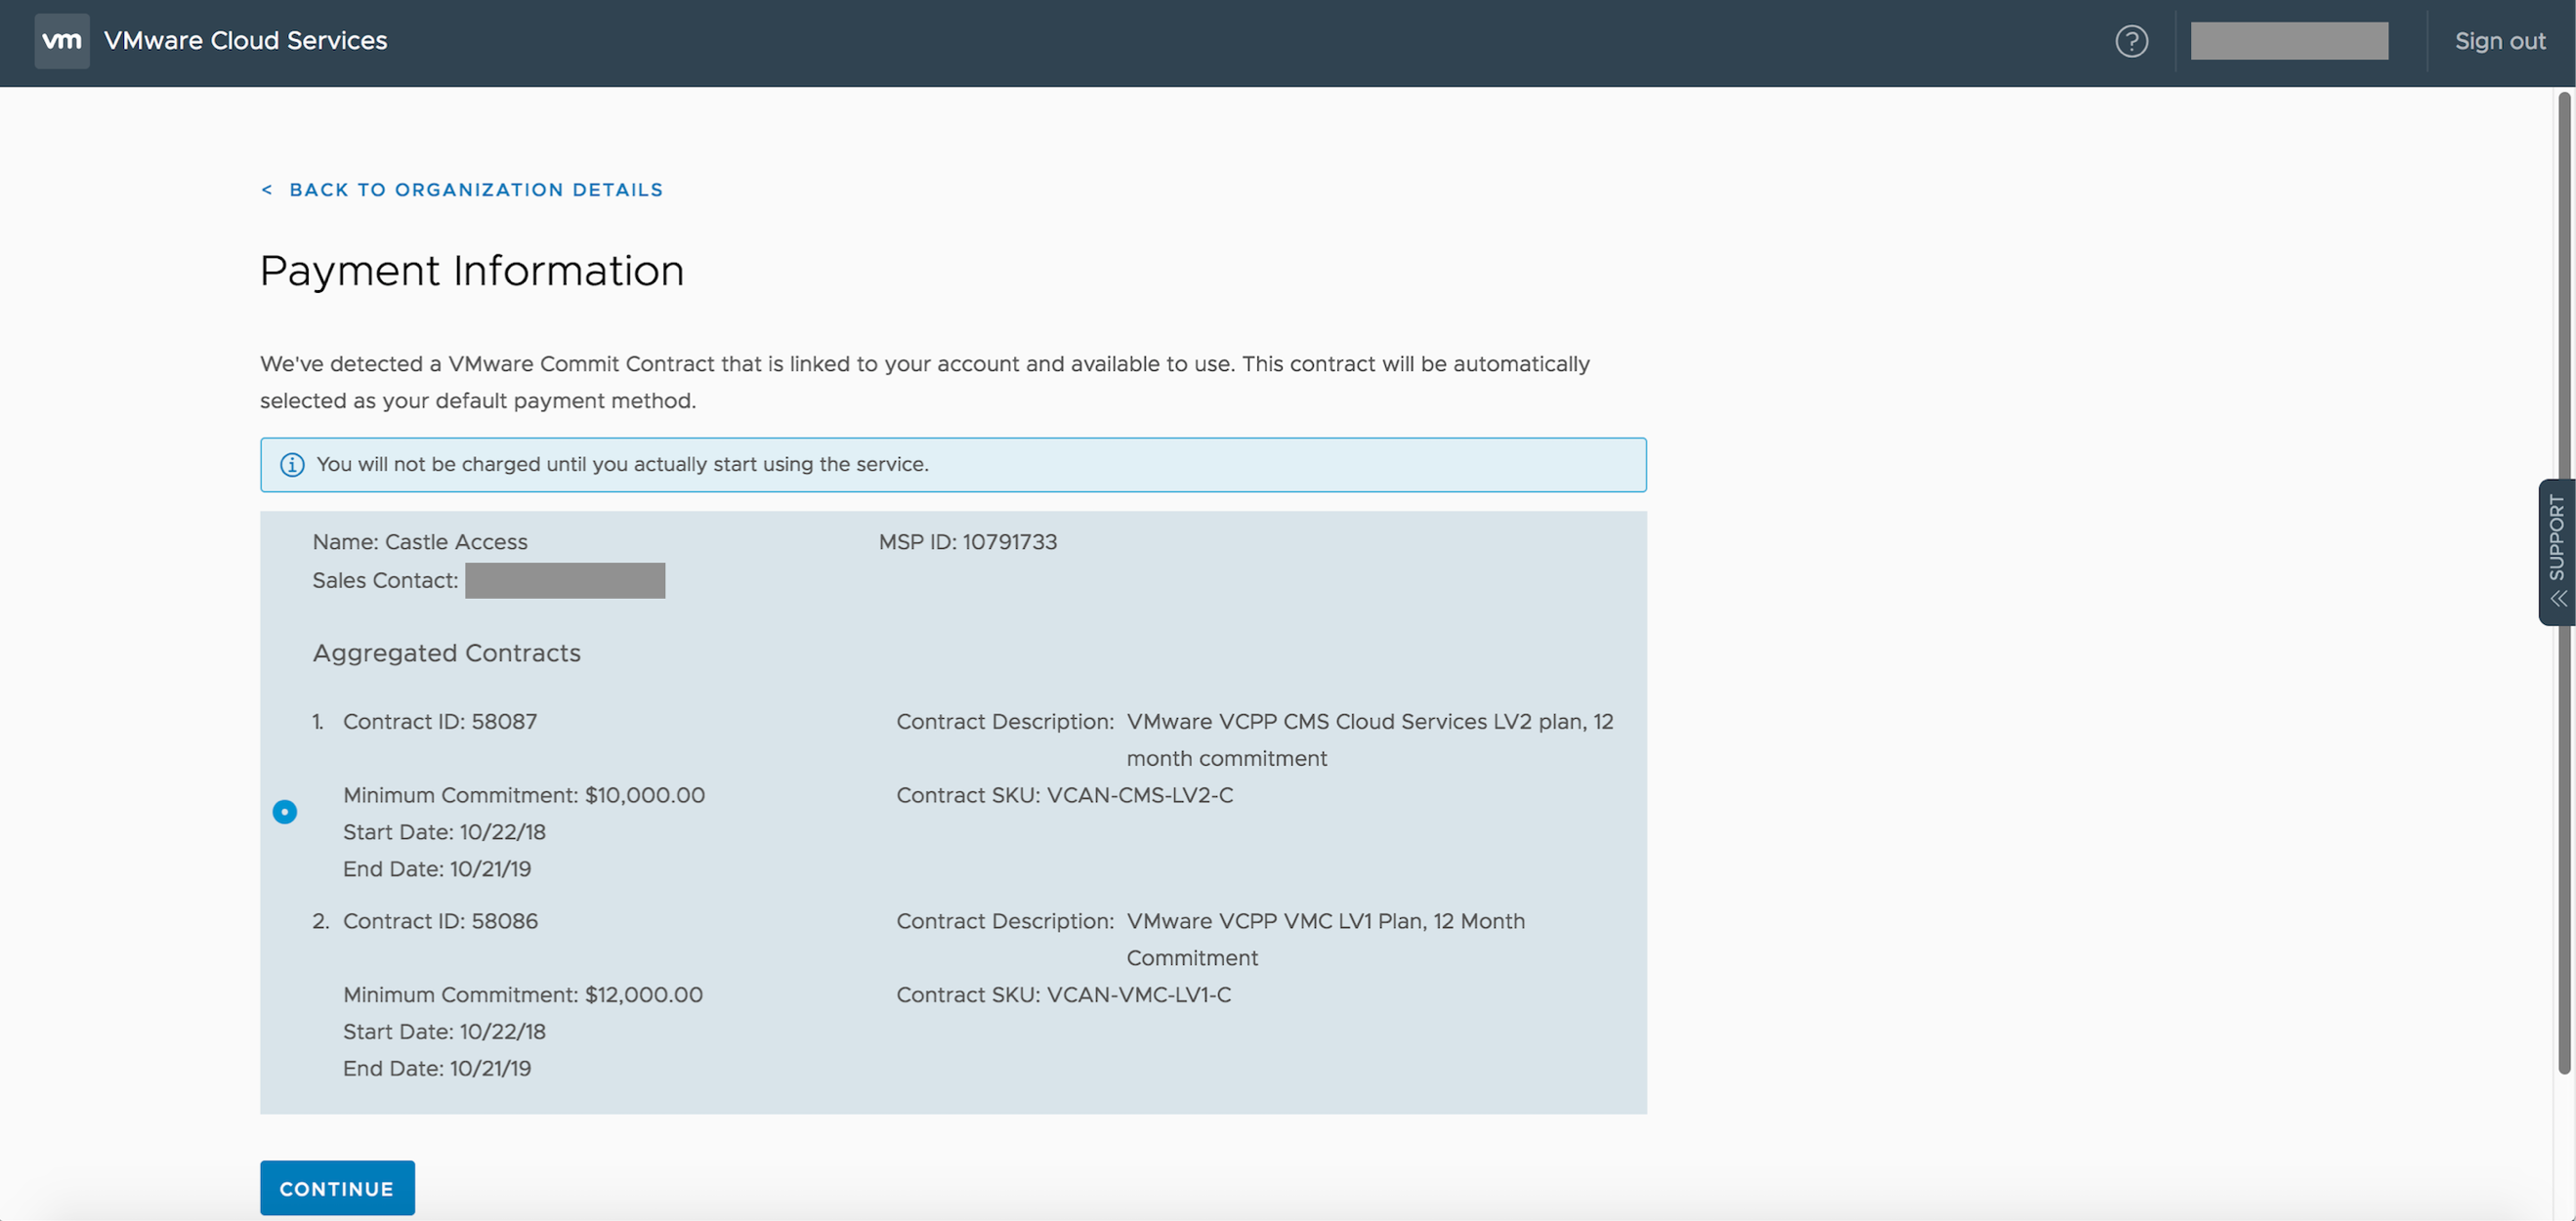
NOTE: If there were two commit contracts signed before you created the master org – VMC MSP commit contract and CMS MSP commit contract for two services for the same provider and email associated, both contracts will appear in the screen above.
- Provide the metadata for the master organization

- Country and zip code are required fields
- Tag is an optional field for an ID, which can be primarily used to filter / query while using the apis
- An example would be eng – a department that will be consuming the service
- Once the master org is created, the service provider lands in the home screen of Cloud Provider Hub console with the services for which the commit contract was created under Services Available for Provisioning
- This user by default is assigned the role of Provider Administrator
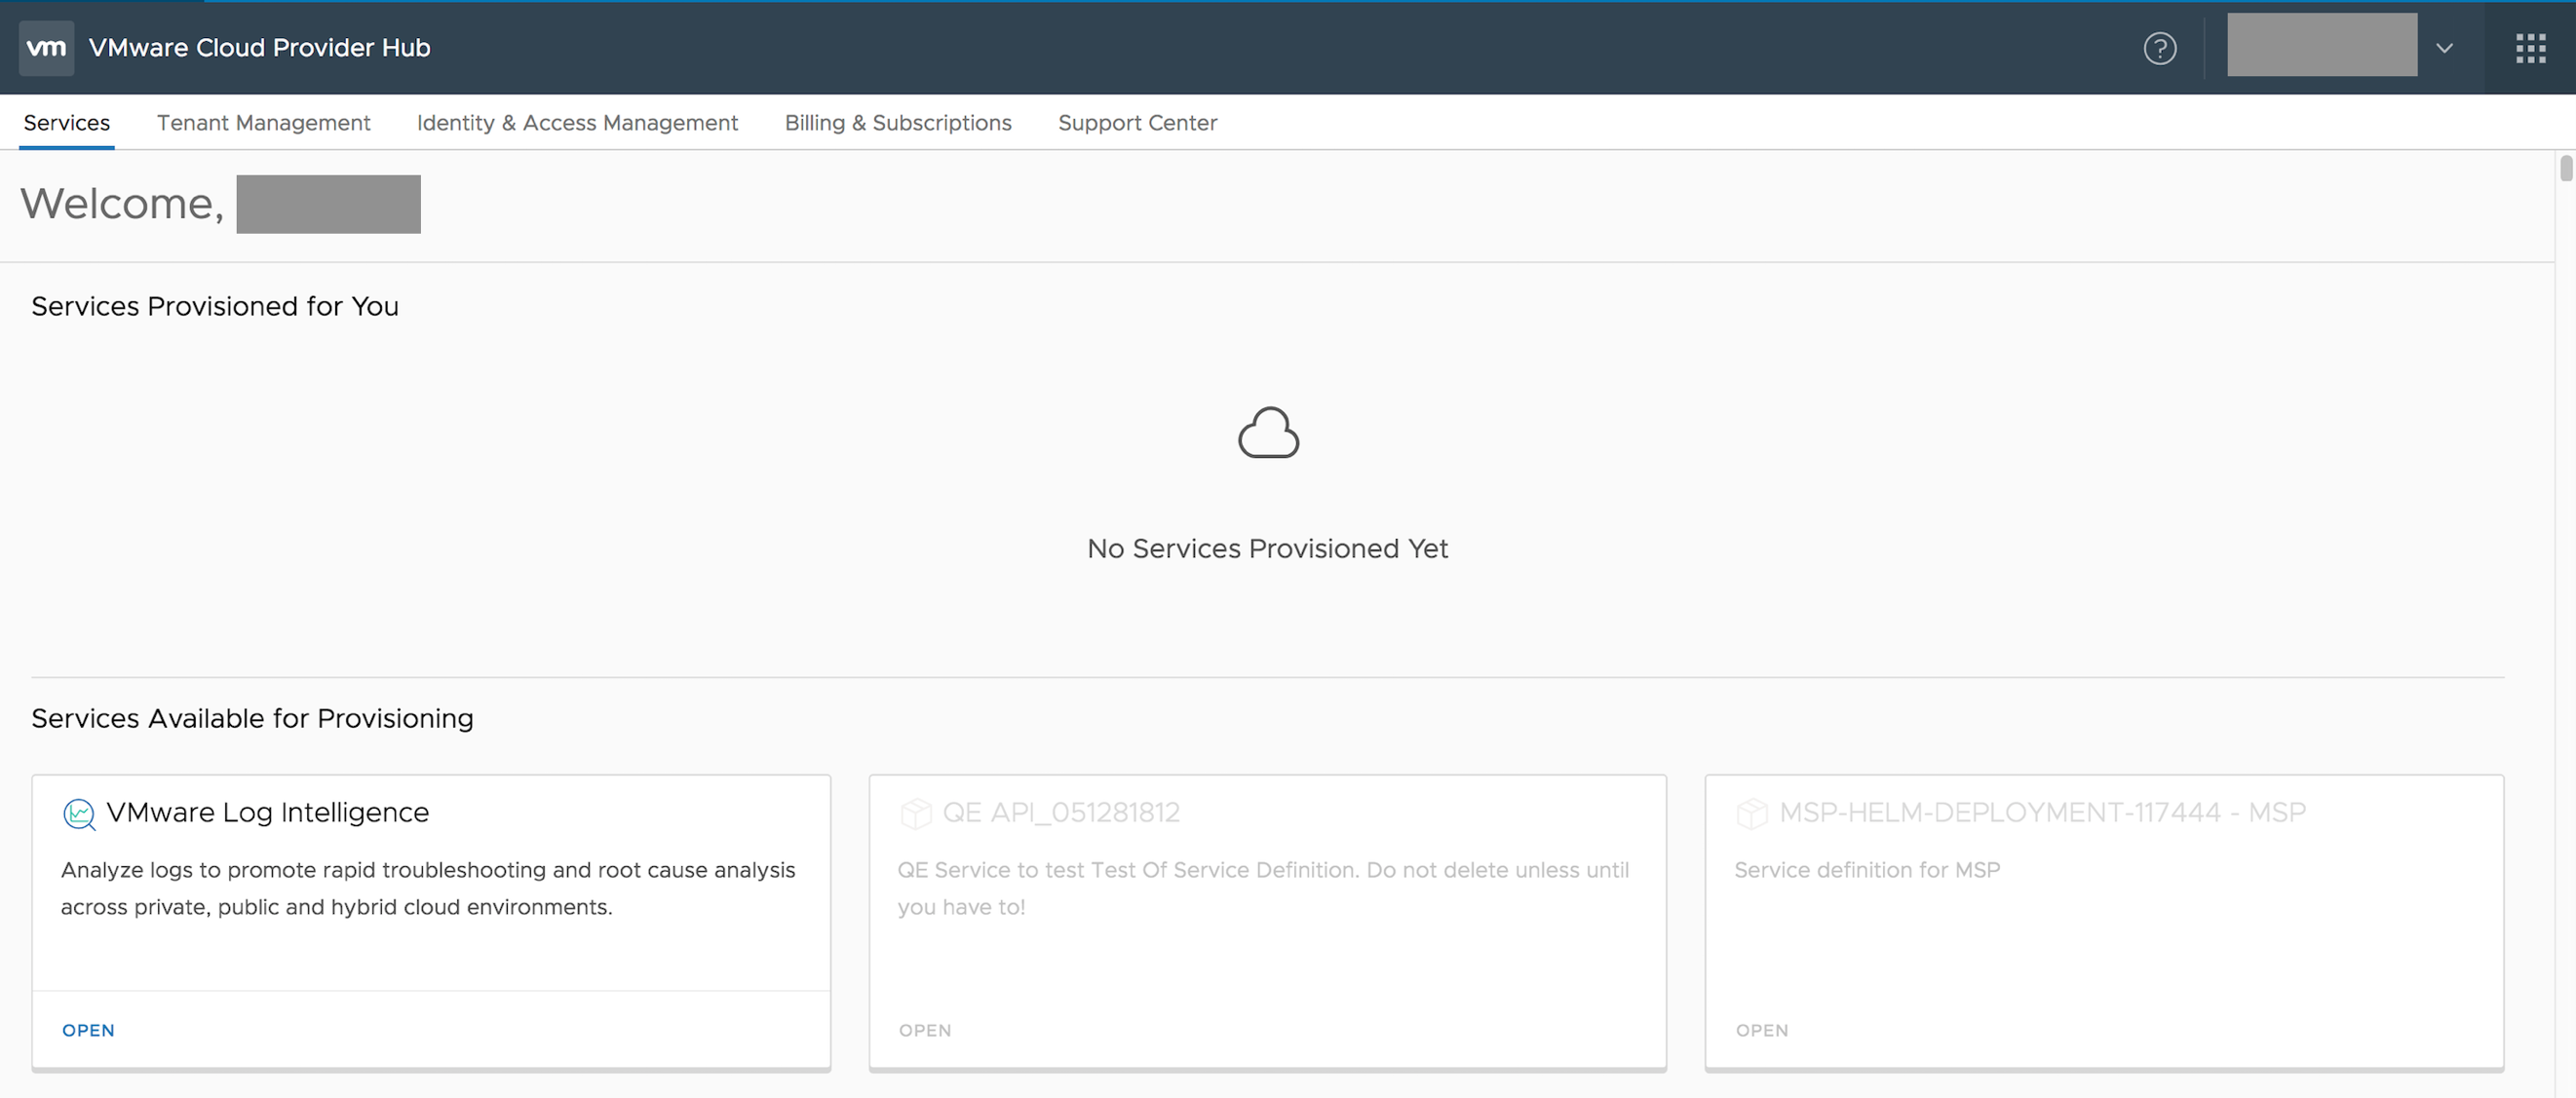
At the end of this step provider has
- Logged into VMware Cloud Services
- Provided name for master Org – Acme
- Accepted ToS
- Confirmed the commit contract(s) associated with that master org
- Provided master org metadata
- Lands on Cloud Provider Hub console with the master org created
- Service (s) for which the commit contract is signed is available for provisioning to the provider
- Service provider who created the master organization has been assigned the provider administrator role
Other provider users with different provider roles with different permissions – Provider Administrator, Provider Operations Administrator, Provider Accounts Administrator, Provider Billing User and Provider Support User. Learn more about the different roles and permissions here
Service Activation for a Tenant
Service activation in Cloud Provider Hub has been simplified from steps to steps
Pre-requisites
- VCPP partner email is a registered email with MyVMware account. Service provider email id used while creating commit contract MUST be a registered valid MyVMware account, with a complete profile and password. Make sure to verify by logging into MyVMware before providing this email for commit contract creation.
- Master organization is created and onboarded
- Admin contact , if provided, while creating tenant must be a registered MyVMware account
Below are the steps for activating a service
- At this time, there are no tenants for this service provider

So provider need to add a tenant using Tenant Management , which results in a tenant org being created with all the metadata provided. At this time, deletion of tenant is not possible.
Provider can even provide the admin contact at a later time. If an admin contact is provided, the email provided becomes a tenant administrator . Provider managing the service access is by default has implied role as Tenant Administrator.
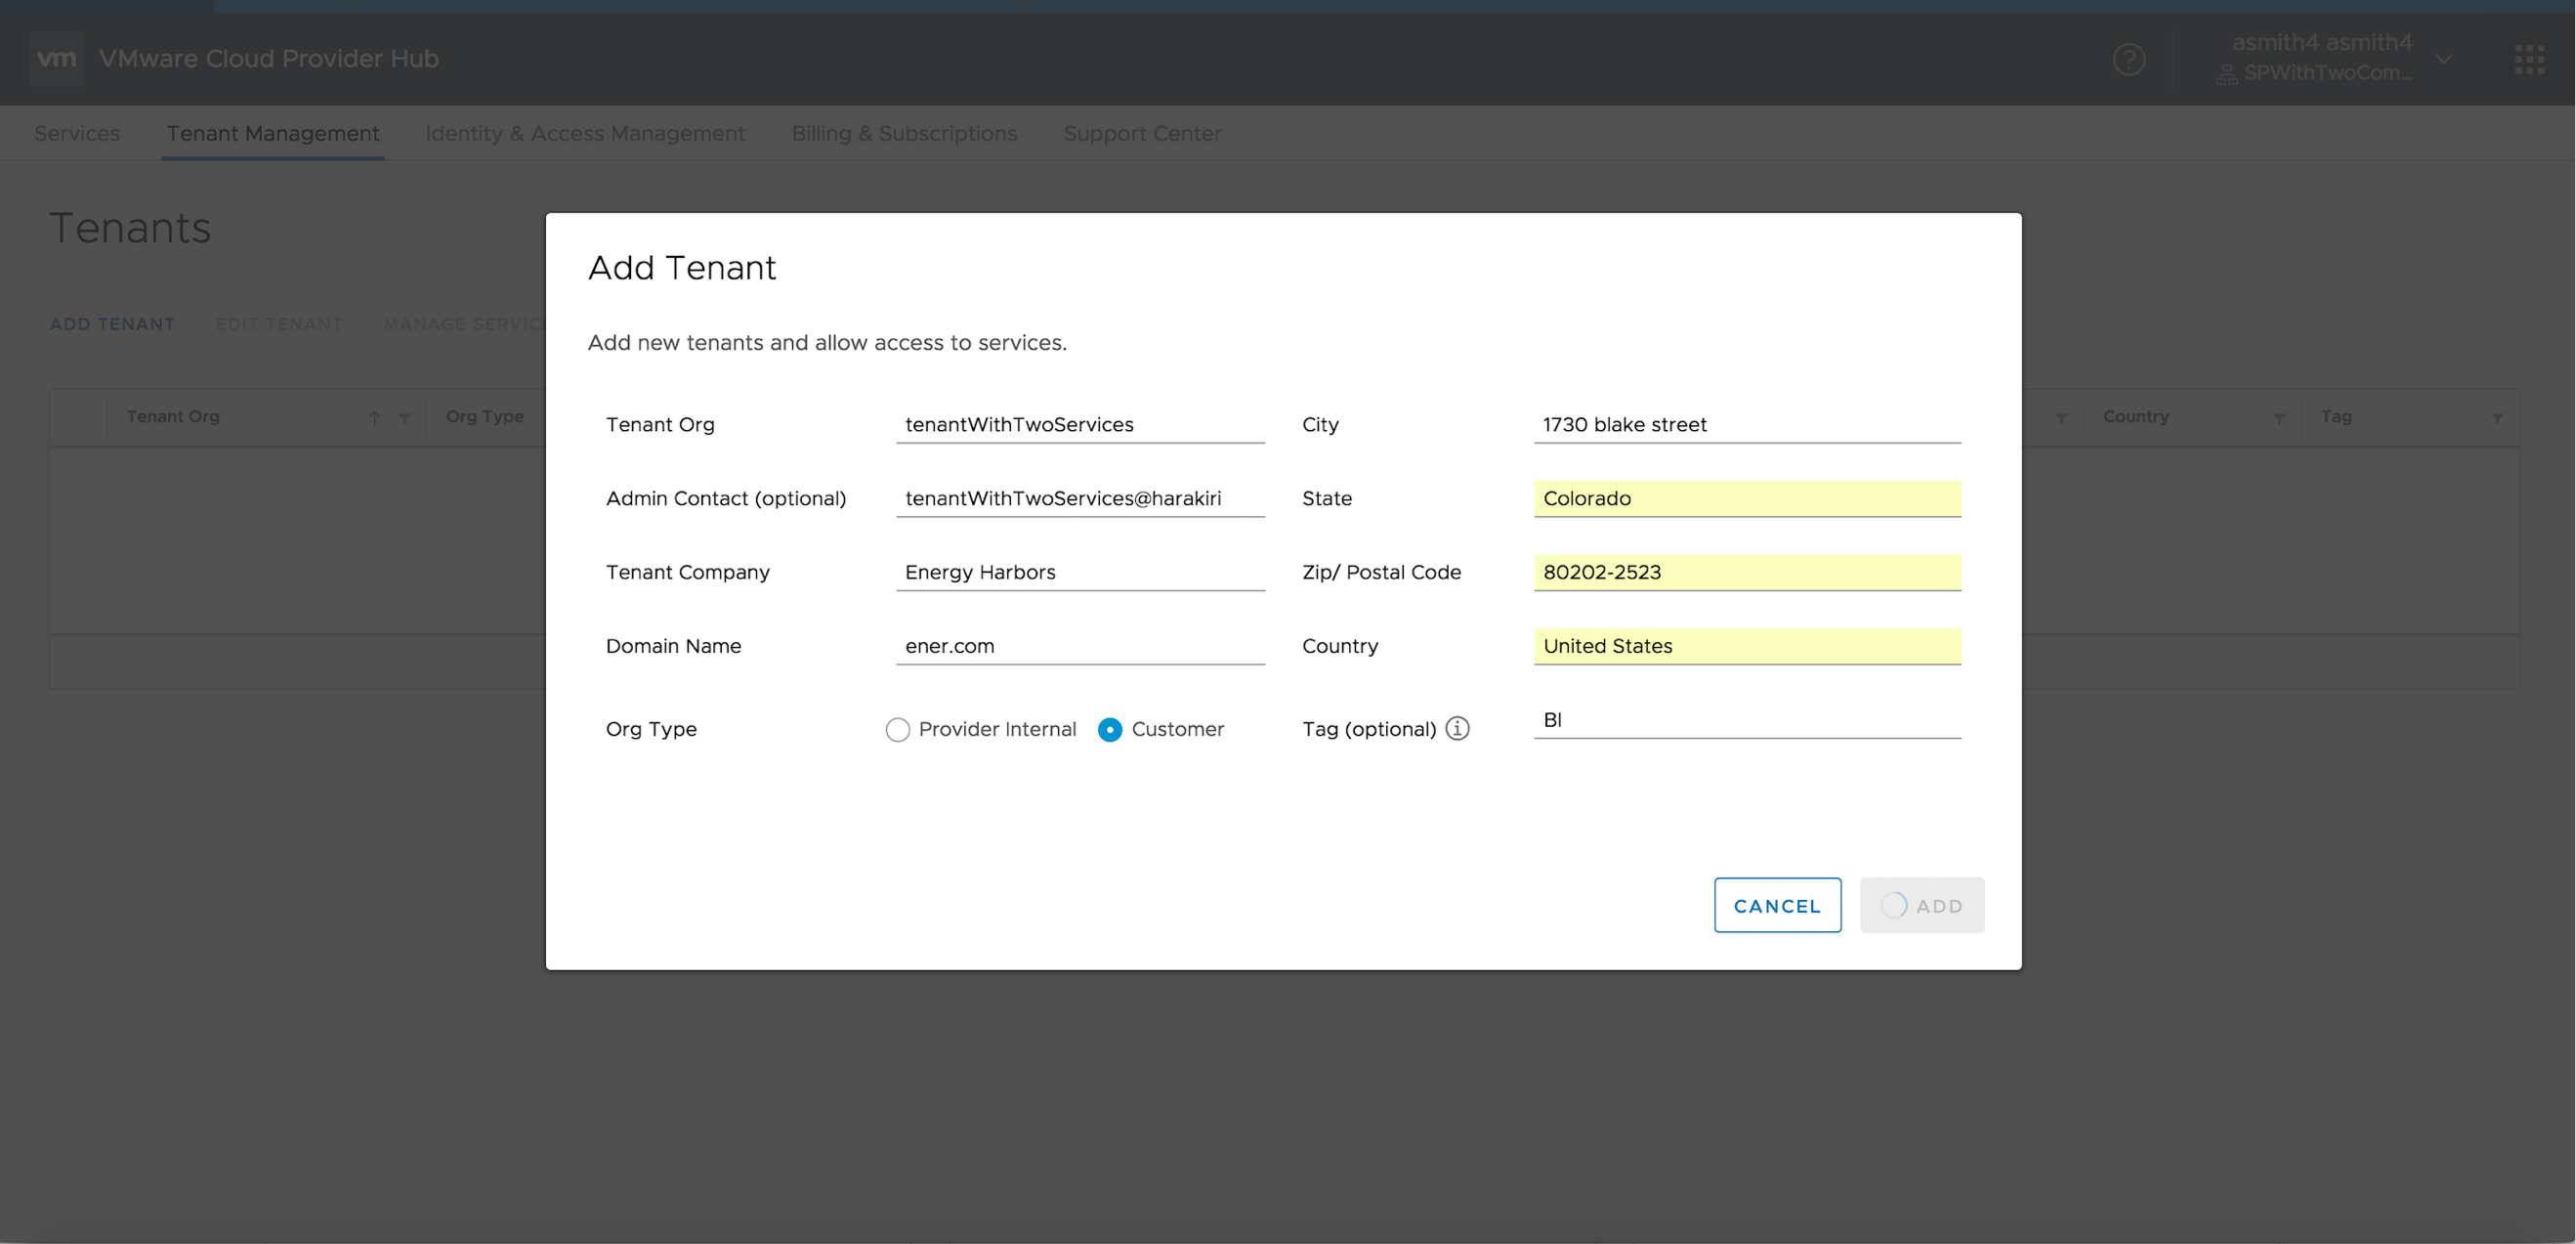
- Once tenant is added, select the tenant and choose Manage Services

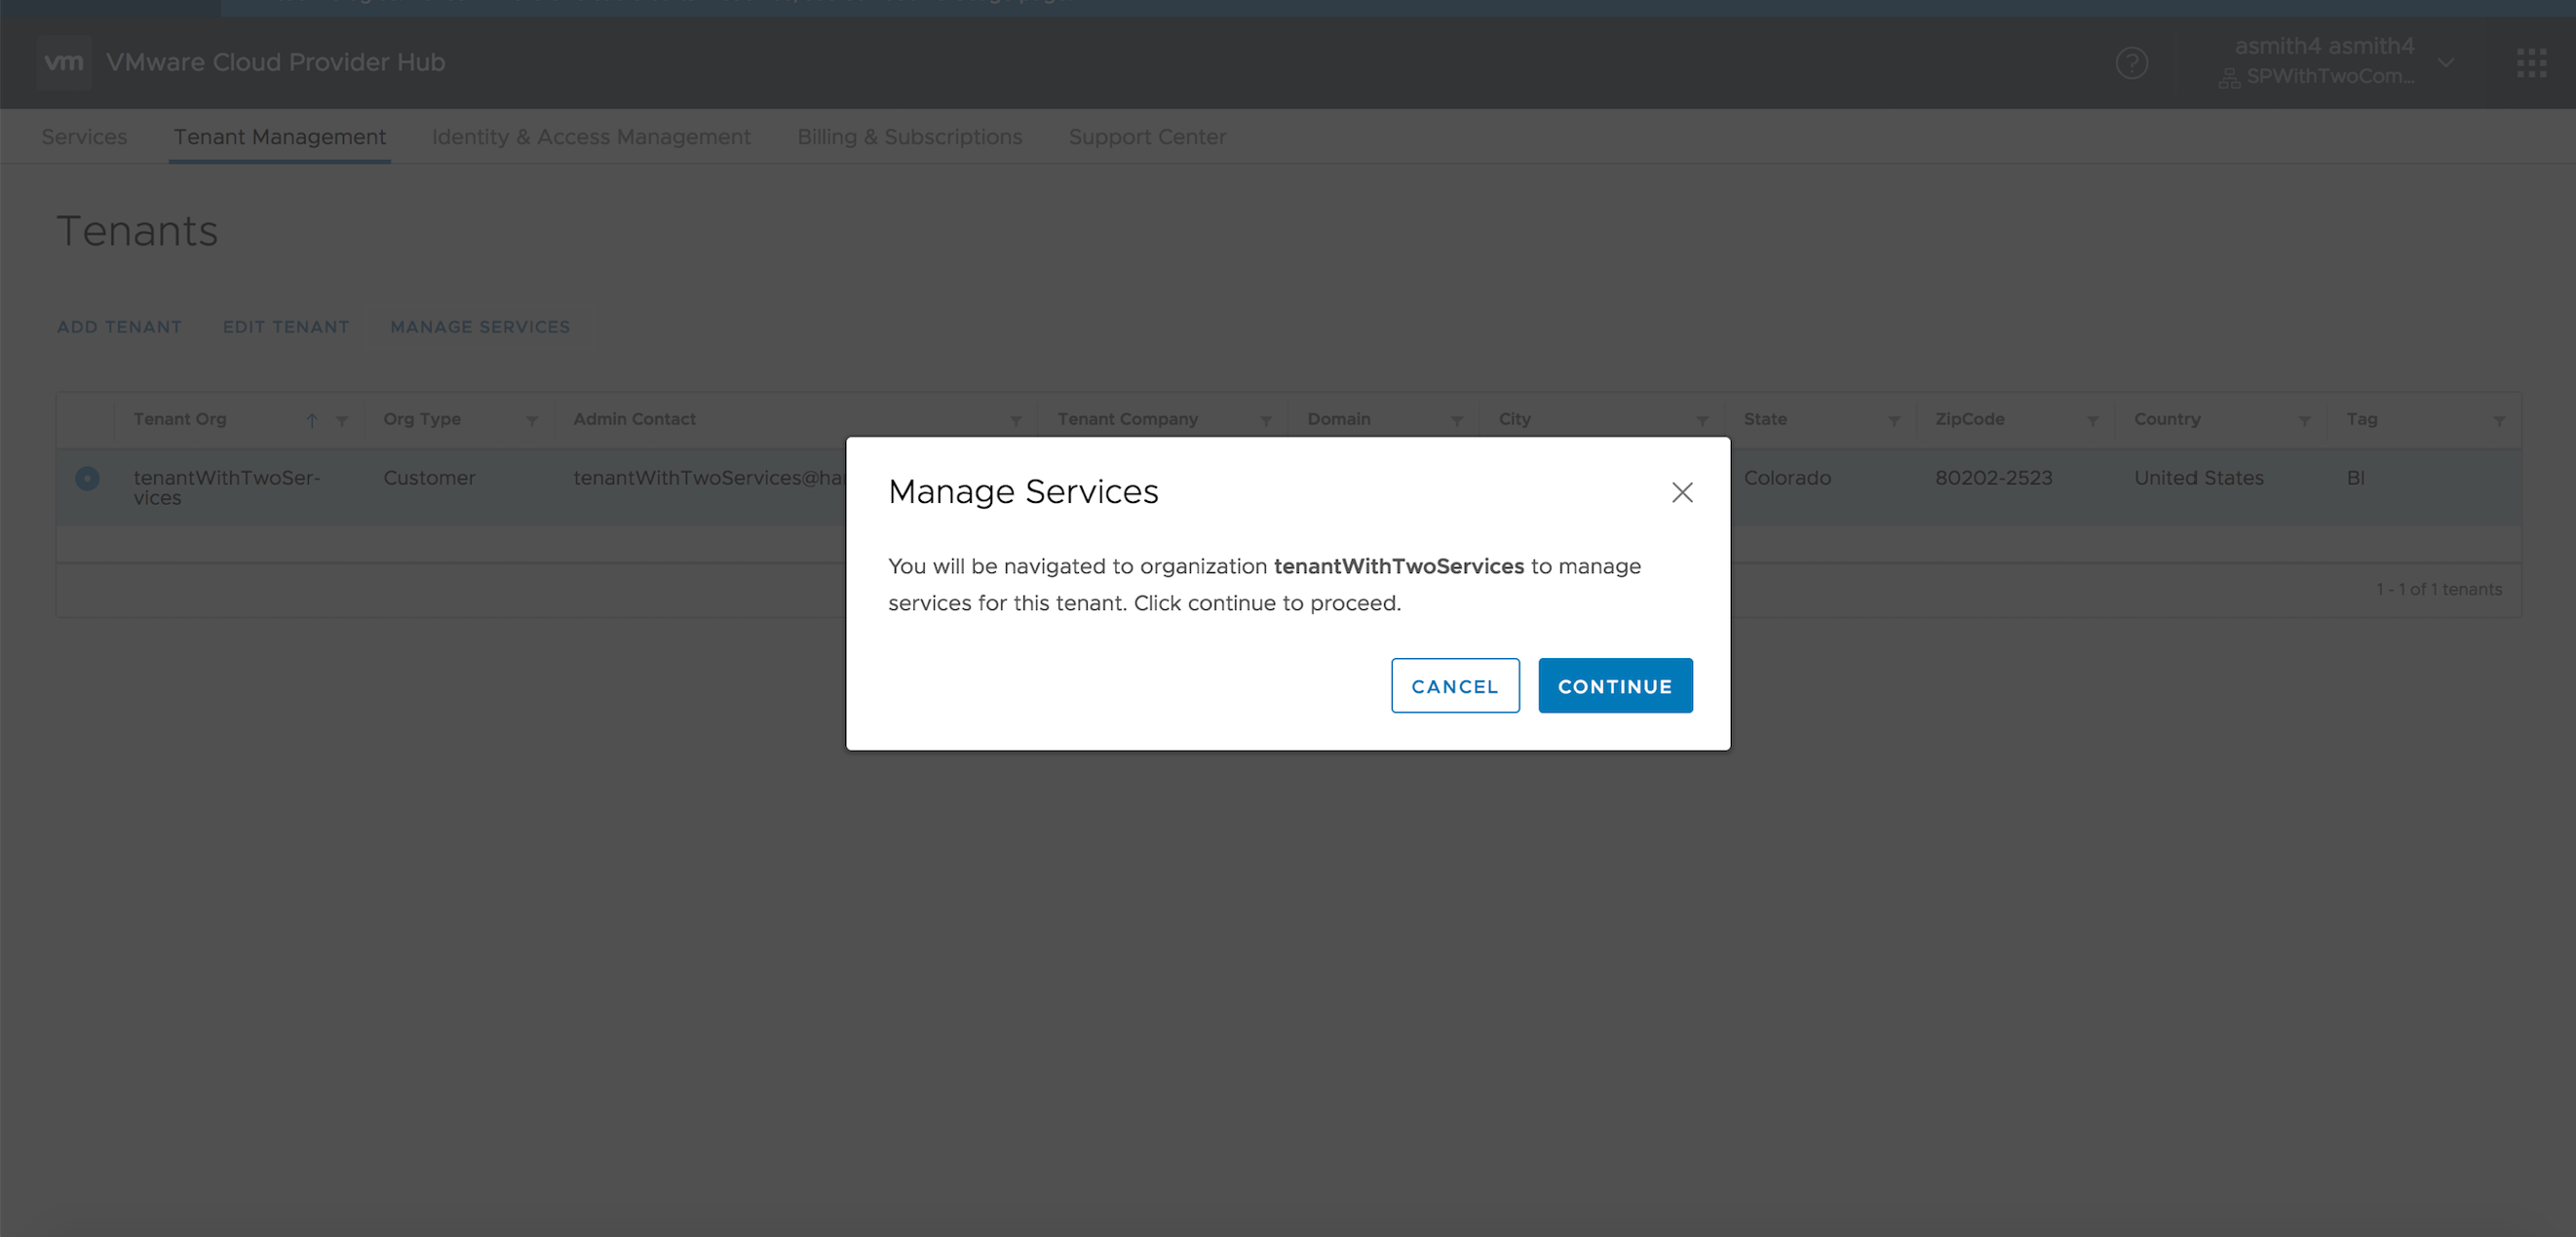
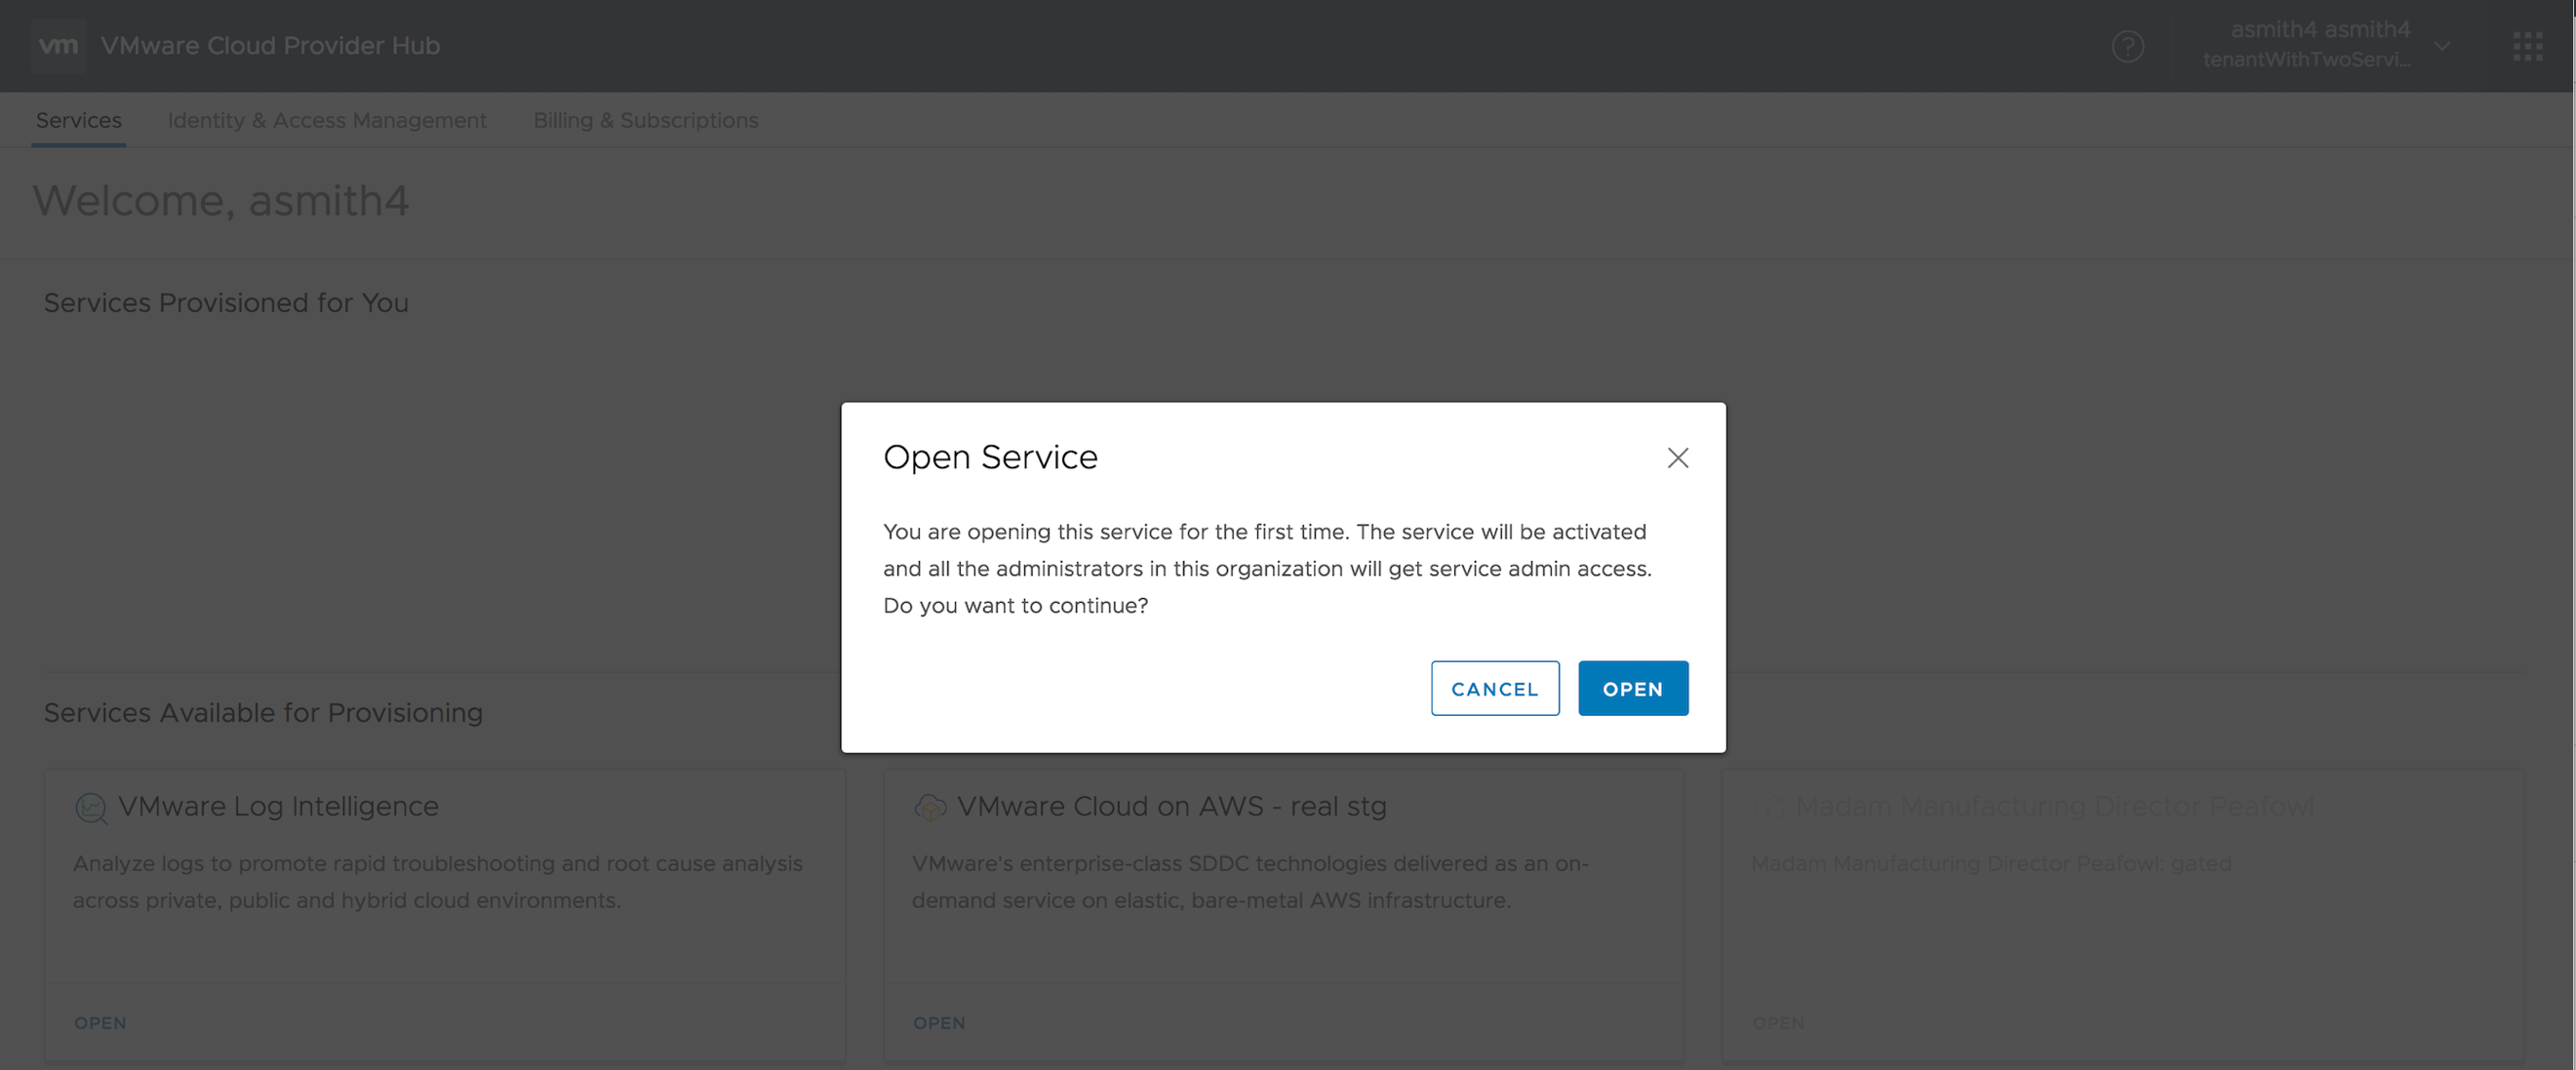
- Service provider is switched to a tenant org and selecting Open will do the magic of service activation for the tenant user.

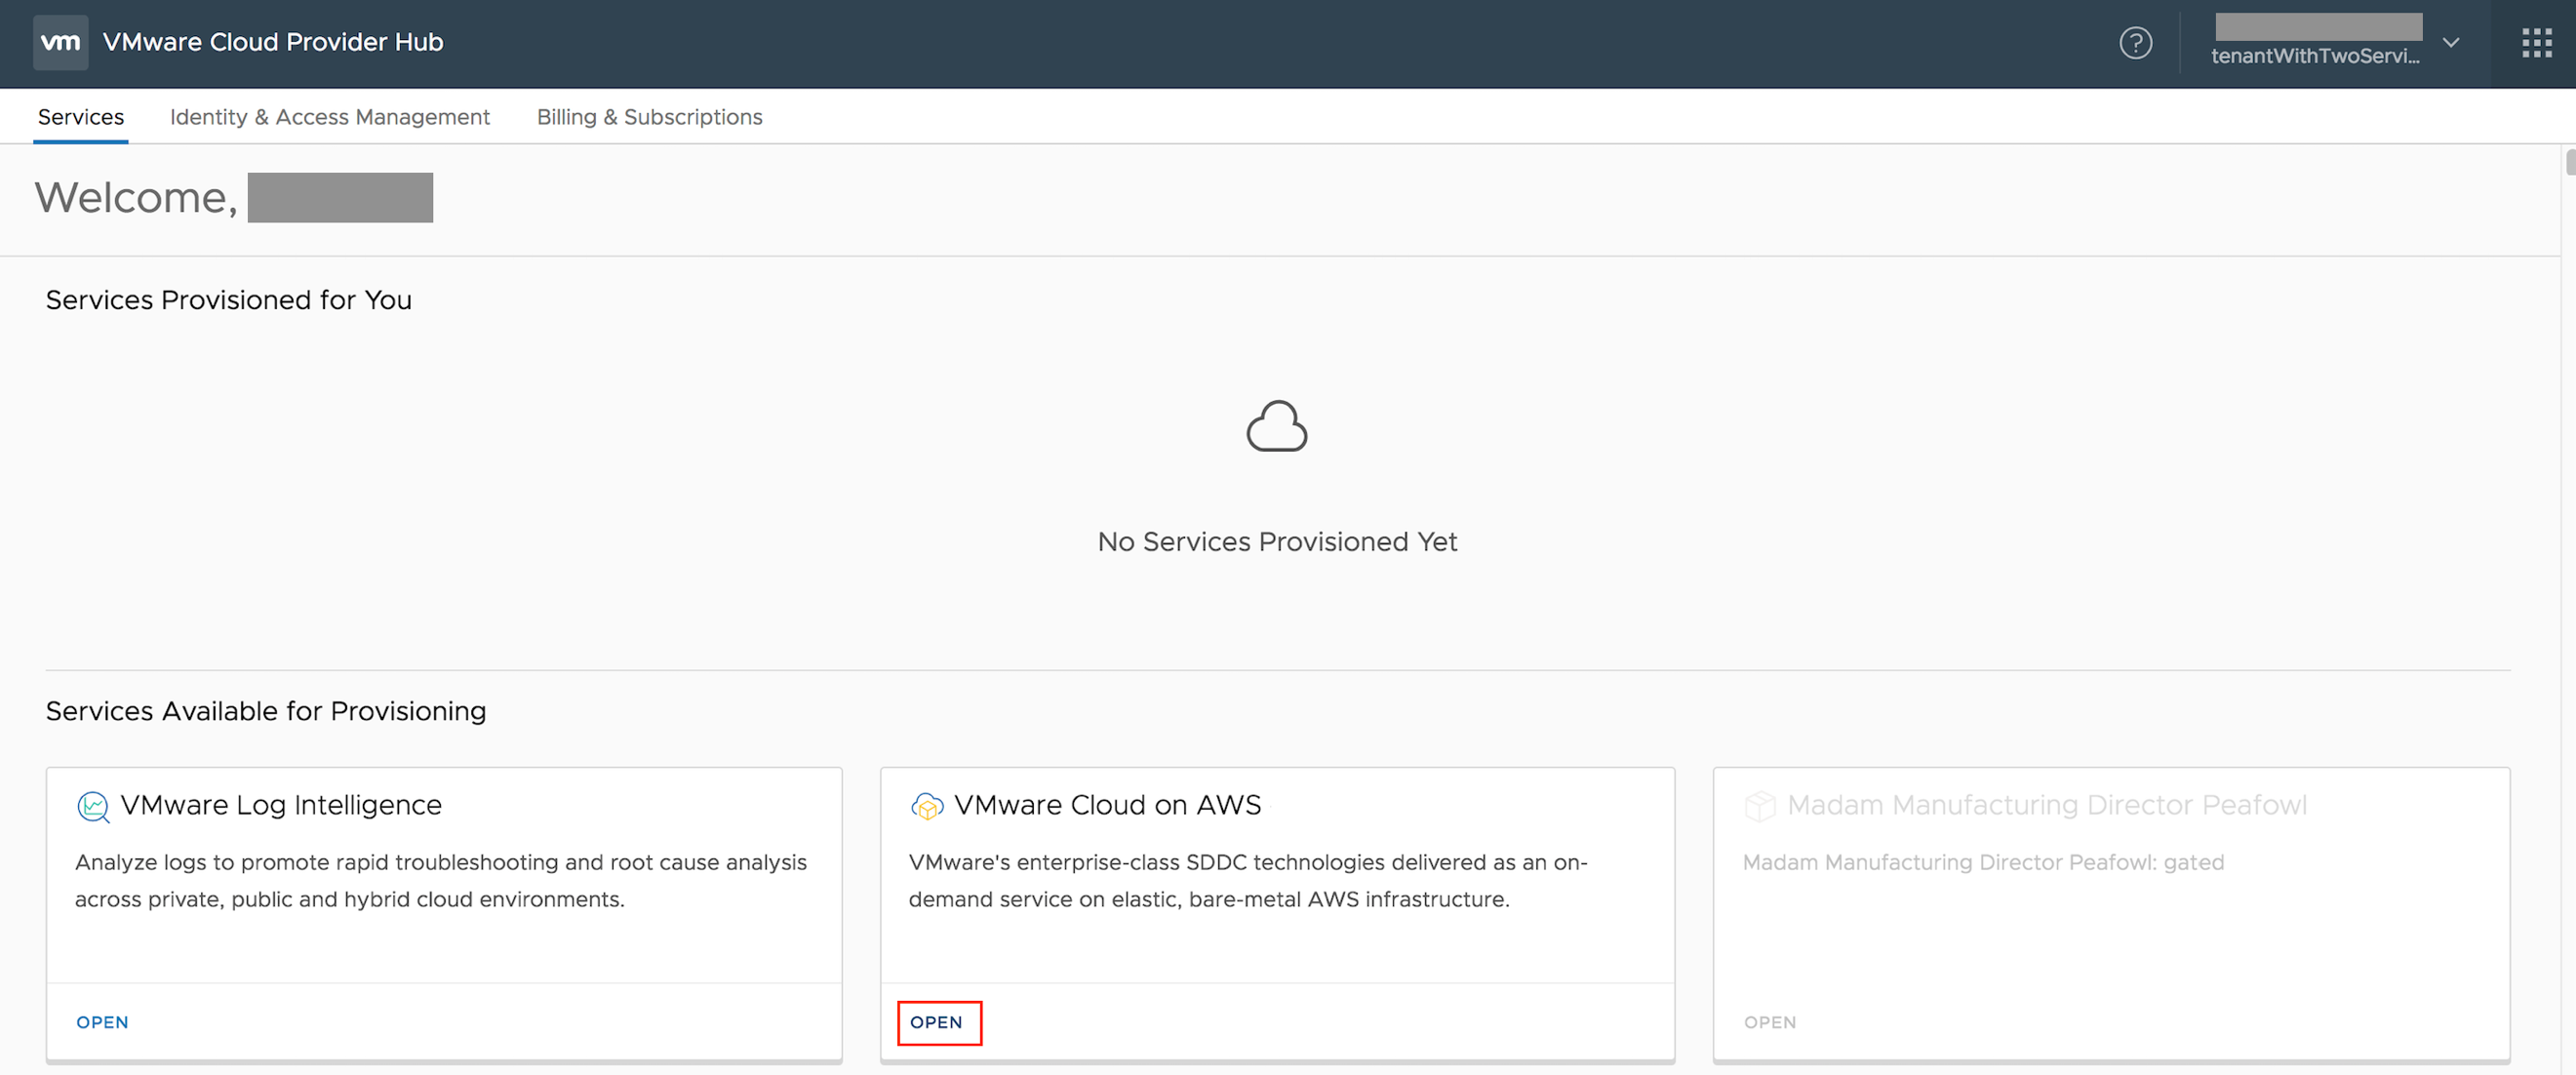
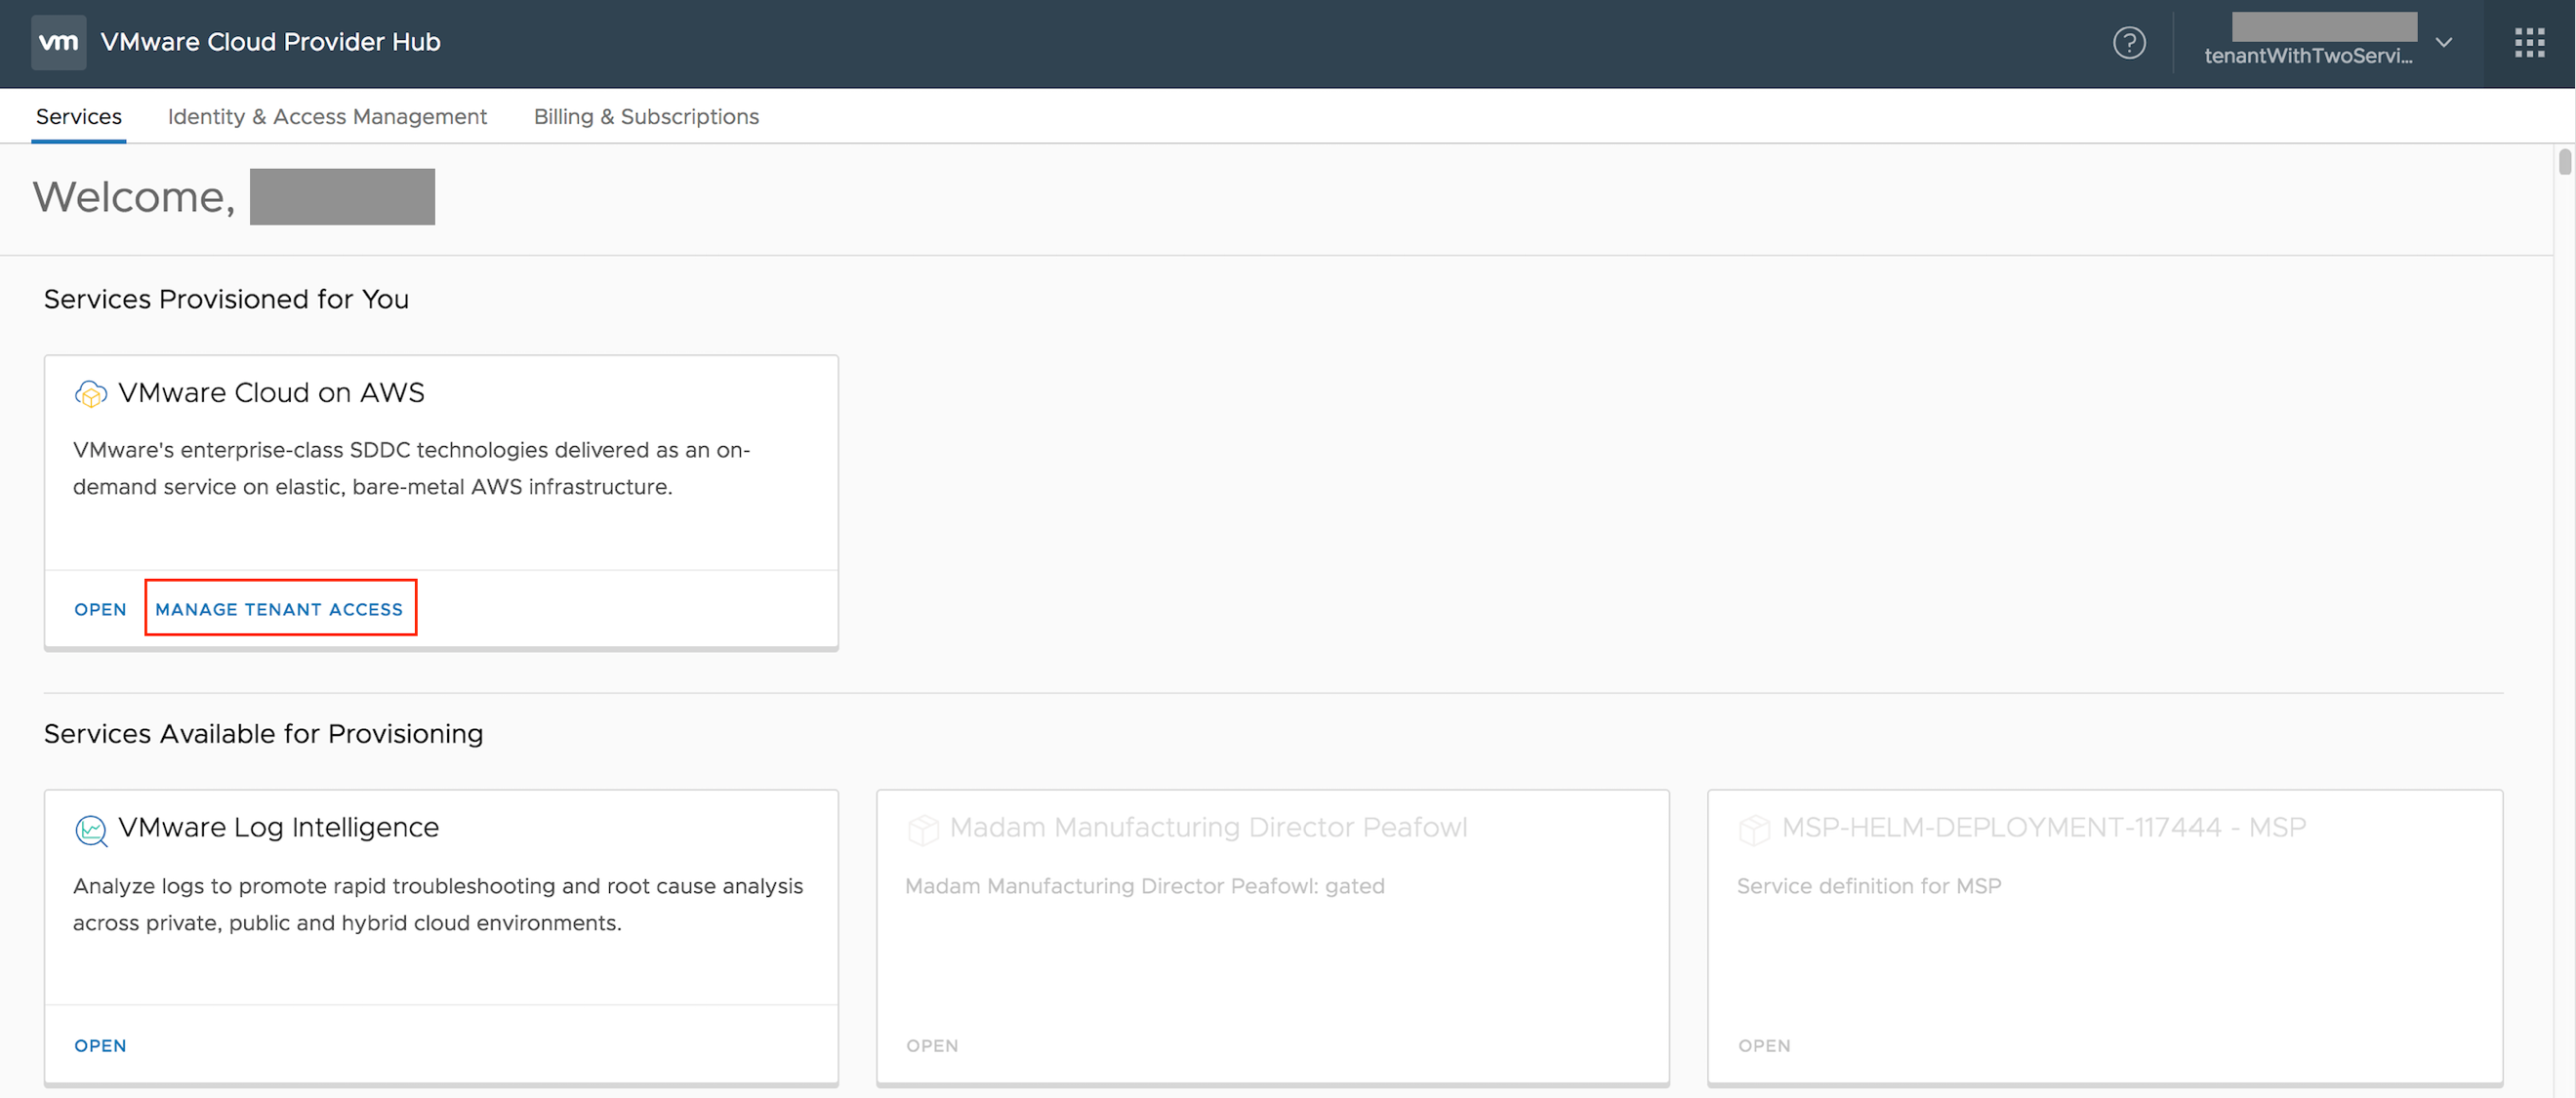
- For each service added providers can choose the access level for the service at tenant org level with Manage Tenant Access.
Providing an example with VMware Cloud on AWS service
-
-
- no access
- fully managed access
- partially managed access
-
- No access for tenant – It is Fully Managed by Provider
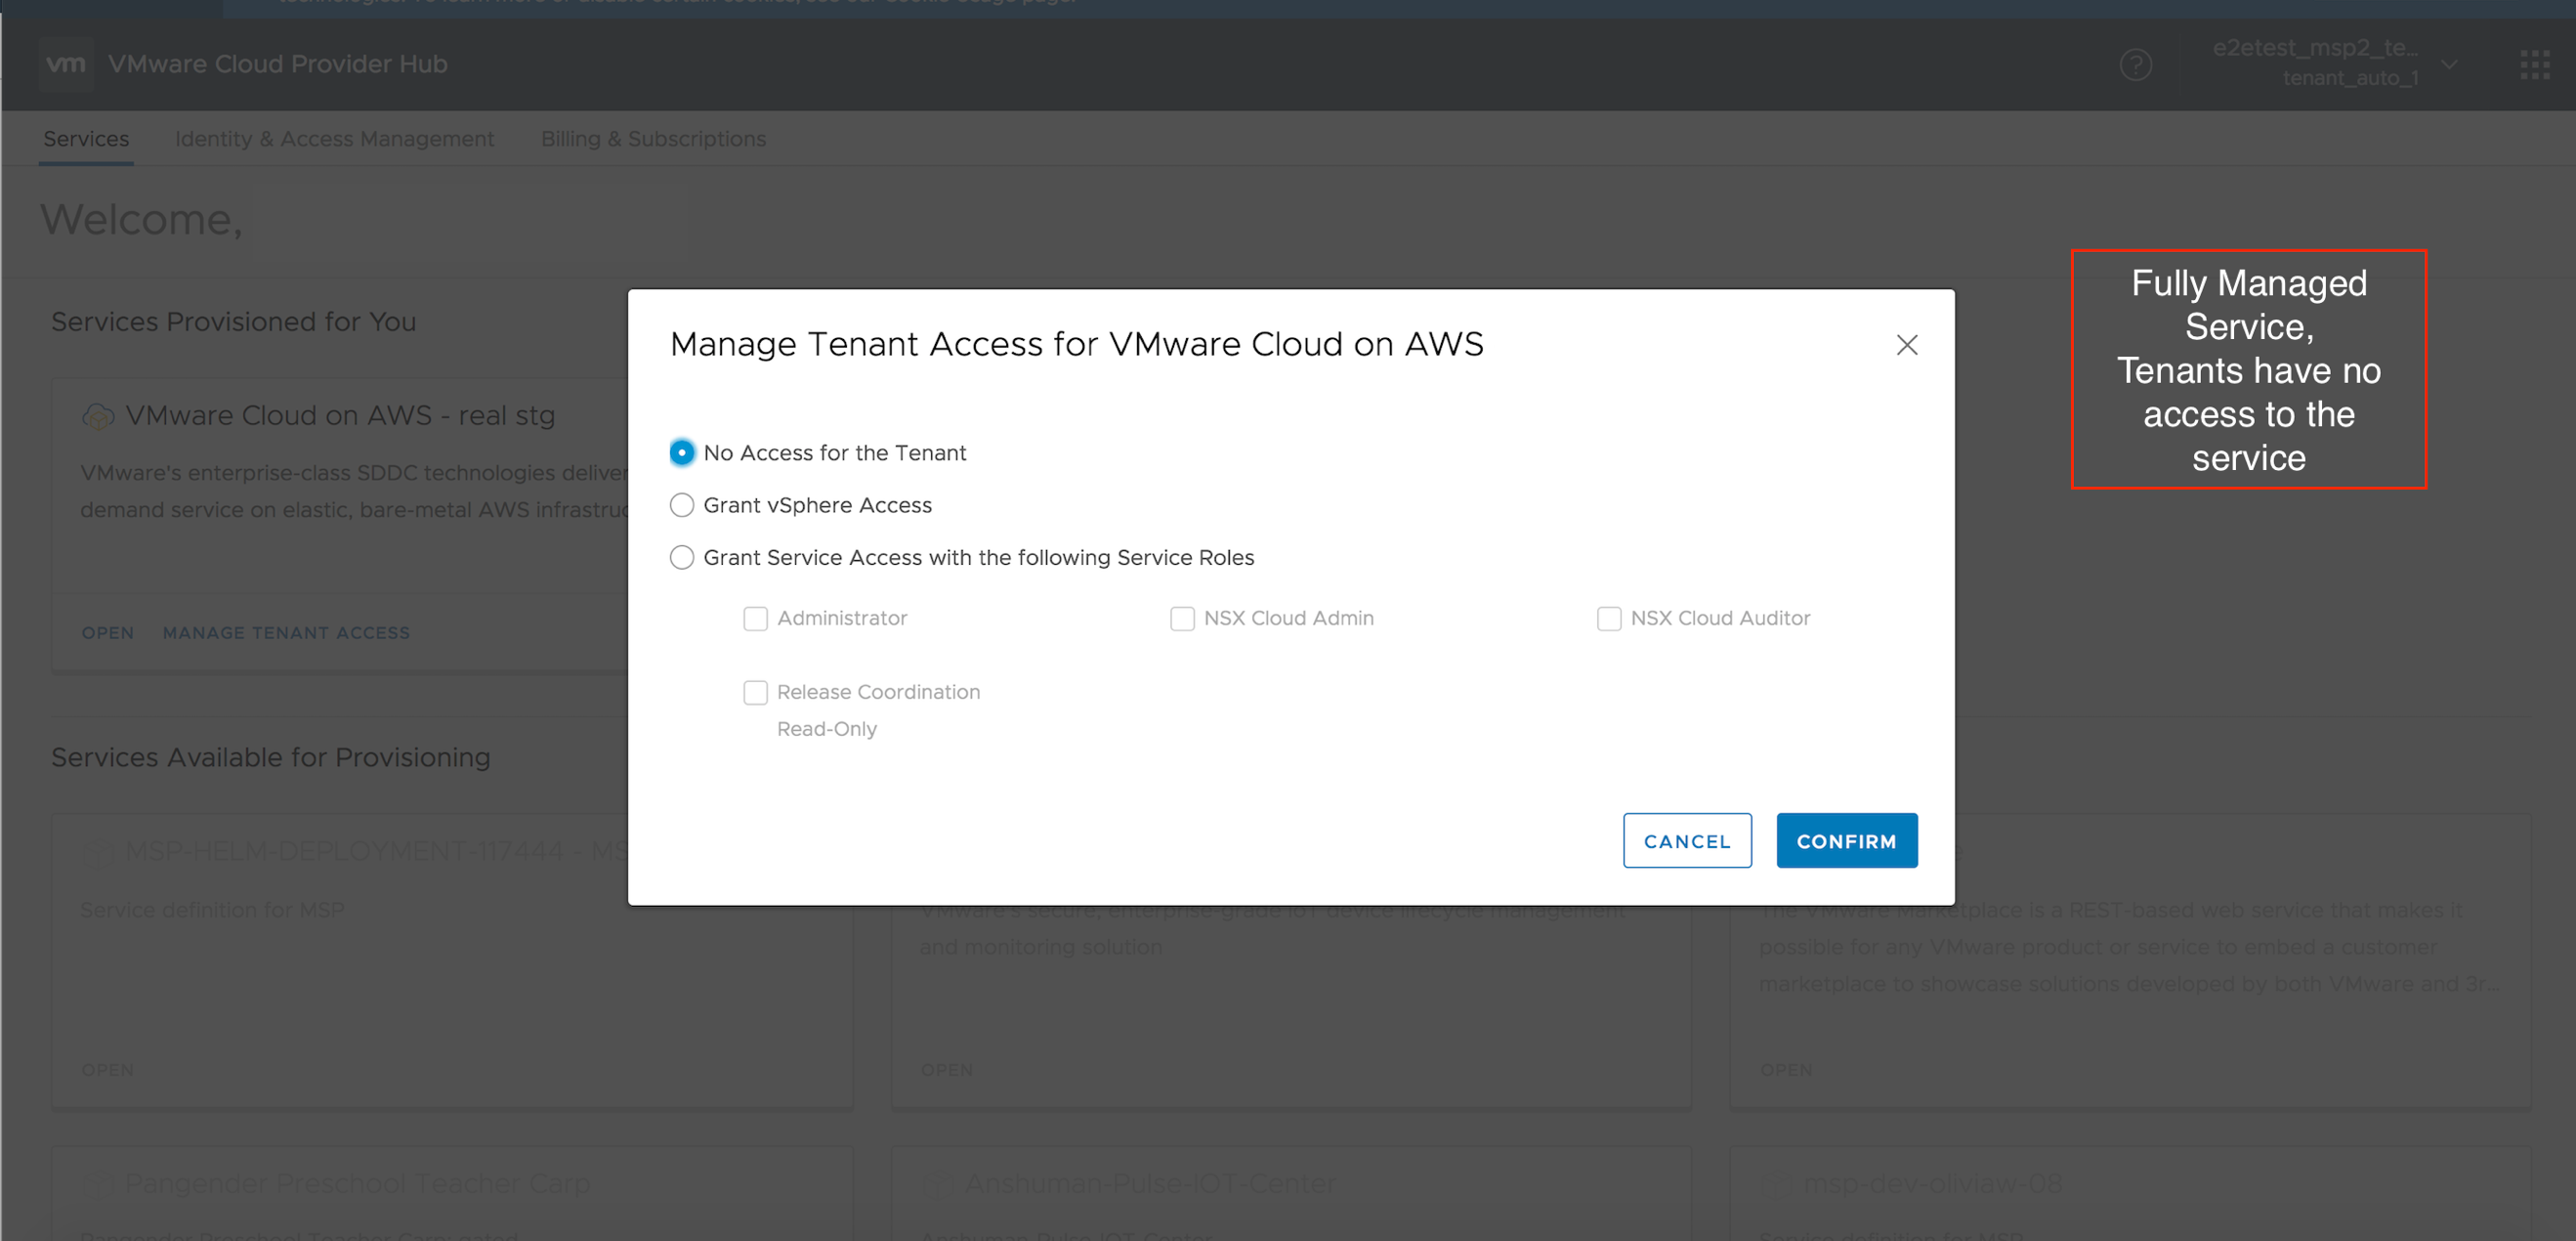
- When No Access for the Tenant option is provided, all users with tenant level access to the tenant organization will not have any access to the service VMware Cloud on AWS under Services Available
- Provider can choose to share the vCenter Server URL, username and password of the SDDC with the tenant via email or just the vms as required
- Tenant granted vSphere Access – Fully managed service by the provider
When Grant vSphere Access option is chosen, all users with tenant level access to the tenant organization can view the service tile for VMware Cloud on AWS under Services Available.
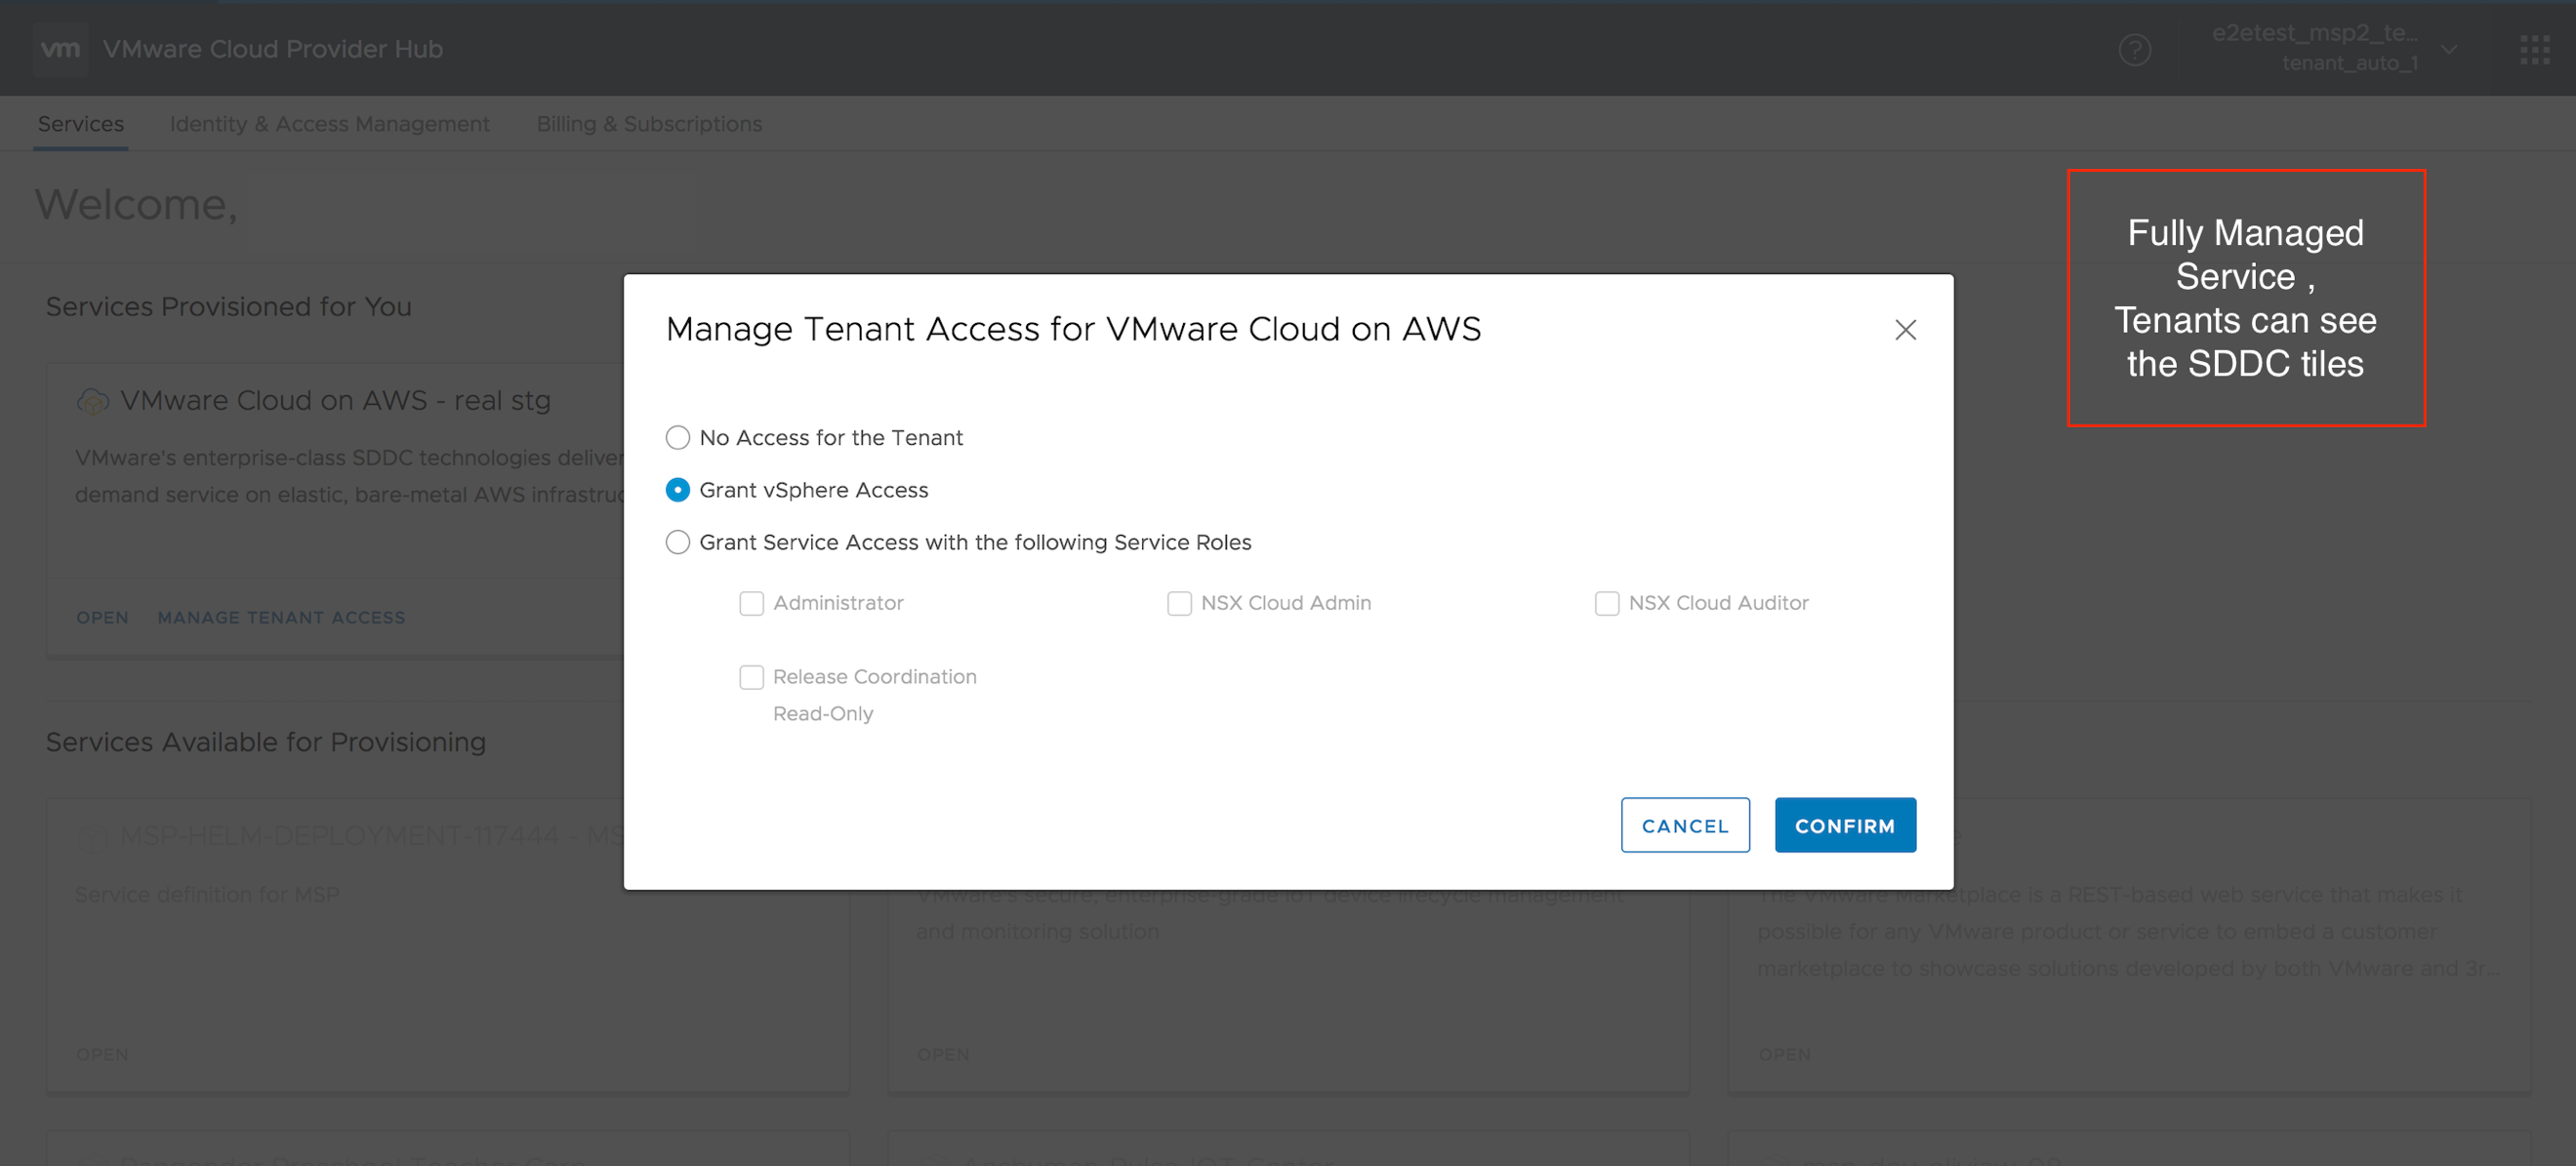
- When a tenant user logs in tenant organization, clicks on Open in the service tile, all the SDDCs deployed in this tenant are listed below the service tile as shown below. Tenant can only connect to vSphere from here.
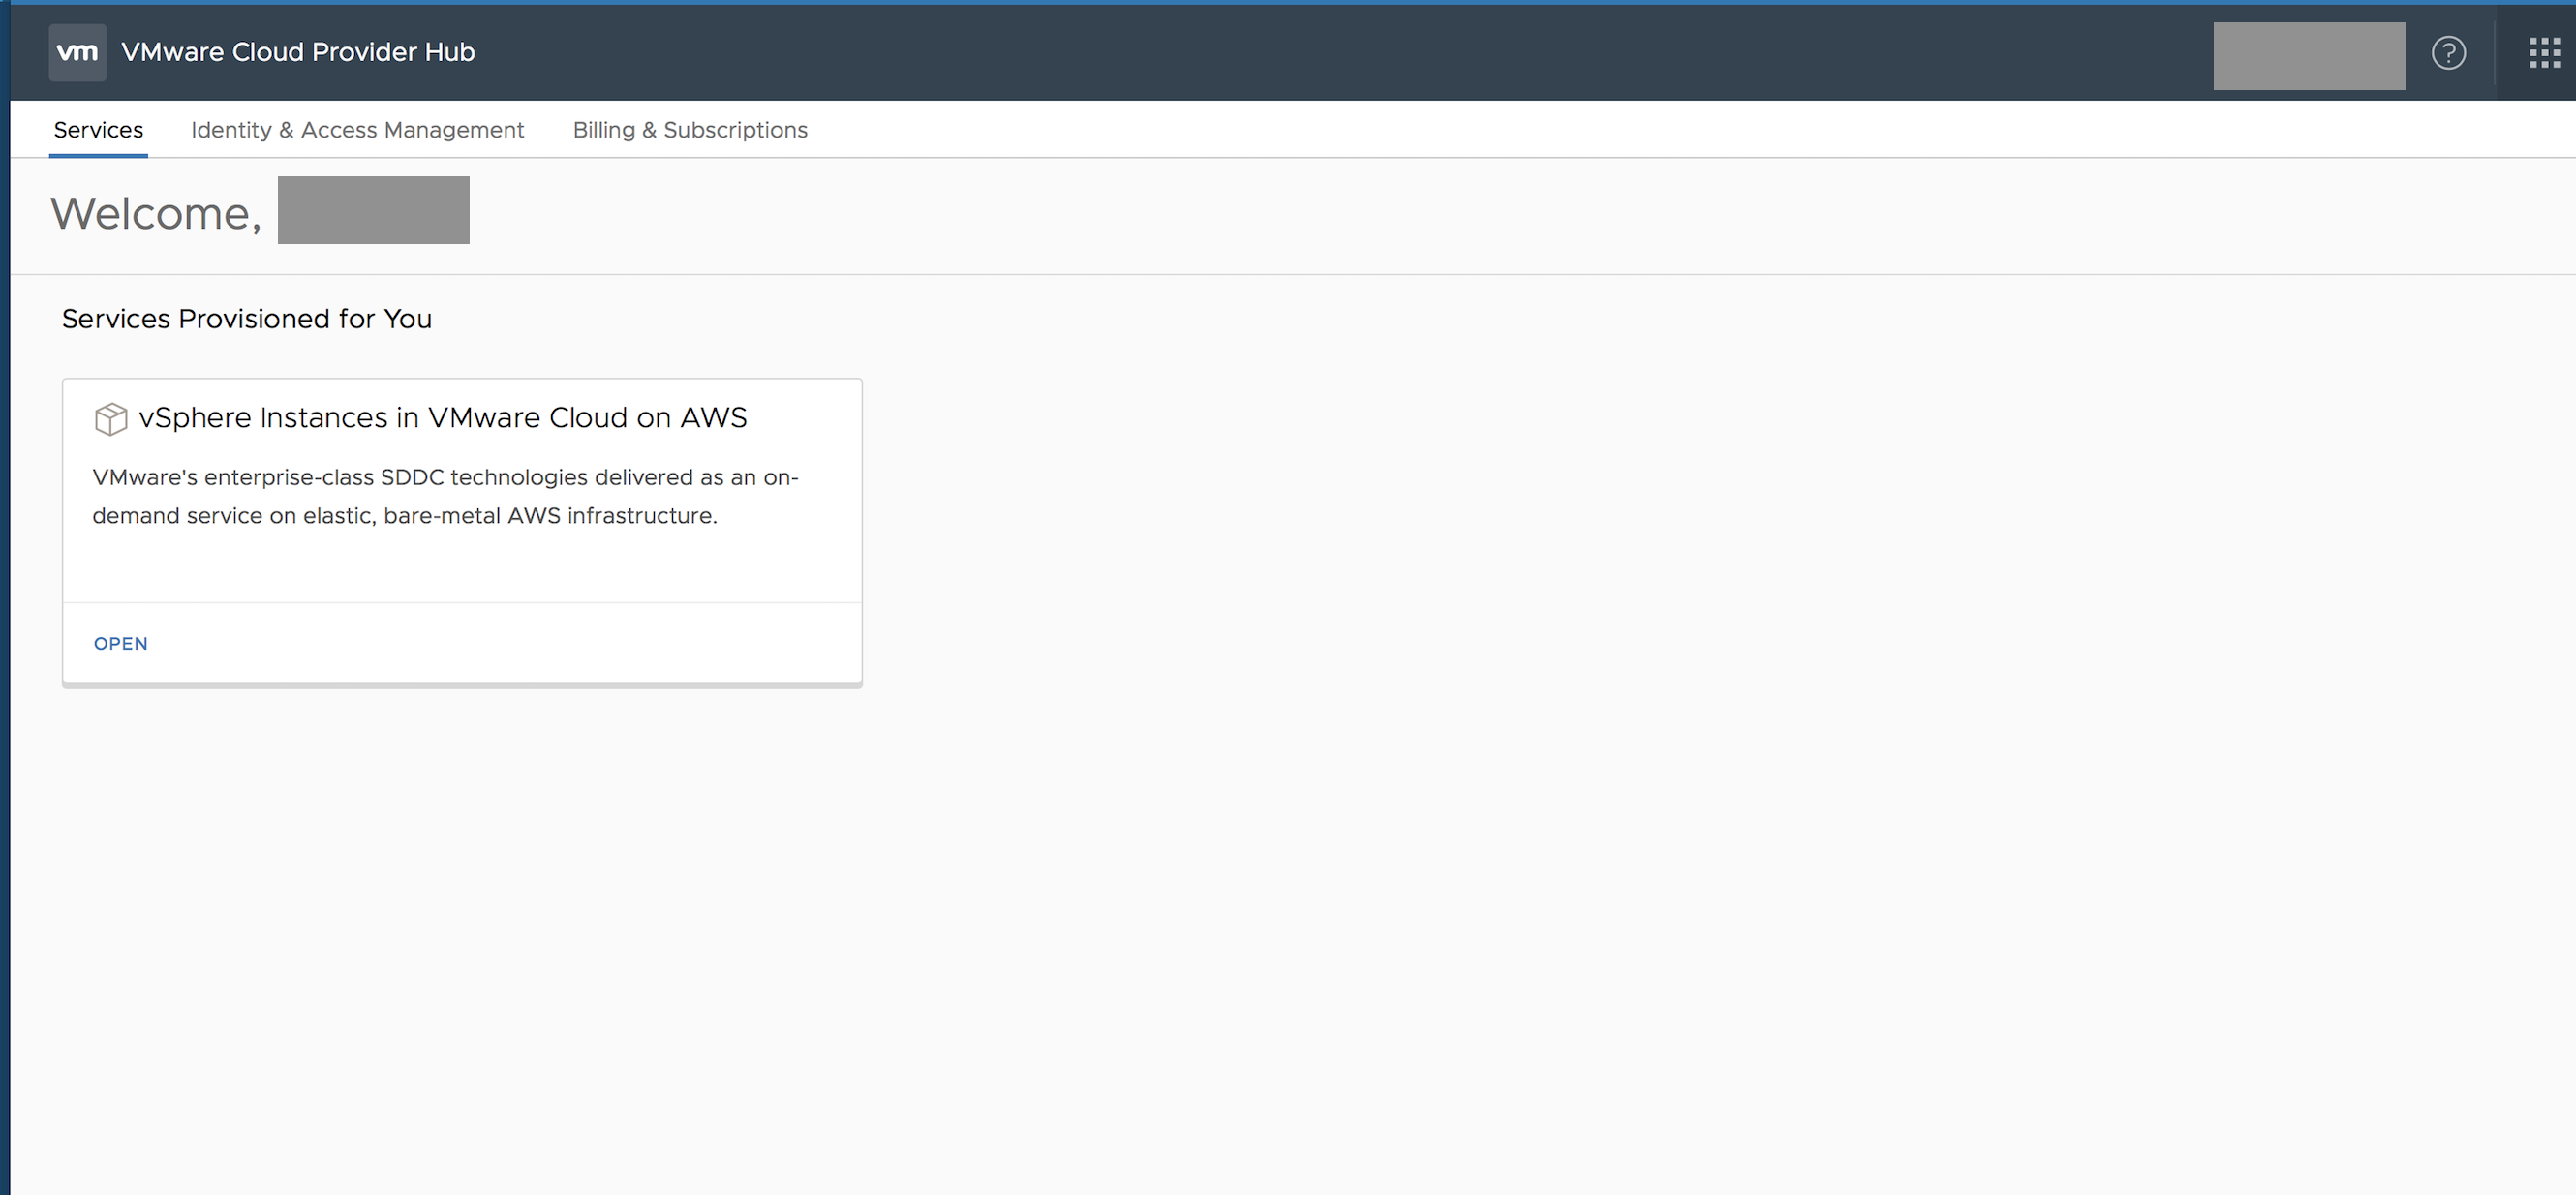
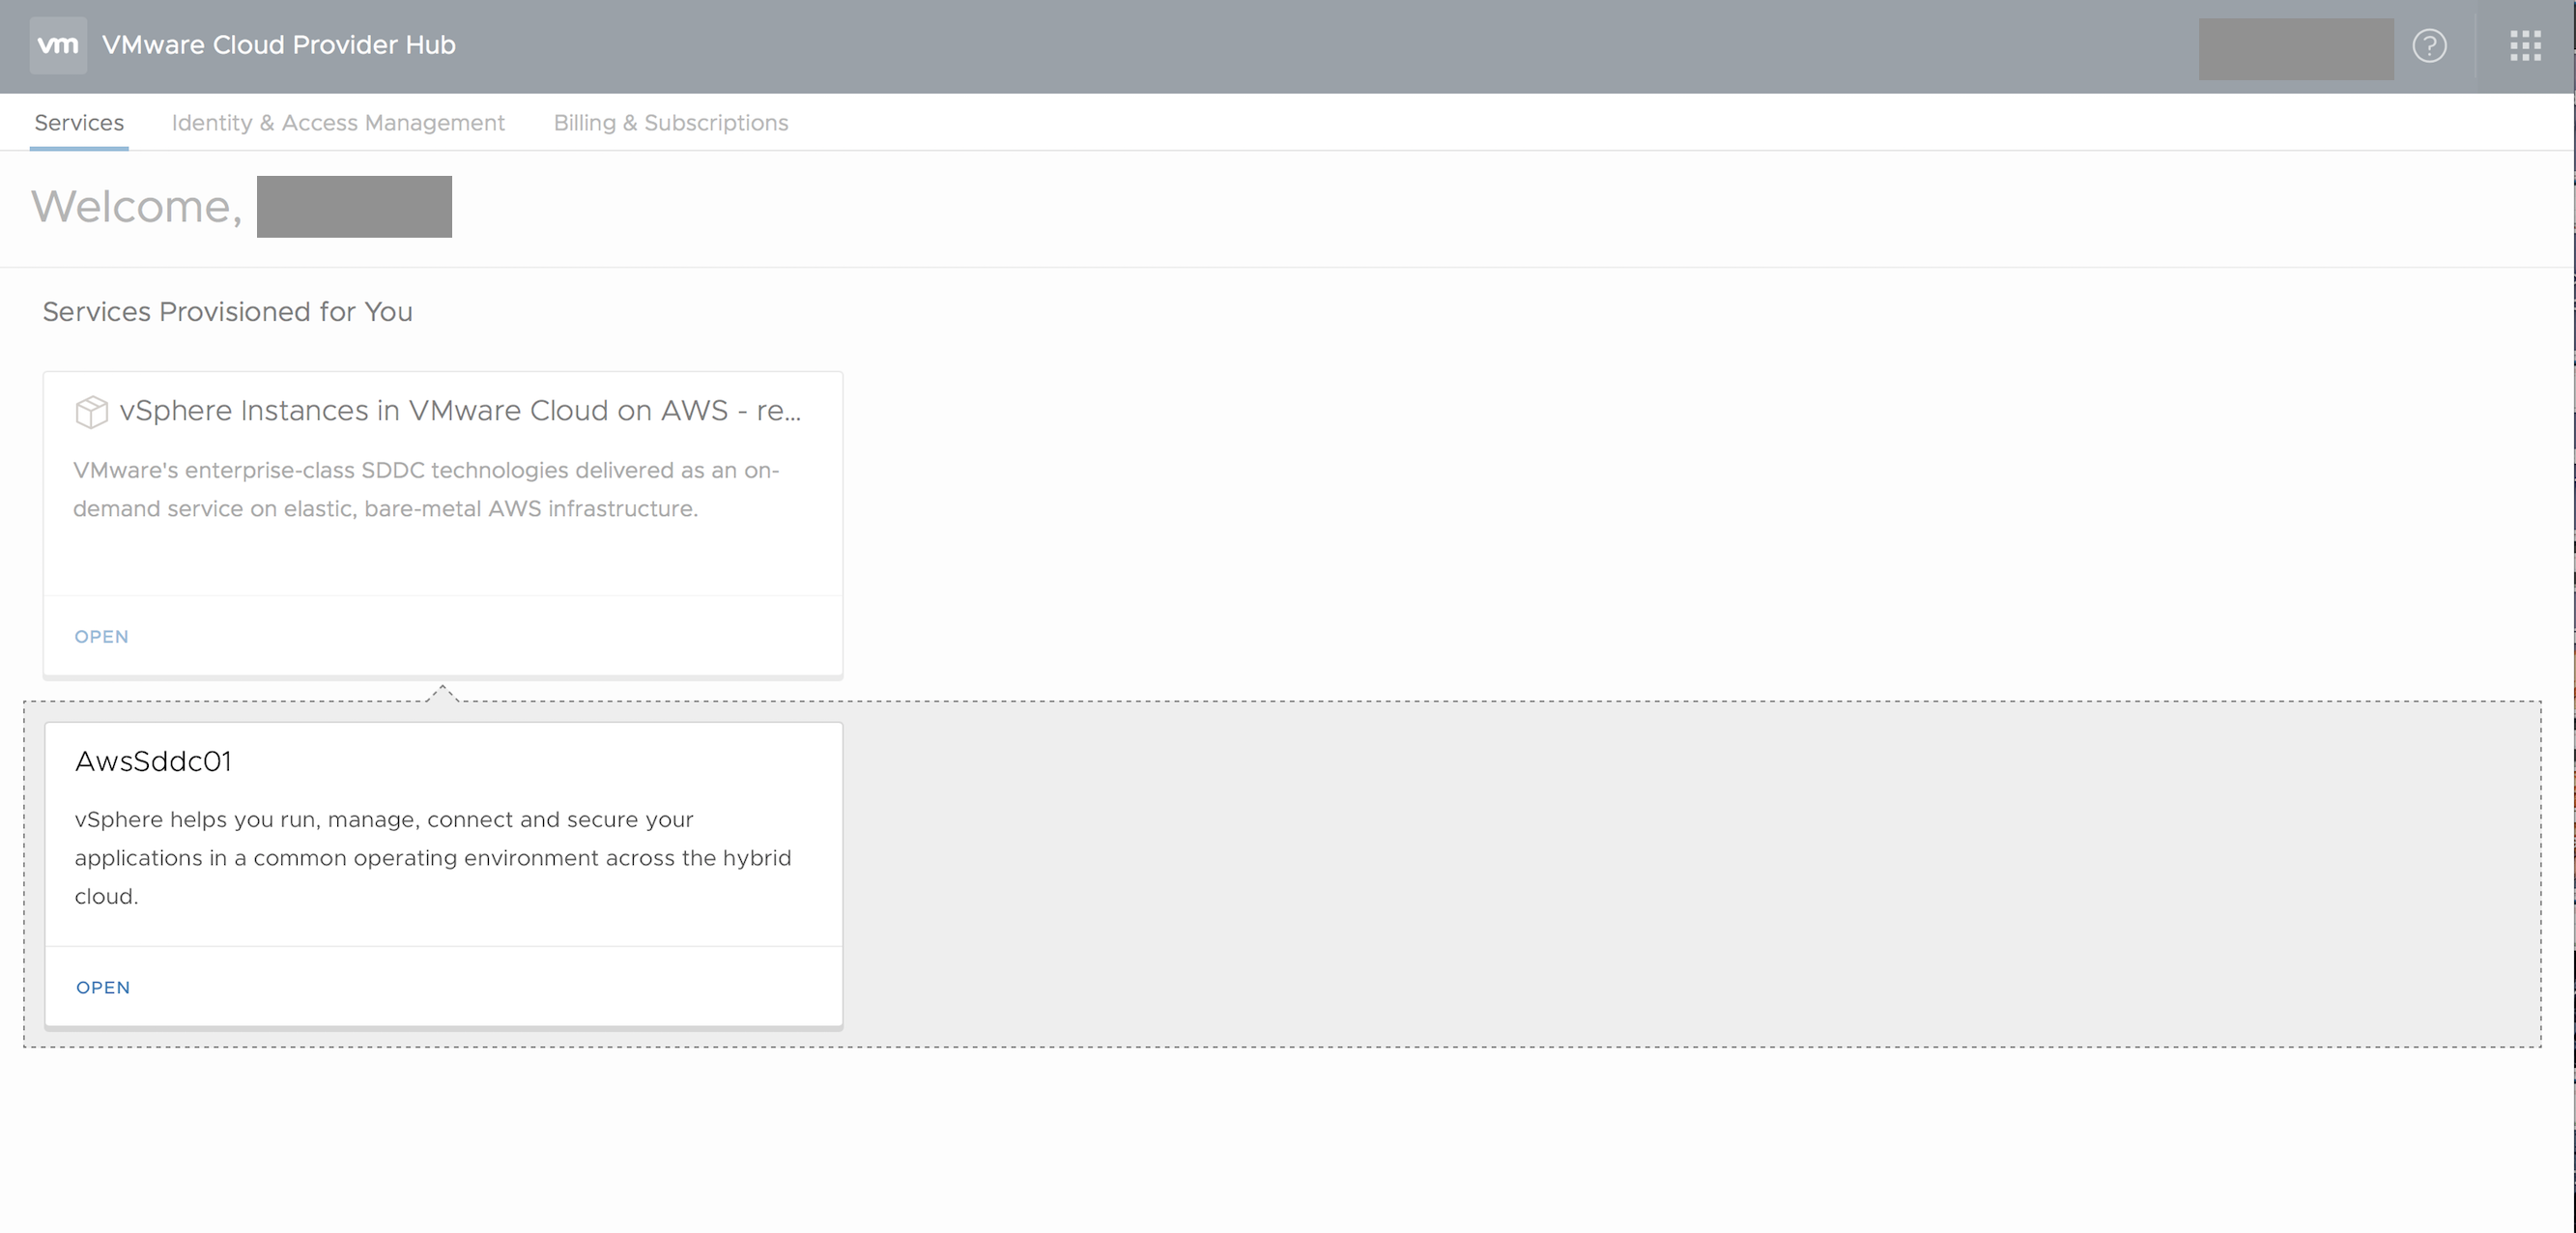
- In this model too, provider needs to deploy SDDC and do the configuration for the tenant
- Provider needs to share the vCenter Server URL, username and password of each SDDC with the tenant via email.
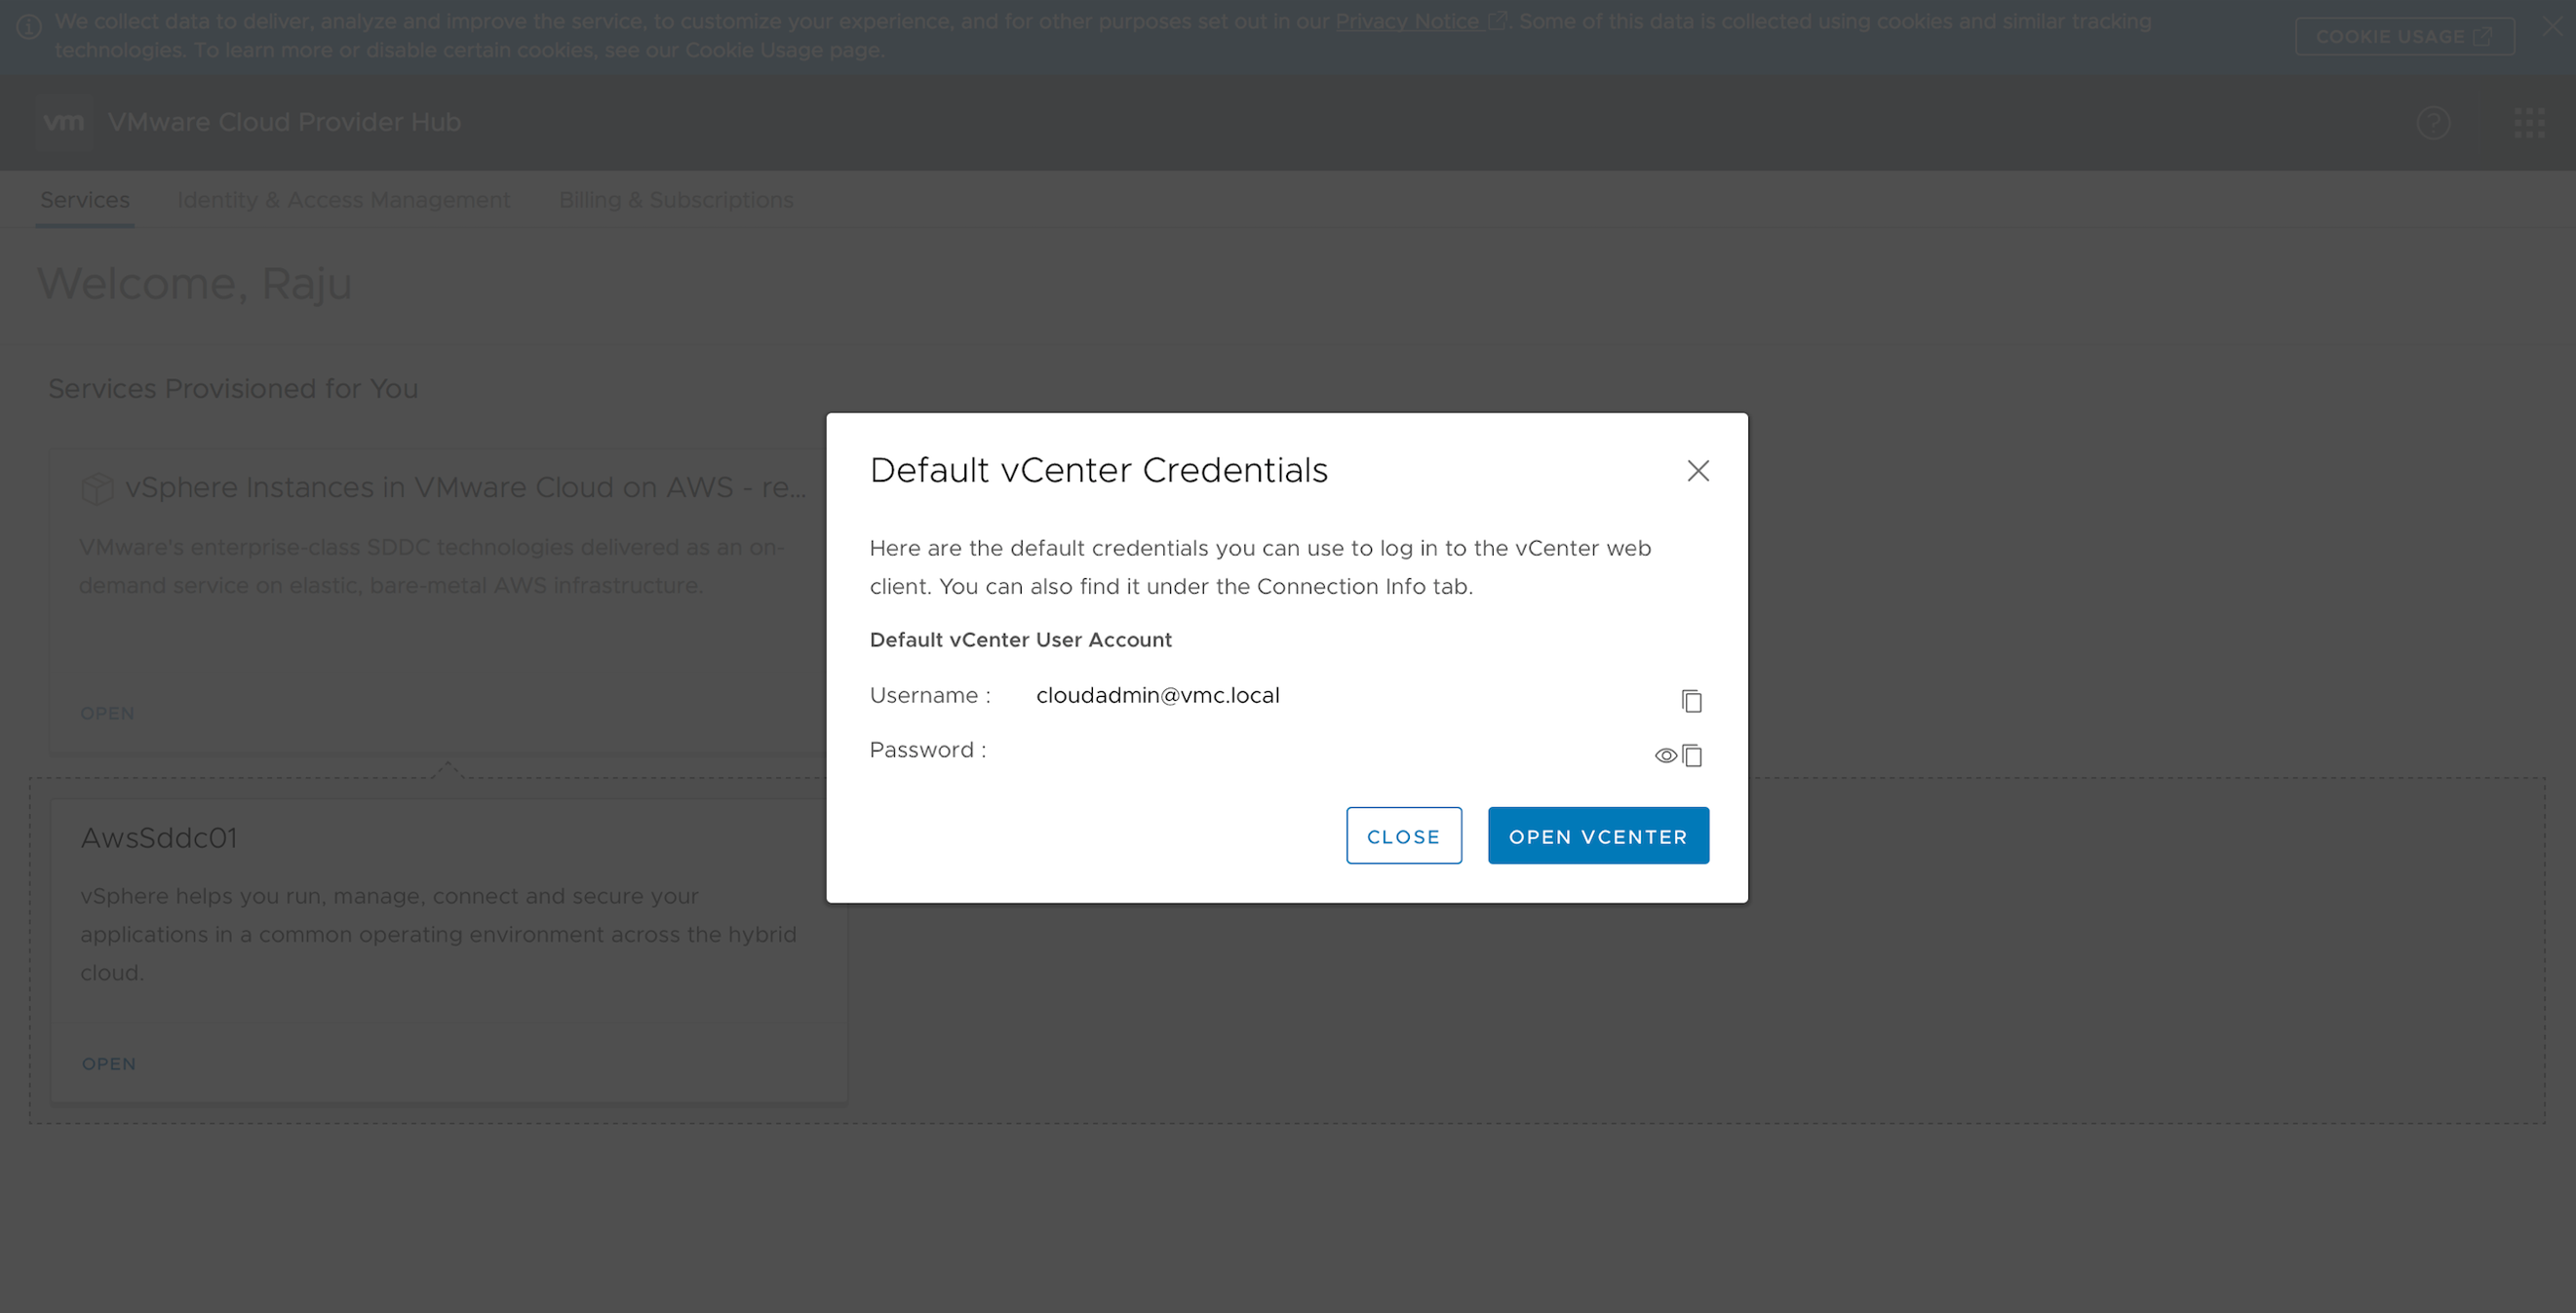
- Provider can get the details of vCenter Server from Settings tab of SDDC as shown below

- Grant service access with service roles
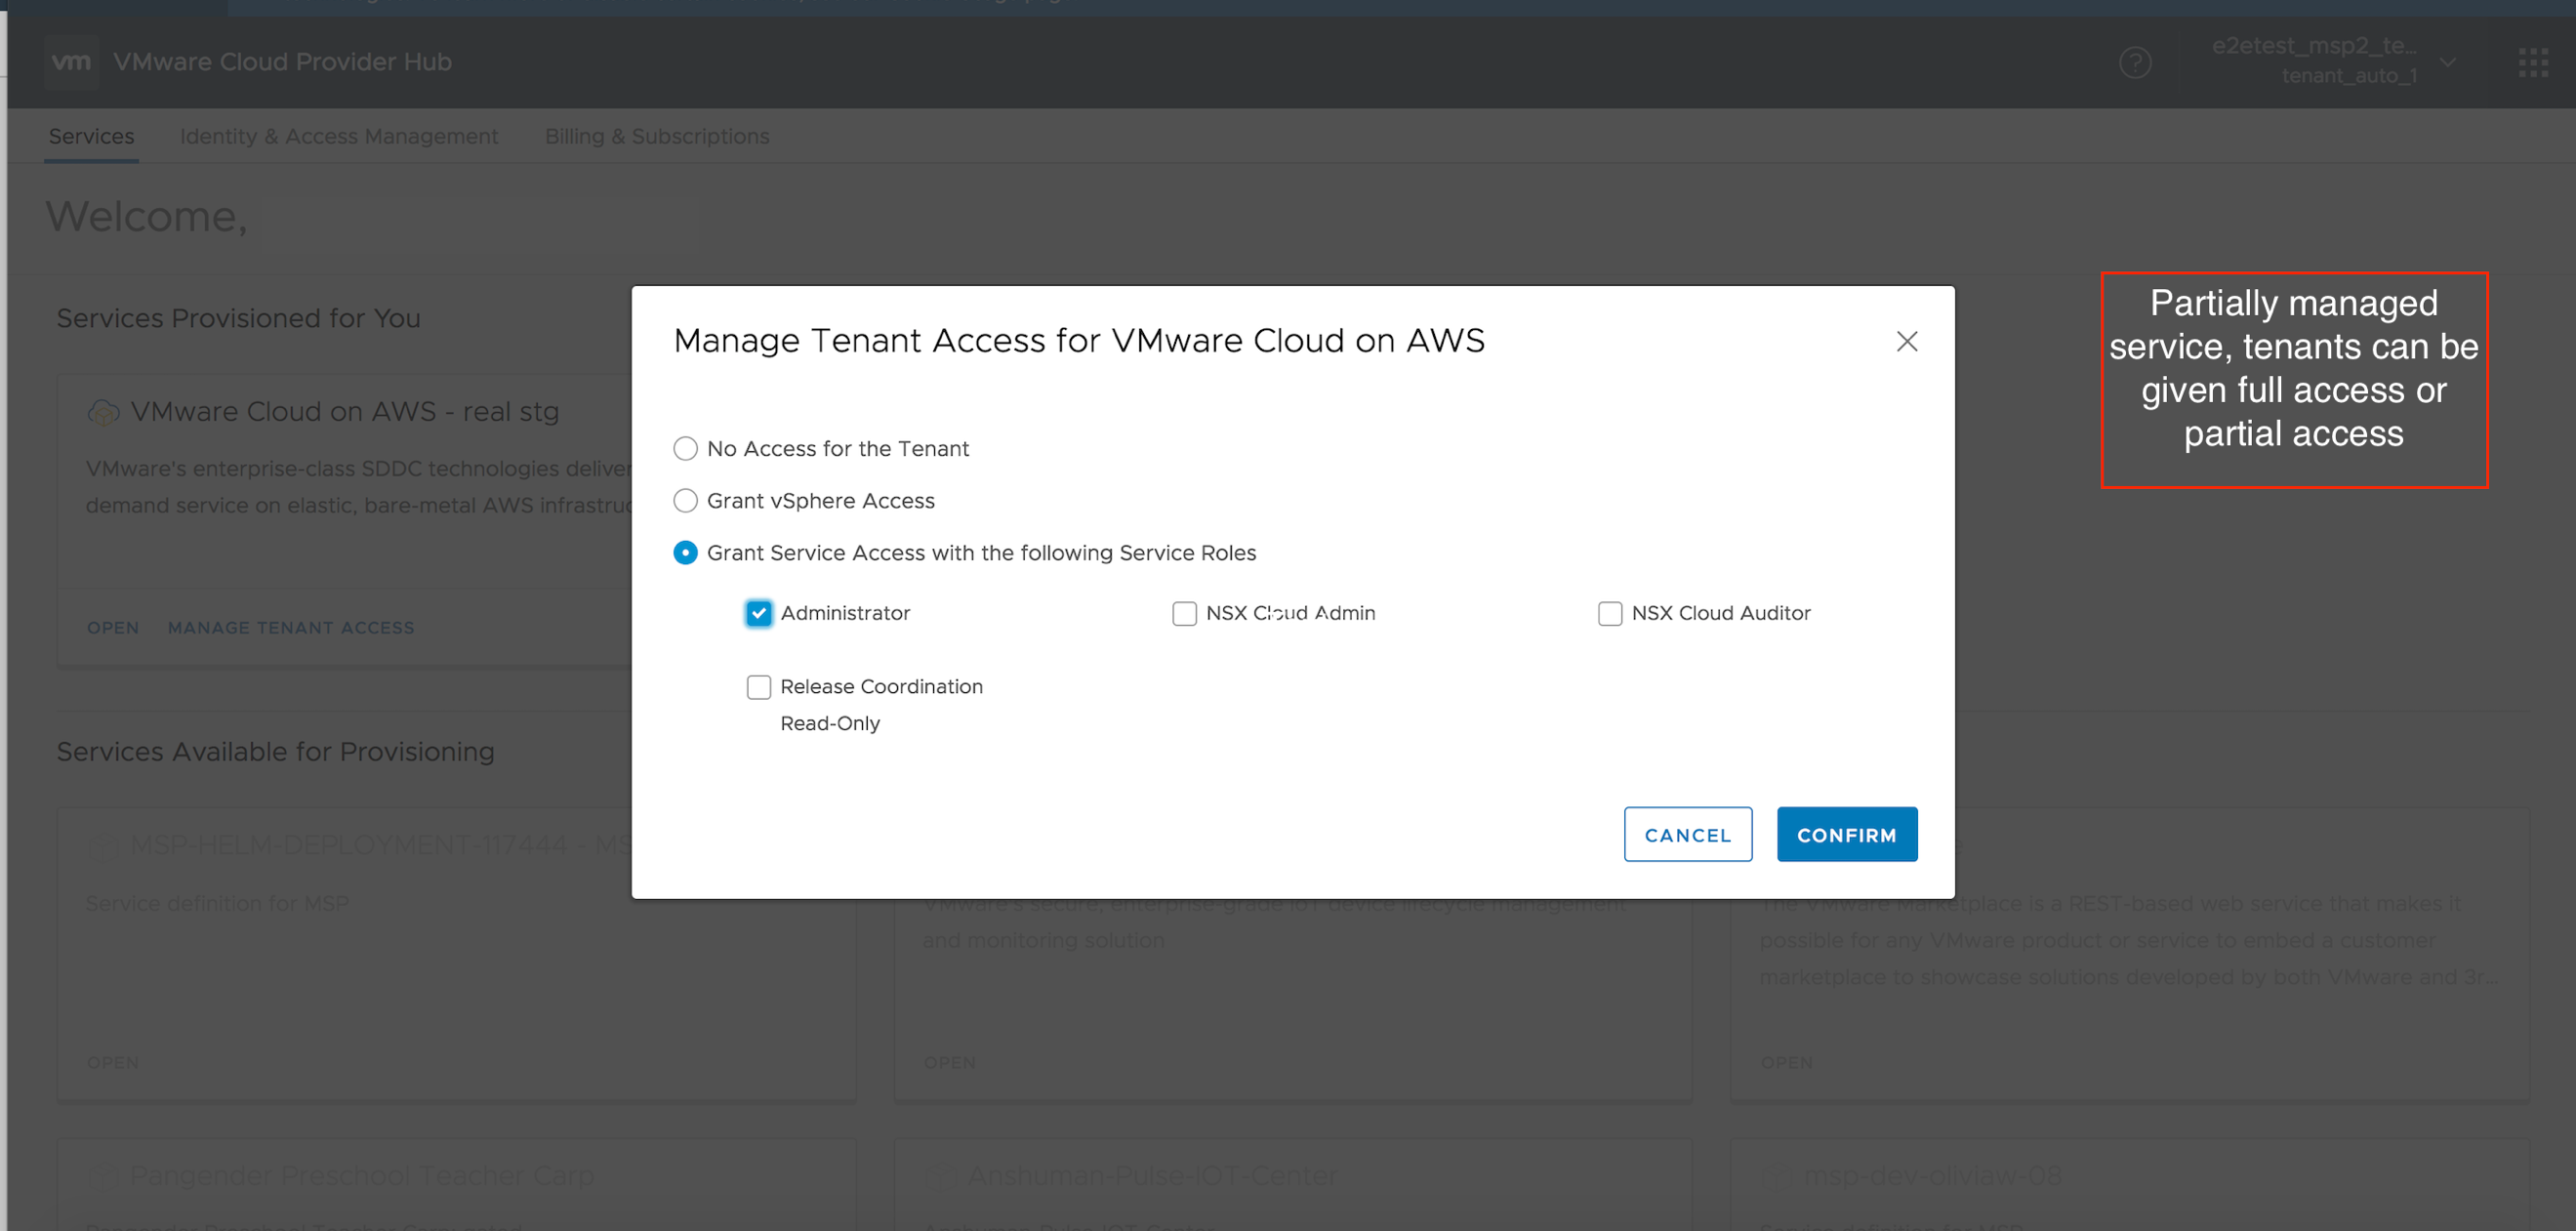
Using the credentials sent by the provider, tenant can login to vCenter Server and deploy vms in it.
- (Optional) Step 3 and Step 4 needs to be repeated for each additional service needed to be added for the tenant.
Need to repeat Step 1 through 5 for each tenant you need to onboard and activate services. The whole process of service activation takes less than 10 minutes.
Different tenant users with roles – Tenant Administrator , Tenant Billing User and Tenant user can be added .
Summarizing the onboarding workflow
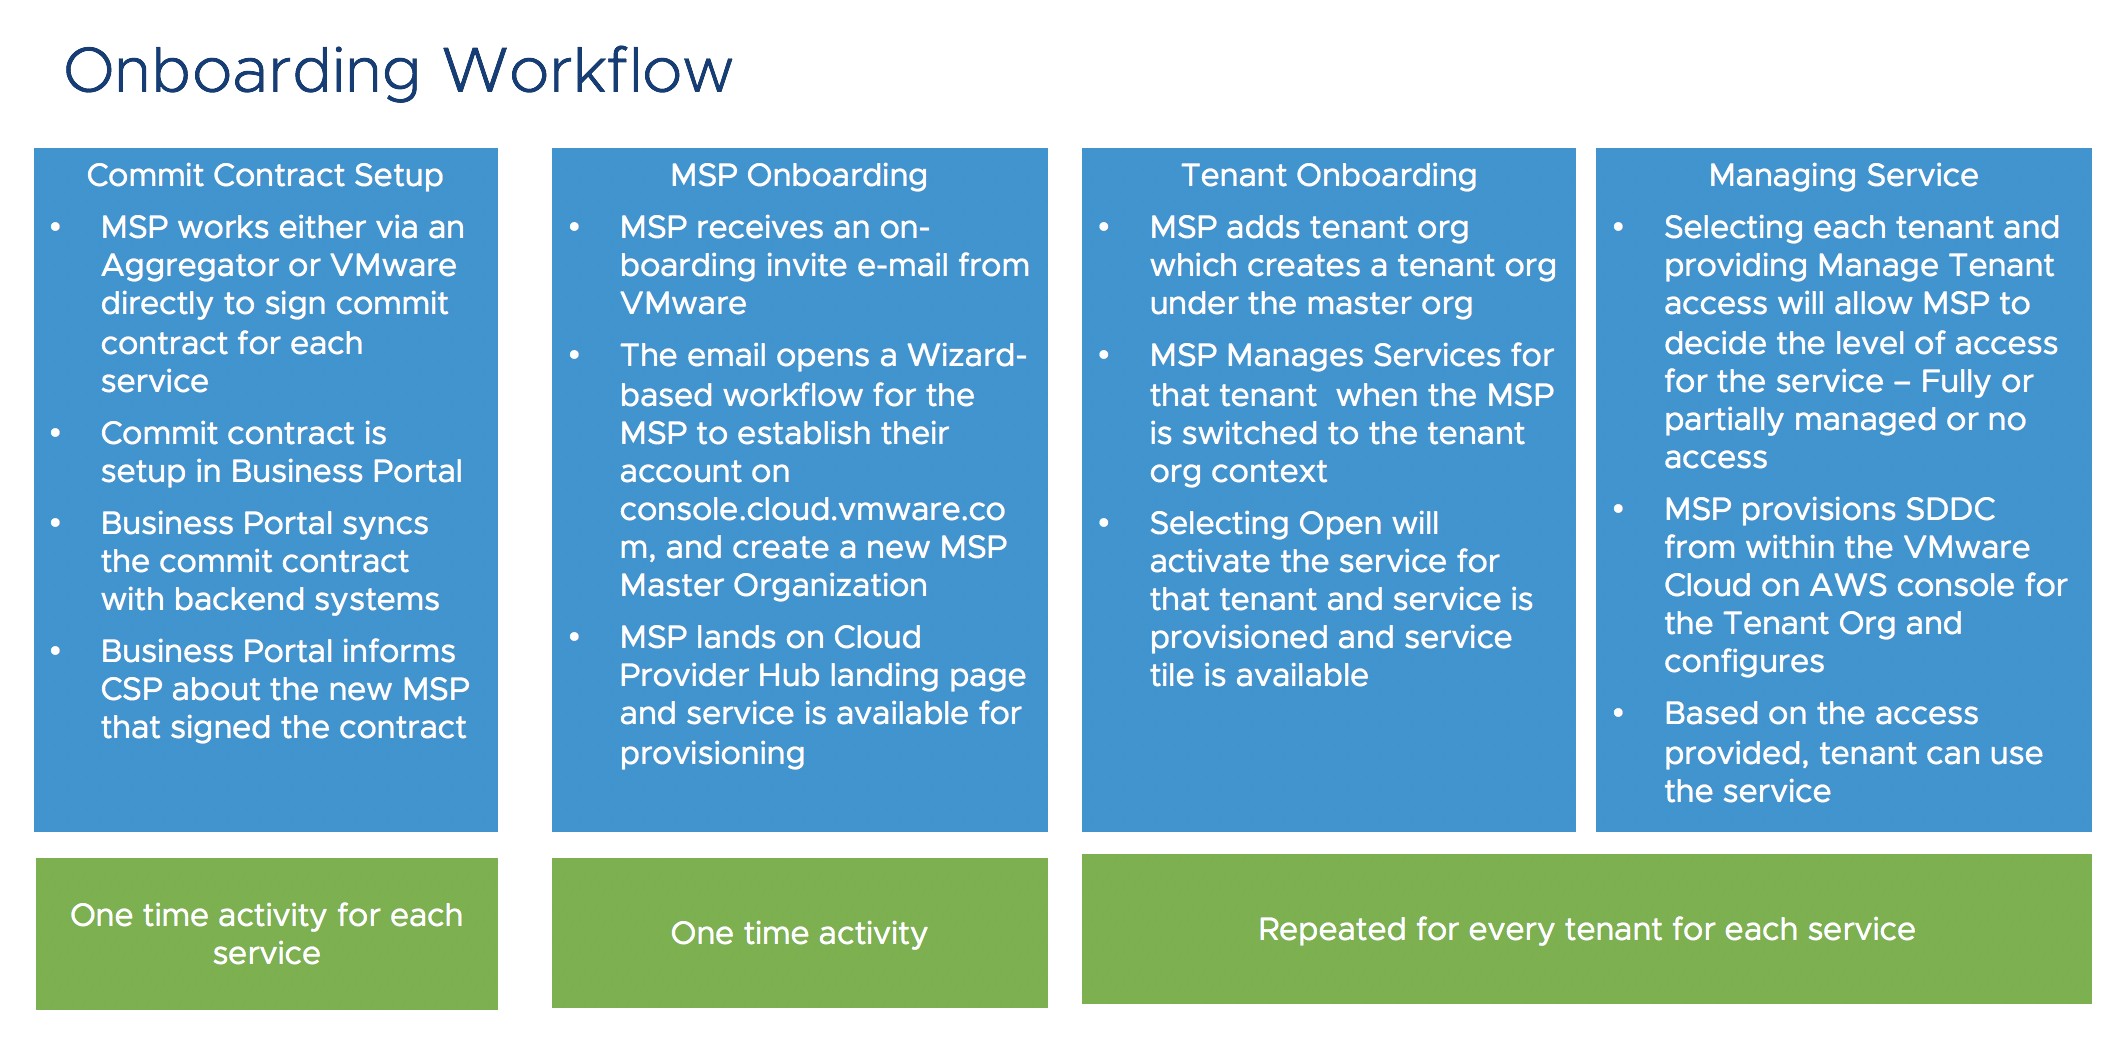
Use contextual help and online documentation and explore further the features of VMware Cloud Provider Hub for your customer end-to-end lifecycle management.

